


Beginner Cybersecurity Practice Guide
Why Kioptrix Level Still Matters
for Building Entry-Level Security Habits
Kioptrix looks like a machine recovered from a dusty server closet, complete with old services, blunt clues, and none of the polished guardrails found in newer training platforms. That is precisely why it remains valuable. The lab makes the mechanics of a security investigation visible. You must decide what to examine, what the evidence means, and when your assumptions have wandered off wearing someone else’s name badge.
The enduring lesson is not a particular exploit or command. It is the habit of approaching an unfamiliar system with restraint: confirm scope, map services, test one idea at a time, preserve evidence, and translate technical findings into defensive actions. Those habits remain useful whether your next target is another vulnerable virtual machine, a certification lab, a help desk investigation, or an authorized penetration test.
This guide turns Kioptrix into a repeatable learning system rather than a one-night race to a root shell. You will learn how to structure a safe home lab, enumerate without drowning in scanner output, research vulnerabilities without copy-and-paste thinking, recover from failed attempts, and produce notes that resemble professional work.
Build a method
Move from observation to hypothesis instead of guessing at exploits.
Make failure useful
Treat errors and dead ends as evidence that narrows the investigation.
Finish professionally
Document impact, uncertainty, and remediation instead of stopping at access.
The promise: by the end, Kioptrix will feel less like an old puzzle box and more like a quiet workshop for durable security judgment. 🧭
Article snapshot
Who it is for: cybersecurity beginners, career changers, help desk professionals, and certification students. What it solves: the tendency to chase commands without understanding the investigation. What you can do next: run a safer, better-documented Kioptrix session using a five-column evidence worksheet and a repeatable workflow.
Table of Contents
Practice Safely: Keep the Target Inside the Lab
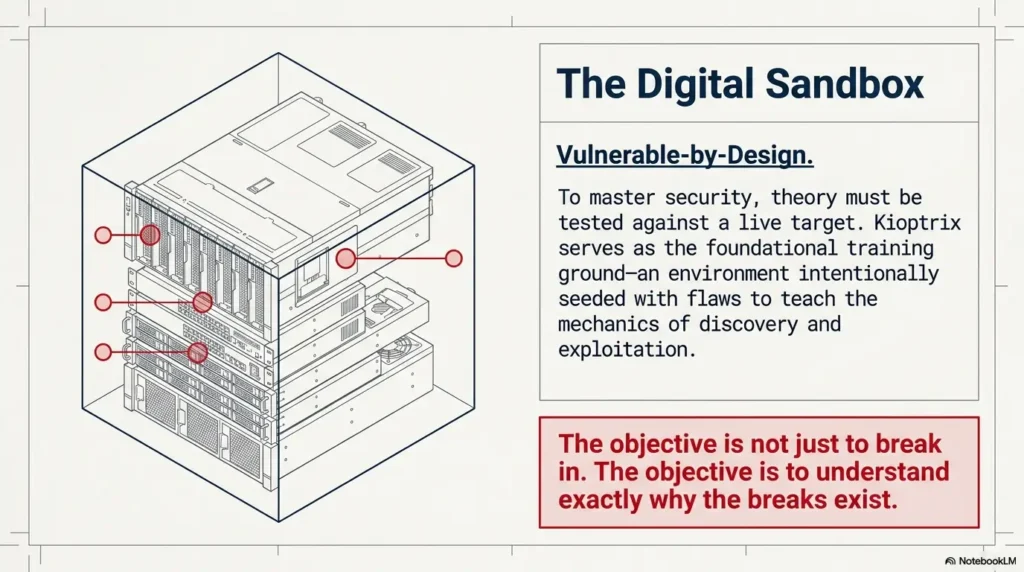
Kioptrix is intentionally vulnerable. That makes it useful for learning and inappropriate for casual exposure to a home network, workplace network, school network, shared Wi-Fi connection, or the public internet. A vulnerable machine is not a toy castle with harmless cardboard walls. It is a real operating system configured with weaknesses that may be abused by anyone who can reach it.
Use Kioptrix only on systems you own or have explicit written permission to test. Keep the target and attacker machine inside a private virtual network. The safest beginner arrangement is usually a host-only or otherwise isolated virtual network that allows communication between the training machines while preventing unsolicited access from other devices.
Authorization is part of the technical work
Many beginners think permission is paperwork that appears before the “real” work. In professional security, permission defines the real work. It determines which addresses may be tested, which techniques are allowed, when testing can occur, what data may be accessed, and what conditions require an immediate stop.
A scan sent to the wrong address is not redeemed by educational intent. Before opening a terminal, write down the target IP address, the virtual network name, the purpose of the exercise, and a stopping condition. This small ritual builds the same mental boundary you will need in a client environment.
Use an isolated network, not bridged mode
Bridged networking places a virtual machine onto the same network as physical devices. That can make the vulnerable target reachable by family laptops, smart televisions, printers, guest devices, and anything else sharing the router. It may also allow the lab to contact systems you never intended to test.
A private host-only network is generally the cleaner choice for a first Kioptrix lab. Your Kali machine and Kioptrix target can communicate, while the vulnerable target remains separated from ordinary devices. Some learners add a second adapter to the attacker machine for updates, but the target itself should not need general internet access during the exercise.
Safety and authorization notice
This article is for controlled, authorized lab practice. Do not scan, probe, exploit, or attempt access against public systems, workplace assets, school infrastructure, cloud resources, or devices you do not own. When the target address, network boundary, or permission is uncertain, stop and verify before continuing.
Safe lab readiness checklist
- Confirm that the Kioptrix image came from a source you trust.
- Place the attacker and target on a private virtual network.
- Disable bridged networking on the vulnerable target.
- Confirm the target IP from the virtual network, not from guesswork.
- Take a clean snapshot before testing.
- Keep personal files and credentials outside the lab machines.
- Record the authorized target address in your notes.
- Shut down or reset the target when the session ends.
For a fuller setup sequence, use the site’s safe hacking lab at home guide and its practical explanation of VirtualBox NAT, host-only, and bridged networking. The goal is not a complicated miniature data center. It is a small, understandable boundary you can verify.
Key takeaway
Permission and isolation are not ceremonial warnings. They are the first controls in your methodology. A learner who defines the boundary before scanning is already practicing a professional security habit.
The Old Machine, New Lesson: Why Kioptrix Has Not Aged Out
Kioptrix contains legacy software and weaknesses that do not represent every modern production environment. You are unlikely to encounter an exact replica of the machine in a mature cloud company. Yet dismissing the lab for its age confuses the training prop with the skill being trained.
A concert student does not abandon scales because the notes are old. Scales expose timing, control, and attention. Kioptrix performs a similar function for entry-level offensive security. Its relatively visible weaknesses reduce environmental complexity so the learner can observe the sequence from discovery to validation.
Legacy software makes the fundamentals easier to see
Modern applications often sit behind content delivery networks, managed identity services, web application firewalls, container platforms, and layers of telemetry. Those systems are important, but they can make a first investigation feel like standing in a railway station where every announcement happens at once.
Kioptrix presents a smaller set of services and clues. You can enumerate ports, identify protocols, inspect web responses, compare service evidence, and research likely weaknesses without first learning an entire enterprise architecture. The reduced complexity lets you see why a method works.
The real lesson is process, not the vintage exploit
A copied exploit command has a short shelf life. A disciplined sequence lasts much longer:
- Confirm the target and scope.
- Identify reachable services.
- Collect service-specific evidence.
- Form a testable vulnerability hypothesis.
- Validate the hypothesis with minimal impact.
- Confirm the security consequence.
- Document evidence, uncertainty, and remediation.
This sequence applies beyond Kioptrix. A security analyst reviewing an exposed service, a system administrator investigating an outdated server, and a penetration tester assessing a client network all benefit from the same rhythm.
What polished beginner labs may hide
Guided platforms are excellent for structured learning, but hints, progress indicators, preconfigured connectivity, and carefully worded tasks can quietly make decisions on the learner’s behalf. You know there is a web issue because the exercise says so. You know which tool family to use because the task title winks at you.
Kioptrix is more silent. It asks, “What do you know?” and waits. That silence can feel uncomfortable, especially during a first lab, but it creates room for judgment. You must decide whether an open service matters, what evidence is missing, and which test would reduce uncertainty most efficiently.
Short Story: The scan that looked like an answer
On his first evening with Kioptrix, Marcus ran a broad scanner and received a page of warnings. He highlighted the reddest line, searched the wording, and launched the first matching module. Nothing happened.
He tried another module, then another. Forty minutes later, his notes contained six commands and no explanation of the target.
The next day, he restarted with a plain service table. One port, one observed version, one question. A web response contradicted the scanner’s assumption, while another service supplied the missing platform clue.
The breakthrough was not a clever command. It was the moment he stopped treating scanner severity as certainty. His final report included the failed tests because they showed how he eliminated bad hypotheses. That page became more valuable than the shell screenshot.
Key takeaway
Kioptrix is still useful when you measure success by the quality of your decisions, not by the age of the software or the speed of obtaining privileged access.
First Habit: Define the Rules Before You Touch the Keyboard
Beginners often begin a lab by searching for the target address and immediately launching a scan. A better opening takes two minutes and prevents several familiar problems: scanning the wrong machine, losing track of assumptions, running tools outside the intended boundary, and being unable to explain what happened later.
Write a tiny scope statement
Your lab scope does not need legal poetry. It needs clarity. Write a compact note containing:
- Authorized target: the single Kioptrix virtual machine and its confirmed private IP address.
- Attacker system: your designated Kali or other testing virtual machine.
- Permitted activity: discovery, enumeration, vulnerability validation, controlled exploitation, and local evidence collection.
- Prohibited activity: scanning other subnets, testing physical devices, exposing the target publicly, or collecting unrelated personal data.
- Stopping conditions: uncertain target identity, unexpected external connectivity, instability outside the target, or evidence that the lab boundary is incorrect.
This creates a reference point. When a tool produces an unfamiliar address or suggests a lateral move, you can compare the action against the scope instead of improvising.
Record a clean starting state
Before probing the machine, note the date, virtual network mode, attacker IP, target IP, and snapshot name. Confirm that both machines can communicate only where intended. This baseline is especially useful when troubleshooting later. If a service disappears or a payload behaves strangely, you will know whether the environment changed.
A snapshot also lets you reset without rebuilding the lab. Resetting is not cheating. It is controlled experimentation. The important question is whether you understand why you are resetting and whether you preserved the evidence needed to learn from the previous attempt.
Use stopping conditions, not stubbornness
A productive lab session has limits. Decide in advance that you will pause when:
- You cannot confirm the target address.
- A command may affect more than the authorized machine.
- The virtual network appears connected to a real subnet.
- You are about to run code you have not inspected or understood.
- You have repeated nearly identical tests without new evidence.
- Fatigue is causing careless copying or poor note-taking.
“Permission is a technical control” may sound like a slogan, but it changes behavior. It teaches you to ask not only “Can this command work?” but also “Should this command run here, now, against this exact target?”
Enumeration Before Exploitation: The Habit That Changes Everything
Enumeration is the work of turning “a machine exists” into an evidence-based description of what the machine exposes. It is more than listing ports. A port number is an address on a building directory. You still need to learn who occupies the room, what function occurs there, and whether the sign on the door is accurate.
Start with evidence instead of vulnerability guesses
A beginner may see port 80 and immediately search for “Kioptrix web exploit.” That approach skips the investigation and often exposes the intended solution before the learner understands the clues. Instead, record what is actually observable:
- Which ports respond?
- Which protocol appears to be running on each port?
- What product or version is suggested?
- What operating system clues are visible?
- Which web titles, headers, default pages, comments, directories, or error messages appear?
- Do two services support the same platform hypothesis?
- Which facts are confirmed, and which are only scanner guesses?
This produces a service map rather than a pile of output. The map helps you decide which service deserves deeper attention and why.
Translate open ports into services, versions, and questions
| Observation | What it may suggest | Better next question |
|---|---|---|
| A web port is open | An HTTP service is reachable | What server, application, directories, methods, and error behaviors are exposed? |
| An SMB-related port is open | File sharing or name services may be present | Can the server disclose workgroup, hostname, dialect, shares, or anonymous-access behavior? |
| SSH is reachable | Remote administration may be available | What implementation and authentication methods are offered, and is there any legitimate credential path? |
| A database port responds | A database service may be externally bound | Is the service actually reachable, authenticated, versioned, and relevant to another observed application? |
The phrase “may suggest” matters. Service detection is an inference. It becomes stronger when supported by direct protocol behavior, banners, application responses, or several independent clues.
Build a service map before choosing the next tool
A simple service map can be maintained in a table:
| Port or surface | Confirmed evidence | Hypothesis | Next low-risk test | Status |
|---|---|---|---|---|
| Web service | Server header, title, response code | Legacy web stack may expose known weakness | Inspect headers, methods, directories, and error pages | Open |
| File-sharing service | Protocol negotiation succeeds | Version or anonymous information may be disclosed | Request basic server information without credentials | Open |
| Operating system clue | Several service responses imply a similar platform | Target may match an older Linux release | Compare evidence and note confidence | Partial |
This table prevents the terminal from becoming a slot machine. You are no longer pulling tool handles to see what lights up. Each action has a reason, an expected result, and a place in the investigation.
Verify important findings with a second method
Automated detection can be incomplete or wrong, especially with old services that respond in unusual ways. If a scanner identifies a specific product version, compare that result with a banner, direct connection, web header, protocol response, or another tool. The second method should test the claim rather than merely repeat the same detection logic.
The site’s Kioptrix enumeration guide and fast enumeration routine can help you organize this stage without turning it into a command dump.
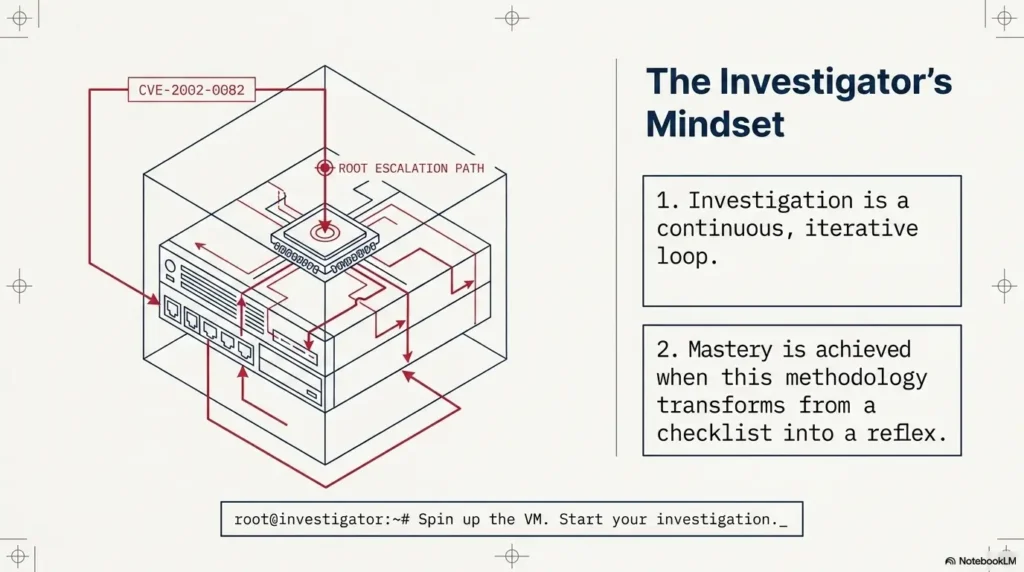
The evidence-first Kioptrix loop
1. Scope
Confirm target, permission, network, and stop rules.
2. Observe
Discover services and collect direct evidence.
3. Hypothesize
Explain what weakness may connect the clues.
4. Test
Run the smallest test that can reduce uncertainty.
5. Explain
Document impact, failure, remediation, and lessons.
Key takeaway
An open port is not a finding by itself. A useful finding connects an exposed service, verified evidence, a security consequence, and a defensive action.
Vulnerability Research Without Copy-and-Paste Thinking
Vulnerability research begins after you have enough evidence to ask a precise question. Searching too early for “how to hack Kioptrix” replaces investigation with answer retrieval. Searching for a verified product, approximate version, platform, protocol behavior, and vulnerability class teaches you how technical research works.
Match the version, platform, and configuration
A vulnerability description may mention the same product name you observed, but that does not prove the target is exploitable. Check the affected version range, operating system assumptions, architecture, enabled modules, authentication requirements, network reachability, and environmental prerequisites.
For example, an exploit may require a feature that is disabled, a default path that has been changed, a specific compiler behavior, or credentials you do not possess. A scanner may identify the product family but misread the patch level. Your job is to compare the advisory’s conditions with the evidence from the target.
Separate exposure, vulnerability, and exploitability
These three ideas are related but not identical:
- Exposure: a service or function is reachable.
- Vulnerability: the service appears to contain a weakness under defined conditions.
- Exploitability: those conditions can be satisfied in the current environment to produce a meaningful security impact.
A reachable legacy service may not match the vulnerable build. A vulnerable build may not be exploitable through the current network path. A successful exploit may provide limited access rather than full control. Clear language prevents your notes from inflating possibility into proof.
Inspect unfamiliar code before running it
Public exploit code is not automatically safe because it appears in a well-known repository or walkthrough. Read the usage notes and source. Identify network destinations, file writes, required arguments, compilation steps, payload behavior, cleanup requirements, and any commands executed on your attacker machine.
You do not need to understand every line at first. You should understand enough to answer:
- What does the code send to the target?
- What condition does it expect?
- What result should appear if it works?
- What files, listeners, or processes does it create?
- Could it contact an external address?
- How will you stop or clean it up?
When you cannot answer those questions, pause and research the code in a disposable environment. “I found it online” is not a security review.
Use a testing guide, not only exploit indexes
Exploit databases help locate technical material, but a testing methodology helps you reason about evidence, validation, impact, and reporting. The National Institute of Standards and Technology provides structured guidance for technical security testing and assessment. Use it to see how discovery, analysis, validation, and reporting fit together beyond a single lab.
Key takeaway
The correct research question is not “Which exploit matches this machine?” It is “Which documented weakness matches the evidence and conditions I have verified?”
Why Did the “Correct” Exploit Fail?
A failed exploit is one of the most valuable moments in a beginner lab. It exposes the distance between a plausible vulnerability and a working attack path. Walkthrough culture sometimes edits this distance out, leaving only clean commands and successful output. Real investigations are less polished and more instructive.
Version detection may be incomplete or misleading
Service identification often relies on banners and response fingerprints. Administrators can suppress or alter banners. Backported security patches can preserve an old-looking version string. Legacy protocols can confuse modern clients. A scanner may report its best guess with high confidence while still being wrong.
When an exploit fails, revisit the version evidence. Which part came directly from the service? Which part came from a fingerprinting database? Did another protocol reveal a conflicting operating system clue? A failed test may tell you that your service model needs revision.
Network conditions can change exploit behavior
Virtual networking, host firewalls, routing, listener addresses, and Network Address Translation can prevent a session from returning even when the target-side condition was triggered. A payload configured with the wrong local address may call back into an empty corridor. The exploit did not necessarily disprove the weakness; the delivery or return path may be wrong.
Check the basics before changing tools:
- Can attacker and target reach each other on the intended private network?
- Is the callback or listener address the attacker’s lab-facing address?
- Is the selected port already in use?
- Does a host firewall block the connection?
- Did the target service restart or crash?
- Does the payload match the target operating system and architecture?
Payload assumptions may not match the target
Exploit code often contains assumptions about shells, interpreters, paths, writable directories, memory layout, network utilities, or available commands. An old machine may lack a utility that a modern payload expects. A shell may open and immediately close because it is unstable or because the listener is configured incorrectly.
Record the exact failure symptom. “Did not work” is too vague. Better notes sound like this:
- The target remained reachable, but no callback reached the listener.
- The service stopped responding after the request and recovered after a reset.
- The exploit reported success, but no session appeared.
- A connection opened and closed immediately.
- The payload ran with a lower privilege level than expected.
Turn failure into a revised hypothesis
Use a small troubleshooting loop:
- State what you expected.
- Record what actually happened.
- List the assumptions required for success.
- Identify which assumption is least supported.
- Choose one test that can confirm or reject it.
- Update the service map and continue only if new evidence appears.
Show me the nerdy details
A failed exploit can reduce uncertainty in several ways. A crash may support a memory-corruption condition while showing that the chosen offsets or payload are incompatible. A connection with no shell may support command execution while exposing a callback problem. A clean rejection may show that the suspected endpoint, method, or version does not match.
The useful unit is not “tool success.” It is the amount of uncertainty removed. This is why a carefully documented failure can be more educational than a copied command that succeeds immediately.
From Initial Access to System Understanding
Initial access is not the end of the lab. It is the moment the investigation changes perspective. You can now observe the system from inside, but you should continue with the same restraint used during enumeration. Avoid altering data, installing unnecessary software, or creating persistence.
Identify the current user, privileges, and environment
Begin with basic situational awareness. Determine which user context you obtained, what groups or privileges are present, which operating system and kernel are running, what directory you entered, and whether the shell is stable. These observations establish impact without immediately reaching for escalation scripts.
Keep the distinction between three outcomes:
- Initial access: the ability to execute actions as a user or service account.
- Privilege escalation: gaining greater authority than the initial context.
- Persistence: creating a way to regain access later.
A beginner lab may teach the first two. Persistence is usually unnecessary and creates poor habits when the objective is simply to confirm impact. Professional testing requires explicit authorization before persistence mechanisms are introduced.
Observe configurations without damaging the machine
Prefer read-only inspection. Look for configuration choices that explain the attack path: outdated packages, excessive service permissions, unsafe file ownership, weak local controls, or credentials exposed through configuration. Do not collect unrelated user data merely because you can access it.
The purpose is to confirm the minimum evidence necessary. If a readable configuration file demonstrates a privilege boundary problem, recording its path, permissions, and relevant non-sensitive setting may be enough. Copying entire directories adds risk without improving the finding.
Explain the cause-and-effect chain
Try describing the attack without naming any tool:
“A network-accessible legacy service disclosed enough version and platform information to identify a known weakness. The weakness allowed unauthorized command execution in a limited user context. Local configuration and patching gaps then permitted elevation to administrative control.”
That explanation is useful to a system owner. “I ran Module X and got root” is not. Tool names belong in reproducibility notes, but the main finding should describe the security condition and business consequence.
Connect each step to a defensive control
| Attack-path stage | Underlying weakness | Control that could interrupt it |
|---|---|---|
| Service discovery | Unnecessary network exposure | Network segmentation, firewall rules, service reduction |
| Version identification | Legacy software and information disclosure | Patch management, banner reduction, asset inventory |
| Initial access | Remotely exploitable service condition | Upgrade, compensating control, service removal |
| Privilege escalation | Unsafe local permissions or outdated kernel | Least privilege, hardening, patching, configuration review |
| Unnoticed activity | Limited monitoring and logging | Centralized logs, alerting, endpoint monitoring |
Key takeaway
Access is evidence of impact, not a trophy. The stronger learning outcome is explaining how the path formed, which trust boundary failed, and which control would have broken the chain.
Common Kioptrix Mistakes That Build the Wrong Habits
A vulnerable machine can teach excellent habits or merely reward fast answer-seeking. The difference lies in how you structure the session. Several common shortcuts make the lab easier while quietly removing its educational value.
Opening a walkthrough before independent enumeration
A walkthrough is useful after you have built your own service map, attempted several evidence-based tests, and documented where you became stuck. Opened too early, it changes every later observation. You stop noticing clues because you already know which ones matter.
Use a staged hint rule:
- Work independently for a defined session.
- Review your notes and identify the exact uncertainty.
- Seek a conceptual hint, not a command sequence.
- Return to the lab and test the idea yourself.
- Read a full walkthrough only after completing or formally ending the attempt.
The article on avoiding Kioptrix walkthrough addiction offers a useful reset when every difficult moment begins to feel like permission to search for the solution.
Running every scanner at maximum speed
More output does not always create more knowledge. Aggressive scans can produce duplicate findings, false positives, service instability, and pages of results that the learner never validates. The result is a dramatic report with very little understanding.
Run tools to answer questions. A port scan answers which network services respond. Service detection estimates what may be running. Web content discovery tests whether unlinked paths exist. A vulnerability scanner proposes conditions that require validation. When you cannot state the question, postpone the tool.
Confusing tool output with proof
Scanner output is evidence, but its meaning depends on how the tool reached the conclusion. A vulnerability label may be based only on a banner. A severity score may describe the worst known outcome, not the outcome confirmed on your target. A green success message may indicate packet delivery rather than a usable session.
Label each note as one of three categories:
- Confirmed: directly observed and reproducible.
- Likely: supported by several clues but not fully validated.
- Unverified: suggested by a tool or source and awaiting a test.
Treating root access as the only measure of success
A session can be valuable without full compromise. You may discover that your network setup is wrong, learn to distinguish two protocols, identify a false version match, improve your notes, or explain why an exploit prerequisite was absent. These are genuine gains.
Wrong-habit warning signs
- Your notes contain commands but almost no observations.
- You search for the machine name plus “exploit” before mapping services.
- You cannot explain why a successful command worked.
- You discard failed attempts instead of recording their symptoms.
- You switch tools whenever output becomes confusing.
- You stop immediately after privileged access.
- You cannot name three defensive changes that would reduce the risk.
Documentation and a Repeatable Security Workflow
Documentation is not the paperwork waiting at the end of the interesting part. It is how you preserve the investigation while it happens. Good notes make troubleshooting faster, reduce repeated work, expose unsupported assumptions, and allow another person to reproduce your conclusions.
Use a five-column evidence log
The simplest useful worksheet contains five columns: observation, evidence, hypothesis, test, and result.
| Observation | Evidence | Hypothesis | Test | Result |
|---|---|---|---|---|
| A legacy web server appears reachable | Header and default page response | The server may expose outdated modules or unsafe methods | Inspect methods, paths, headers, and error behavior | Record confirmed and rejected clues |
| File-sharing protocol responds | Successful negotiation and hostname clue | Anonymous information may reveal platform details | Request non-authenticated server information | Update platform confidence |
| Exploit attempt opens no session | Listener remains silent; target stays responsive | Payload address or exploit prerequisite may be wrong | Verify lab-facing address and prerequisite evidence | Revise or reject hypothesis |
The worksheet forces movement from fact to reasoning. It also shows when you are repeating tests without learning anything new.
Capture evidence with context
A screenshot should show enough information to understand what it proves. Include the target identifier, relevant command or request, meaningful response, and timestamp when appropriate. Avoid giant terminal screenshots containing unrelated commands, personal paths, tokens, or credentials.
Name files consistently. A useful pattern might include the host, stage, service, and sequence number. For example: target-enum-http-01 or target-impact-user-context-02. Consistency makes the final report far easier to assemble.
The site’s Kioptrix reconnaissance log template and pentesting note-taking systems guide provide additional structures for organizing commands, screenshots, and findings.
Separate facts, assumptions, and unknowns
At the end of each session, make three short lists:
- Confirmed facts: evidence you can reproduce.
- Working assumptions: explanations that fit the evidence but require more testing.
- Open questions: uncertainties that determine the next session.
This simple separation guards against narrative drift. Humans enjoy turning scattered clues into a smooth story, even when two scenes are missing. Security work rewards the person willing to leave a blank space labeled “unknown.”
Finish with remediation and reflection
A useful Kioptrix report should contain:
- Scope and lab boundaries.
- Executive summary in plain English.
- Attack-path overview.
- Service enumeration evidence.
- Confirmed vulnerabilities and impact.
- Failed tests and revised assumptions.
- Risk-reduction recommendations.
- Cleanup actions and snapshot reset.
- Personal reflection on what to improve next time.
For a complete structure, see the Kioptrix penetration test report guide. The most important habit is ending with defensive meaning. A screenshot of privileged access says what happened. Remediation explains how to prevent it.
Five-phase repeatable workflow
- Scope and isolate: confirm permission, target identity, network mode, and snapshot.
- Discover and enumerate: map services, collect banners, and note confidence.
- Research and validate: match conditions, inspect code, and test minimally.
- Confirm impact: identify access level, privilege path, and security consequence.
- Report and reset: preserve evidence, recommend controls, clean up, and reflect.
Key takeaway
The quiet skill employers notice is not command memory. It is the ability to preserve evidence, distinguish certainty from assumption, explain impact, and recommend a practical fix.
When to Stop, Reset, or Seek Help
Persistence is useful in learning, but persistence without boundaries becomes noise. Stop or reset when the environment is unsafe, the evidence no longer changes, or you do not understand the behavior of a tool or payload.
Stop for boundary or safety uncertainty
Immediately pause if the target appears on a bridged or public-facing network, the address overlaps with a real device, unexpected hosts answer your discovery traffic, or the vulnerable machine contacts an external service. Verify the virtual adapters and routing before continuing.
Also stop before running unfamiliar code that modifies your host system, downloads additional components from unknown locations, disables security controls, or uses addresses outside the lab. Move questionable testing into a disposable virtual machine and inspect the code first.
Reset when the machine state is no longer trustworthy
Repeated exploit attempts may crash services, alter files, leave listeners running, or change conditions in ways that confuse later tests. If you cannot explain the current state, preserve your notes, record why you are resetting, and restore the clean snapshot.
Do not reset merely to erase an inconvenient failure. Reset when controlled comparison requires a known baseline. The distinction is subtle and important.
Seek conceptual help before command help
When stuck, ask a narrow question:
- Which evidence would distinguish these two service versions?
- Why might a listener receive no callback on a host-only network?
- What prerequisite does this vulnerability require?
- How can I validate the finding without causing additional changes?
- Which part of my reasoning is unsupported?
These questions preserve the learning process. Asking for “the command that works” usually removes it.
The OWASP Web Security Testing Guide provides structured testing ideas for web-facing services, while CISA’s vulnerability guidance helps connect findings to defensive prioritization and remediation. Both are useful once you begin moving from puzzle-solving toward repeatable assessment.
FAQ
Is Kioptrix still useful for cybersecurity beginners?
Yes. Kioptrix remains useful for learning scope control, service enumeration, vulnerability validation, troubleshooting, privilege concepts, and reporting. Its software is old, so learners should treat it as a fundamentals lab rather than a model of every modern production environment.
Which Kioptrix level should a beginner start with?
Most beginners should start with the earliest Kioptrix level and focus on methodology rather than speed. The Kioptrix beginner roadmap can help sequence later machines once the learner can independently scope, enumerate, validate, and document the first lab.
Is Kioptrix safe to run on a home computer?
It can be used safely when contained in virtual machines on an isolated network. Do not expose the target to the public internet or use bridged networking. Keep personal data outside the lab, take snapshots, and verify the network boundary before scanning.
Should Kioptrix use a bridged or isolated network?
Use an isolated host-only or equivalent private virtual network. Bridged mode may expose the intentionally vulnerable target to real devices on your local network and should be avoided for beginner practice.
Can I use Metasploit while learning Kioptrix?
Yes, but use it after identifying the service and understanding the suspected weakness. Record the module prerequisites, options, payload assumptions, and result. Repeating the lab manually or with fewer automated steps can reveal what the framework handled for you.
What should I document during a Kioptrix lab?
Document scope, network setup, target address, timestamps, commands, important output, service evidence, hypotheses, failed tests, access level, privilege path, screenshots, remediation, and cleanup. Separate confirmed facts from assumptions and open questions.
Does completing Kioptrix help with an entry-level security job?
Completing the machine alone is not a credential, but a clear write-up can demonstrate methodical reasoning, technical communication, safe lab practice, troubleshooting, and remediation thinking. Those qualities are more persuasive than simply stating that you obtained root access.
What should I practice after finishing Kioptrix?
Repeat the lab without a walkthrough, try a constrained manual-enumeration attempt, write a one-page report, then move to another vulnerable machine with unfamiliar services. The site’s Kioptrix-to-Hack-the-Box transition guide offers one possible progression.
Your 15-Minute Next Step: Repeat the Lab With One Constraint
Do not begin by scheduling an heroic six-hour session. Begin with fifteen quiet minutes. Open a blank note and create five columns: observation, evidence, hypothesis, test, and result. Add a short scope statement above the table and confirm that the target is on an isolated virtual network.
Then choose one constraint for your next attempt: no walkthrough, no vulnerability scanner, no Metasploit until manual validation, or no new command unless you can state the question it answers. A constraint slows the fingers just enough for the mind to catch up.
A practical 15-minute work session
- Minutes 1–3: confirm the target, private network, snapshot, and stopping conditions.
- Minutes 4–7: review existing notes and identify one unanswered question.
- Minutes 8–11: run one low-risk test designed to answer that question.
- Minutes 12–14: record the result and revise the hypothesis.
- Minute 15: write the next question, then stop cleanly.
After completing the machine, write a one-page report that explains the attack path without relying on tool names. Include one failed assumption and three controls that would have reduced the risk. This final exercise closes the loop: you move from observing an old vulnerable server to thinking like someone responsible for protecting a real one.
The habit worth carrying forward
Kioptrix matters because it gives beginners a place to practice restraint. You can learn to pause before scanning, ask what the evidence supports, test one idea at a time, preserve useful failures, and finish with a recommendation rather than a victory pose.
Old software eventually leaves production. Good investigative habits do not.
Last reviewed: 2026-06