
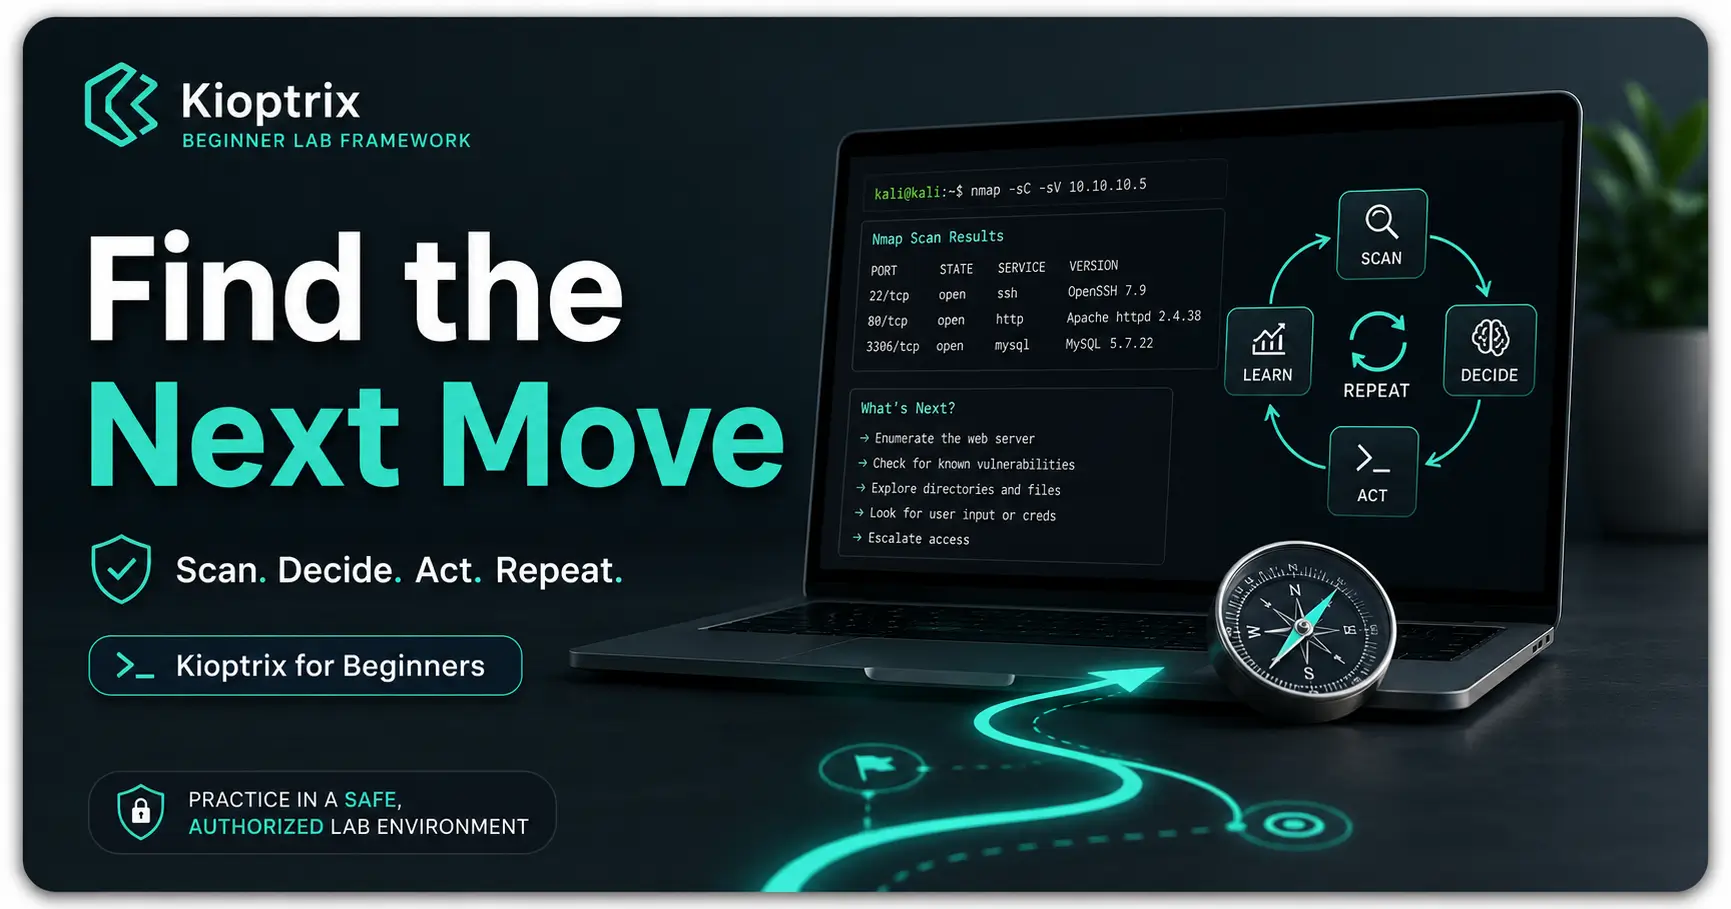
Beginner Cybersecurity Lab Guide
Kioptrix Level for Learners
Who Need a Clearer “What Next?” Framework
Kioptrix can feel strange the first time you sit in front of a Kali terminal, a quiet virtual machine, and a scan result that looks like a tray of unlabeled keys. You have tools. You may even have a walkthrough nearby. What you do not yet have is the calm inner rhythm that tells you which clue deserves your next ten minutes.
This guide treats Kioptrix as a thinking practice, not a trophy hunt. The goal is not to memorize a magic command or sprint toward root with your hair on fire. The goal is to learn how to observe, question, test, document, and review inside an authorized lab where the walls are padded and the mistakes are useful.
If you are a CTF beginner, help desk worker, SOC learner, self-taught Linux user, or career switcher trying to build real penetration testing habits, Kioptrix can be a clean training mirror. It shows you where your process is strong, where you are guessing, and where a notebook can save you from command confetti.
Find the next move
Turn scans, pages, and errors into specific questions instead of nervous guessing.
Stay lab-safe
Practice only in systems you own or have explicit permission to test.
Build proof habits
Create notes that explain your reasoning, not just your command history.
One useful promise: by the end, you will have a repeatable Kioptrix decision loop you can use before, during, and after every lab session. 🧭
Snapshot
This article is for beginner cybersecurity learners who can run tools but freeze after the first scan. You will learn how to use Kioptrix as a safe, authorized lab for building a repeatable “what next?” workflow, choosing tools without wasting money, avoiding common beginner mistakes, and writing evidence-based notes you can reuse for OSCP-style study, portfolio posts, or interview stories.
Table of Contents
Before You Act: Keep the Lab Door Closed
Kioptrix is useful because it gives you a legal, controlled place to practice security thinking. That boundary matters. The same curiosity that makes a learner sharp can become risky if it leaks into systems you do not own or do not have permission to test.
This article is educational. It is not permission to scan, probe, exploit, or test public websites, employer systems, school networks, neighbor routers, cloud assets, or any target outside your own authorized lab. If the phrase “I wonder what would happen if…” appears in your head, the safe answer is simple: only in your lab.
Key takeaway: authorization is not decoration
Use Kioptrix on a local virtual network you control. Keep practice machines isolated from public networks. Do not test third-party systems unless you have clear written permission and a defined scope.
Practice only on systems you own or are authorized to test
A safe Kioptrix setup usually means one attacker VM and one vulnerable target VM on a host-only or isolated lab network. The clean version is boring in the best possible way. No public target. No real users. No accidental discovery of your office printer at midnight.
If you are studying after work, this matters even more. Many career switchers learn on shared laptops, home Wi-Fi, or employer-issued machines. Before running anything noisy, confirm that your virtual network is pointed at your lab and not the rest of your household or workplace.
Why CTF skills become risky outside a sandbox
CTF practice compresses real security ideas into a teaching box. That is helpful, but it can distort your judgment if you forget the box exists. In the real world, scanning can trigger alerts, testing can break services, and “just checking” can still be unauthorized activity.
The better habit is to pair every technical step with a permission check. Before discovery, ask: “Is this my lab?” Before deeper testing, ask: “Is this target in scope?” Before documenting, ask: “Could this note expose someone else’s data?”
The simple rule: no permission, no probing
You do not need a legal treatise to stay safe. Use this rule: no permission, no probing. Not “just one scan.” Not “only a banner check.” Not “the site looks abandoned.” Permission is the fence around the garden.
In a lab, your curiosity has room to run. Outside the lab, it should wear a seatbelt and carry paperwork.
Who Kioptrix Helps Most, And Who Should Skip It
Kioptrix is often recommended to beginners because it makes common penetration testing phases visible: discovery, enumeration, web review, exploit validation, shell handling, and privilege escalation. The trick is that visibility does not always equal clarity. A beginner can stare at open ports for an hour and feel the room slowly turn into soup.
The best learners use Kioptrix to practice process. They are not asking, “What command wins?” They are asking, “What evidence do I have, what question follows, and what safe test would reduce uncertainty?”
Best fit: learners who know basic Linux but freeze after scanning
If you can navigate directories, read files, understand IP addresses at a basic level, and copy terminal output into notes, Kioptrix can be a strong next step. You do not need to be elegant. You need enough comfort to avoid fighting the operating system every five seconds.
The common pain point is not tool installation. It is decision paralysis after the first scan. You see SSH, HTTP, SMB, or database services and wonder which door to knock on first. This guide is built for that exact foggy hallway.
Good fit: SOC, help desk, and IT learners building attacker-thinking
Help desk workers already understand messy systems, half-documented services, strange errors, and users who swear nothing changed. That experience is useful. Kioptrix helps you turn defensive familiarity into attacker-style questioning inside a safe container.
For SOC learners, Kioptrix can also improve alert interpretation. When you understand what a scan, web probe, failed login, or shell attempt looks like from the attacker side, defensive logs stop looking like weather reports and start looking like footprints.
Not for: shortcuts against real systems
If your goal is to attack real systems without permission, this is the wrong path. A lab guide should not help with that. If your goal is professional skill, ethical testing, or a structured study habit, Kioptrix is a useful little anvil.
For a broader learning path, pair this article with a beginner roadmap such as a Kioptrix labs beginner roadmap so one lab session does not float alone like a sock in the laundry of ambition.
The Real Problem: You Do Not Need More Commands
Beginner pentesting often looks like a tool problem. You open a video, see a command you do not recognize, and assume the missing command is the missing skill. Sometimes it is. More often, the missing skill is knowing why that command was chosen at that moment.
Kioptrix rewards learners who slow down. A service version, page title, login prompt, error message, or permission result is not just output. It is a clue asking to be placed in context.
Key takeaway: enumeration is reading
Typing more commands is not the same as understanding more evidence. After each major result, write one sentence: “This suggests…” or “This does not yet prove…”
Beginners rarely get stuck because they lack tools
Kali Linux already comes with more tools than a beginner can use well in one month. Adding ten more usually increases noise, not confidence. The learner’s better question is: “Which tool answers my current question with the least confusion?”
For example, if you do not understand what a web page exposes, adding an aggressive directory brute force may be premature. First, view the page, check links, read source comments, observe headers, and record what the application appears to be.
The missing skill is choosing the next question
A good Kioptrix session moves through questions:
- What hosts exist in my lab network?
- Which services are exposed?
- What versions, pages, shares, or behaviors can I confirm?
- Which finding is most likely to produce the next reliable clue?
- What test would prove or weaken that idea?
That final question is gold. It keeps you from treating every open port as an emergency and every search result as a treasure map.
Stop celebrating output and start explaining it
Scan output can feel satisfying because it looks official. Rows, ports, versions, scripts, banners. Very tidy. But output is not proof until you understand what it means and how it connects to the target.
A cleaner habit is to write two lines under every important finding: “Observed” and “Possible meaning.” Keep them separate. The first is evidence. The second is your interpretation. Mixing them too early is how rabbits get holes and learners get lost.
Build Your “What Next?” Loop Before Touching Tools
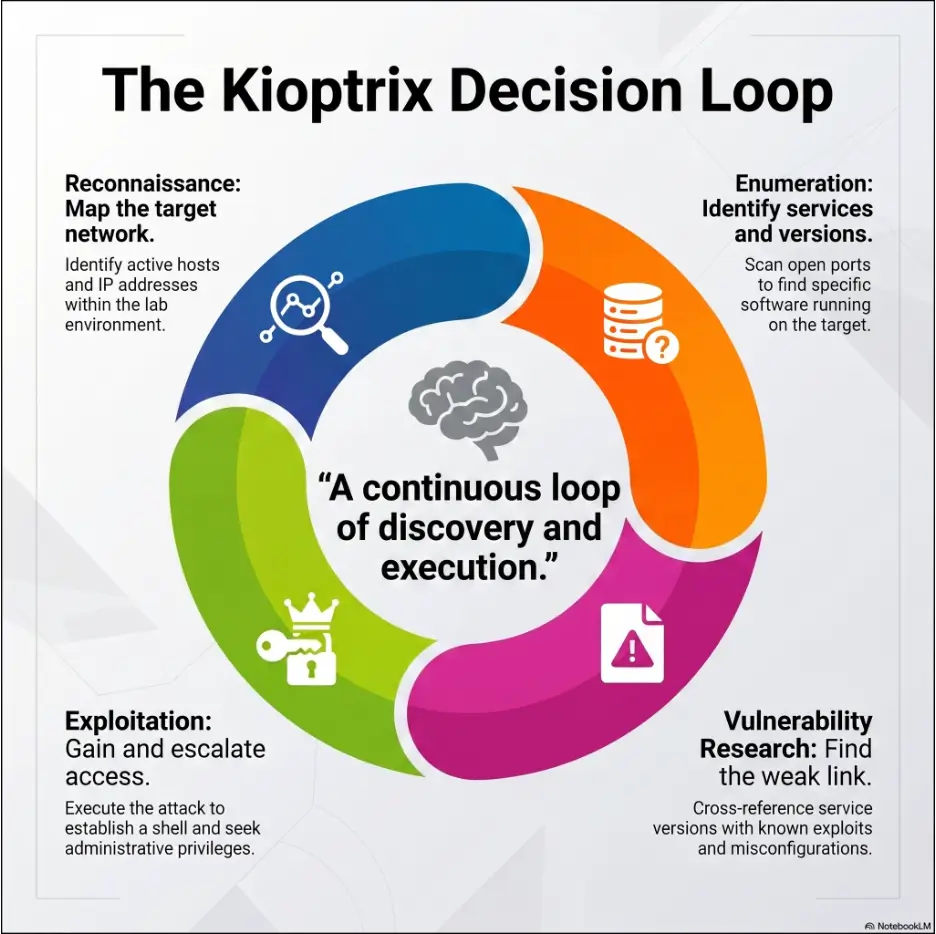
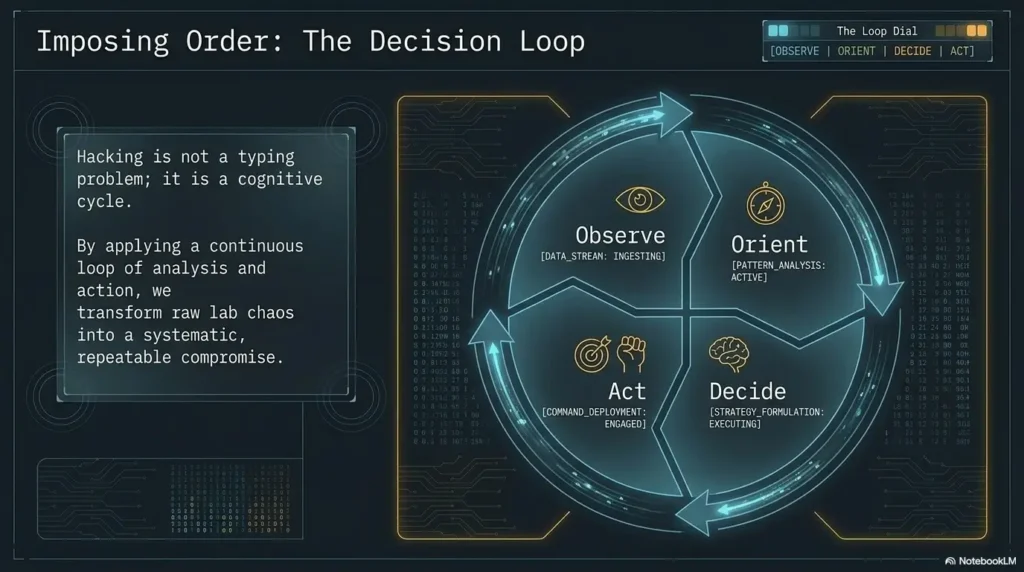
The best Kioptrix workflow is a loop, not a straight road. You observe, interpret, test, and review. Then you do it again. This is less glamorous than a dramatic exploit demo, but it is much closer to how useful security work happens.
Before launching another tool, run the loop in your head. Better yet, write it down. Your notes become a map of decisions instead of a pile of terminal confetti.
The Kioptrix “What Next?” Loop
1. Observe
What did the lab reveal?
2. Question
What does this make me ask?
3. Choose
Which clue deserves one small test?
4. Test
What can I verify safely?
5. Review
What changed, and what comes next?
Step 1: What do I know?
Start with facts, not feelings. “The target has a web service” is a fact. “The web service is vulnerable” is not yet a fact. “I saw a login form” is a fact. “The login form has SQL injection” is a hypothesis.
This distinction keeps your work honest. It also helps when you later write a lab report, portfolio post, or interview explanation. Professionals do not get paid for vibes. They get paid for evidence, analysis, and clear communication.
Step 2: What changed after this scan?
Every command should change your understanding. If it does not, either the command was unnecessary, the result was misread, or the question was unclear. That is not a failure. That is a tiny diagnostic bell.
After a scan, write: “Before this, I knew X. Now I know Y.” If you cannot fill in Y, pause. The terminal is not hungry. It can wait.
Step 3: What is the smallest safe test?
The smallest safe test is the one that confirms or weakens a theory without making a mess. In a Kioptrix lab, that might mean checking a service banner, browsing a page, testing a known default path, reviewing a share listing, or comparing a version to known issues.
The beginner mistake is jumping straight from “interesting” to “exploit.” A better sequence is: observe, compare, confirm, then test. This habit becomes even more valuable when you later work with real clients, formal scopes, and written rules of engagement.
Step 4: What evidence would prove me wrong?
Good learners look for disconfirming evidence. If you think a service version is vulnerable, what would prove the opposite? A patched build? A different module? A banner that lies? A blog post that assumes a different target?
This is where Kioptrix becomes more than a beginner lab. It teaches you not to fall in love with your first theory. In security work, the first theory often arrives wearing a cape and leaves wearing clown shoes.
First Contact: Find the Machine Without Guessing
Your first job is not exploitation. It is orientation. Which network is your lab on? Which IP belongs to the vulnerable VM? Which IP belongs to your attacker box? Which address is your gateway? If you skip this step, every later decision may wobble.
Beginners sometimes attack the wrong IP because it “looked right.” That mistake is common, embarrassing, and completely avoidable. Treat target identification as a small ritual: confirm, label, and document.
Start with network discovery, not wishful thinking
In an authorized lab, discovery tells you what machines are present. You are not trying to be fancy. You are trying to avoid guessing. A host-only network, a clean naming system, and a quick note of each VM’s role can prevent a full hour of wrong-target theatrics.
For deeper practice on safe lab design, a guide like setting up a safe hacking lab at home is a useful companion before you start running louder tests.
Confirm the target before scanning deeply
Once you believe you found the Kioptrix VM, confirm it with simple clues. Does the IP appear in the expected virtual network range? Does the MAC vendor make sense for the hypervisor? Do the services look like a vulnerable Linux lab rather than your printer, NAS, or router?
Your notes should include the target IP, attacker IP, date, lab name, and network mode. It sounds small. It is the kind of small thing that rescues you when you return two days later and your brain has become refrigerated oatmeal.
Do not attack the wrong IP because it “looked right”
Wrong-IP mistakes usually happen when learners skip labels. Give each machine a name in your notes. Screenshot your VM network settings. Keep one file for the session. This is not bureaucracy. It is future-you being kind to present-you.
Service Scanning: Turn Open Ports Into Questions
Open ports are not answers. They are signs on doors. A port number suggests a service, but it does not tell you the full story. You still need to confirm what is running, how it behaves, and whether it connects to a plausible next test.
A better scan habit is to translate each service into a question. “HTTP is open” becomes “What application is served, and does it reveal versions, paths, forms, or errors?” “SMB is open” becomes “Can I list shares, learn host details, or confirm access restrictions?”
Port numbers are labels, not answers
Port 80 often suggests HTTP, but that does not mean you understand the web application. Port 22 may suggest SSH, but that does not mean brute forcing is appropriate. Port 139 or 445 may suggest SMB, but the useful question is what the service reveals, not whether the port exists.
Learn to separate service discovery from service understanding. Discovery says, “A door exists.” Understanding says, “This door has a label, a lock type, scratches around the frame, and a note taped to the handle.”
Version details are breadcrumbs, not trophies
Version detection can be useful, but banners can be incomplete, misleading, or patched. Treat a version as a breadcrumb that deserves verification. Compare it with observed behavior, configuration hints, and target context.
If you want to strengthen Nmap basics, use a focused guide such as a Kali Linux Nmap tutorial for beginners. The point is not to collect flags like shiny pebbles. The point is to answer better questions.
Pattern interrupt: stop celebrating the scan result
A scan result is not a medal. It is the grocery list before dinner. The work begins when you decide what each item means and what to cook first.
After scanning, choose one service to investigate deeply. Use three criteria: evidence strength, likely learning value, and safety inside the lab. If two services look equally promising, pick the one you can explain most clearly.
Web Enumeration: When the Browser Becomes Your Notebook
Web enumeration is where many Kioptrix learners either rush or drown. The browser looks familiar, so they assume the web portion is easy. Then they miss the small clues: a default page, a comment, a forgotten path, a server header, a login behavior, an error that says just enough.
Use the browser like a notebook with glass on top. Click calmly. Record paths. Notice differences. When something changes, write what changed.
Look for forms, paths, errors, comments, and forgotten corners
Your first web pass should be quiet. Visit the root page. Check visible links. Look at page titles, forms, source comments, technologies, and response clues. Note any login prompts, upload areas, admin paths, old copyright years, or framework hints.
Only after the quiet pass should you consider automated web enumeration. Even then, make your question specific. Are you looking for hidden directories, common files, backup artifacts, or application routes?
Treat every page as a conversation with the server
A web server speaks through status codes, redirects, headers, content, and errors. A beginner sees “page not found.” A careful learner asks, “Is this a normal 404, a custom 404, a redirect, or a permission wall?”
That level of attention prevents copy-paste fog. You are no longer running a tool because a forum post mentioned it. You are asking the server a question and listening to the answer.
Mini web enumeration checklist
- Record the root page title and visible links.
- Check source comments and obvious asset paths.
- Note forms, parameters, errors, and redirects.
- Compare normal pages with missing pages.
- Use automated discovery only after naming what you are trying to find.
The quiet clue: boring pages often leak the loudest hints
Default pages, old CMS hints, sample files, and plain error messages are not glamorous. They are often more useful than the dramatic login page that steals all your attention.
When a page feels boring, ask why it exists. Is it a default install? A forgotten admin panel? A placeholder left by an old package? In beginner labs, the useful clue often wears beige socks.
Exploit Research Without Copy-Paste Fog
Exploit research is where beginners can learn the most and make the biggest mess. The internet is full of write-ups, proof-of-concept code, outdated assumptions, and commands copied from unknown environments. In Kioptrix, the safer habit is to research slowly and match evidence carefully.
This article will not hand you a target-specific exploit recipe. That is not the point. The point is to learn how to decide whether an exploit claim applies to your lab, what risk it carries, and what evidence you should capture before and after testing.
Match service, version, and context before trusting any exploit
A public exploit may require a specific service build, configuration, module, path, credential, operating system, or architecture. If your target differs, the exploit may fail or teach you the wrong lesson.
Before testing anything, write a match note: “This may apply because…” and “This may not apply because…” That tiny balance keeps your brain from turning search results into prophecy.
Read the exploit notes before running anything
Read the description, assumptions, dependencies, target requirements, and expected behavior. In a lab, you can also snapshot your VM before risky testing. A snapshot is not a moral shield, but it is a practical safety net.
If you use framework tools, treat them as learning aids, not magic vending machines. You still need to know why a module was selected, what it checks, what it changes, and what evidence proves success or failure.
Do not fire Metasploit because the blog did
Metasploit can be useful in labs, but it can also make learners passive. If your only explanation is “the module worked,” you have learned less than you think. Try to explain the vulnerability class, the affected service, the required conditions, and the outcome in plain English.
A balanced path is to compare manual learning and framework learning. For Kioptrix-specific thinking, a guide like Kioptrix Metasploit vs manual exploitation can help you choose the right approach for your goals.
When You Get a Shell: Slow Down
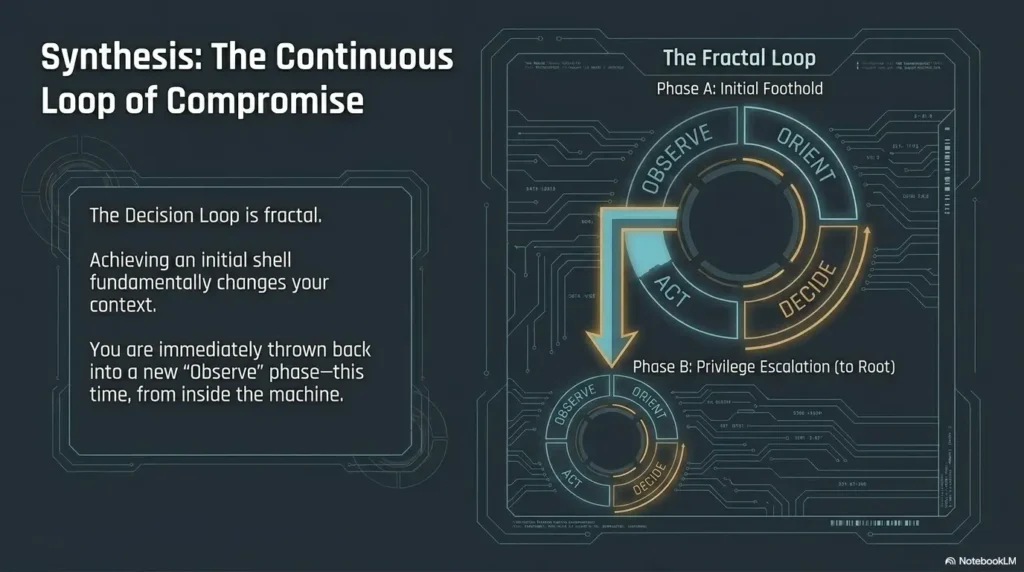
Getting a shell feels exciting. It should. It is the door opening after a long hallway of cautious knocking. But initial access is not the finish line. It is a change in perspective.
At this point, beginners often rush. They type louder, poke randomly, and forget to document how they arrived. Slow down. A shell gives you a new question: “Who am I, where am I, what can I read, and what can I safely verify?”
Key takeaway: root is not the lesson
The lesson is the chain: discovery, evidence, hypothesis, test, access, context, escalation, and explanation. If you cannot retell the chain without commands, review before moving on.
Initial access is only a doorway
Once inside a lab machine, identify your current user context and environment. You are not trying to loot. You are trying to understand the system’s story: user permissions, file locations, services, scheduled tasks, configuration patterns, and possible misconfigurations.
Document the exact path to access. What clue led you there? What test confirmed it? What changed after access? These notes turn a fragile win into reusable learning.
Stabilize, identify context, and document the path
A lab shell may be awkward. Before doing anything complex, understand its limitations. Can you run commands reliably? Can you see output? Are you in a restricted environment? Are common paths available?
Write down practical context rather than rushing toward privilege escalation. The system may already be telling you which direction matters. A writable directory, unusual permission, old kernel, weak service account, or exposed credential clue is more useful than frantic wandering.
Explain the chain without commands
After initial access, pause for two minutes and write the chain in human language. Example structure: “I discovered the target, found a web service, identified an application clue, validated a likely weakness inside the lab, and gained low-privilege access.”
This style becomes valuable for write-ups, interviews, and reports. A hiring manager or mentor does not need a wall of commands first. They need to see that your thinking has a spine.
Privilege Escalation: Make the System Explain Itself
Privilege escalation is not a guessing contest. It is local enumeration with patience. You are asking the system to explain who uses it, what runs on it, what is writable, what is old, what is scheduled, and what trust relationships exist.
In Kioptrix, privilege escalation often teaches the cost of messy notes. If you skipped earlier evidence, you may not know whether a clue is new or already explained. Good notes become a lantern here.
Check users, permissions, kernels, cron jobs, and writable paths
Your local review should be structured. Look at identity, groups, file permissions, service configuration, scheduled tasks, environment variables, kernel and OS details, writable locations, and sensitive files you are permitted to inspect inside the lab.
Do not treat automated privilege escalation scripts as replacements for understanding. They can point to possible clues, but you still need to decide what is real, what is noise, and what is safe to test in your lab.
Separate “interesting” from “actionable”
Not every odd file matters. Not every old package creates a path. Not every permission result is exploitable. A mature learner can say, “Interesting, but not yet actionable.” That sentence saves hours.
Use a two-column list: “Possible clue” and “Why it matters.” If you cannot explain why it matters, park it. Parking is not quitting. It is keeping the desk clean.
Privilege escalation triage card
- Identity: current user, groups, home directory, restrictions.
- System: OS, kernel, architecture, services, scheduled jobs.
- Permissions: writable paths, unusual ownership, sensitive readable files.
- Credentials: only document clues inside the lab and avoid exposing real secrets.
- Hypothesis: one likely escalation path and one reason it may fail.
Why one harmless-looking file can change the whole box
A configuration file may reveal a database user. A backup file may reveal application history. A writable script may reveal a scheduled task. A forgotten note may explain a service relationship.
The useful habit is not “open everything.” It is “notice what connects.” Privilege escalation often appears when two small facts shake hands.
The Learner’s Evidence Table
A decision log is the simplest upgrade you can make to your Kioptrix learning. It turns a chaotic session into a reproducible investigation. It also helps you avoid the classic beginner trap: “I got root once, but I cannot explain how.”
You do not need a paid note-taking system to start. A text file, Markdown note, spreadsheet, or paper notebook can work. The tool matters less than the structure.
Observation: what did the lab reveal?
Observation should be plain. Do not decorate it with assumptions. If you saw a login page, say that. If a share listing failed, say that. If a service appeared filtered, say that. The observation column is your clean countertop.
Interpretation: what might it mean?
Interpretation is where you allow cautious imagination. A login page may suggest authentication testing, technology identification, or default credential research. A failed share listing may still reveal naming or access restrictions.
Use words like “may,” “could,” and “suggests.” They remind you that interpretation is not proof.
Test and result: what can I verify next?
Testing should be small and tied to a question. The result should state what changed. If nothing changed, that is still a result. Failed attempts are not trash. They are negative space in the painting.
For a more structured workflow, use a Kioptrix recon log template or build your own four-column version from the table above.
Show me the nerdy details
A strong Kioptrix workflow resembles the scientific method in miniature. Observation captures raw output. Interpretation creates a hypothesis. Testing applies a controlled action. Review compares expected and actual results.
This reduces confirmation bias. When learners jump straight from version number to exploit, they often ignore contradictory evidence. When they force each step into a table, weak assumptions become visible.
The table also improves reporting. A future reader can understand why each action happened, not merely that it happened. That is the difference between a command diary and a technical investigation.
Tools, Budget, And Setup Choices That Actually Matter
You can learn a lot from Kioptrix without spending much. A basic laptop, free virtualization software, a Kali VM, the vulnerable machine, and a disciplined note system are enough for many learners. Paid tools and upgraded hardware may help later, but they should solve a real bottleneck.
This matters for AdSense-era learners searching “best tools,” “cost,” “setup comparison,” and “what should I buy before OSCP.” The honest answer is rarely “buy everything.” It is “remove the friction that is actually slowing you down.”
Good, better, best Kioptrix setup
Free vs paid tools for beginners
Free tools are enough to learn the core Kioptrix workflow. Paid tools may become useful for comfort, reporting, automation, team study, or advanced practice. But a paid tool cannot fix unclear thinking. It only makes unclear thinking faster and shinier.
Before buying anything, ask: does this tool help me observe better, test more safely, document more clearly, or review more consistently? If not, it may be study jewelry.
Questions to ask before paying for a course, tool, or lab platform
- Does it teach decision-making, or only show finished walkthroughs?
- Does it include safe lab setup guidance?
- Does it explain failures and false starts?
- Does it help me write better notes or reports?
- Can I use what I learn on future boxes, not just one target?
- Is the price reasonable for my current stage?
If you are comparing virtualization options, VirtualBox vs VMware vs Proxmox for labs can help you match setup choices to your budget and patience level.
Common Mistakes That Make Kioptrix Feel Harder
Kioptrix is not always hard because the lab is hard. Sometimes it feels hard because the learner’s process keeps adding sand to the gears. The good news is that many beginner mistakes are fixable in one session.
The biggest improvement is not technical. It is behavioral: pause more, write more, test less randomly, and review what failed.
Key takeaway: failed attempts are data
A failed test can tell you a service is patched, a path is wrong, a credential clue is weak, or your assumption was early. Document it instead of burying it.
Skipping notes because “I’ll remember this”
You will not remember it. Not cleanly. Not after dinner, updates, a browser crash, and three tabs titled “possible exploit.” Notes are not extra work. They are the work becoming visible.
Use a simple rule: after every major action, write one sentence. Not a novel. One sentence. Your future report will thank you with tiny trumpets.
Running louder scans before understanding quiet ones
Inside a local lab, you have more freedom than in a real engagement. Still, learning to start quiet is a professional habit. Read before flooding. Confirm before assuming. Increase intensity only when the question deserves it.
This makes your practice more realistic. Real testing often involves scope, timing, rate limits, monitoring, and client impact. Your lab can teach that discipline early.
Confusing tool output with proof
A tool can suggest a vulnerability. Proof requires confirmation, context, and explanation. If a scanner reports something, ask what evidence supports it. If an exploit fails, ask whether the target is different, the exploit assumption is wrong, or your environment is broken.
For older lab machines, false positives and strange version clues are common learning material. Treat them as training weights, not insults.
Searching for the answer before naming the problem
Walkthroughs can help, but they can also flatten your thinking. Before searching, write the problem in your own words: “I have HTTP and SMB open, but I do not know which service gives the strongest next clue.” That question is better than “Kioptrix answer.”
If you use a walkthrough, use it as a mirror. Read just enough to get unstuck, then return to your notes and explain why the clue mattered.
FAQ
Is Kioptrix good for absolute beginners?
Kioptrix can work for motivated beginners, but it is smoother if you already know basic Linux navigation, IP addressing, virtual machines, and simple note-taking. If those pieces are new, spend a little time on Linux and networking basics first.
Which Kioptrix level should I start with?
Most beginners should start with the earliest Kioptrix level or a beginner-oriented guide that explains the workflow without spoiling every decision. The right first level is the one that lets you practice discovery, enumeration, and documentation without drowning.
Do I need Kali Linux for Kioptrix?
You do not strictly need Kali, but it is convenient because many common security tools are preinstalled. Beginners benefit from reducing setup friction. Just remember: Kali is a toolbox, not a teacher.
Should I use Metasploit or manual exploitation?
Use both thoughtfully. Manual work helps you understand the weakness. Framework tools can help you compare behavior, validate assumptions, and learn workflow. Avoid using Metasploit as a black box if your goal is skill growth.
Why do I get stuck after Nmap?
You probably have scan output but no decision framework. Convert each open service into a question, choose the most promising clue, and run one small test. Nmap tells you doors exist. You still need to decide which door deserves attention.
Is following a walkthrough cheating?
No, not if you use it carefully. Try first, document where you got stuck, read only enough to learn the missing clue, then return to the lab and explain the reasoning in your own words. Passive copying teaches very little.
What should I write in my Kioptrix notes?
Write target details, scan summaries, service questions, web findings, failed attempts, successful tests, screenshots, shell context, privilege escalation clues, and a final plain-English attack chain. Your notes should explain why each step happened.
How do I know when to move to harder CTF machines?
Move on when you can complete a beginner lab and explain the chain without relying on copied commands. You do not need perfection. You need a repeatable method, honest notes, and the ability to recover from dead ends.
Your 15-Minute Next Step: Run One Decision Log
The next step is not to binge three walkthroughs or install five more tools. Open one Kioptrix lab session and create a three-column note: evidence, question, next action. That is enough to change the texture of your learning.
For 15 minutes, do only this: confirm your lab target, run one discovery or service review step inside your authorized environment, and write one sentence about what changed. Then choose one small next question. No rushing. No root fever. No command parade.
15-minute Kioptrix decision log
- Write the lab name, date, attacker IP, and target IP.
- Record one confirmed observation.
- Turn that observation into one question.
- Choose the smallest safe test that answers the question.
- Write what changed after the test.
If you want your practice to become portfolio-ready, review how to turn a Kioptrix lab into a pentest-style report after you finish the box. That is where beginner practice starts becoming professional evidence.
The quiet victory of Kioptrix is not that you reach root once. It is that you become the kind of learner who can look at a strange machine, breathe, gather evidence, ask the next sane question, and keep the lab door closed while curiosity does its useful work.
Last reviewed: 2026-07