

Evidence-first cybersecurity training
Kioptrix Level for Building
a Stronger Troubleshooting Mindset
Kioptrix is often introduced as an old vulnerable machine that beginners can scan, exploit, and conquer. That description is accurate, but it misses the more valuable lesson. The machine is a compact laboratory for learning how to think when the screen is quiet, the scan returns something unexpected, and the command copied from a guide refuses to behave.
A stronger troubleshooter does not simply collect more commands. They separate observation from interpretation, change one variable at a time, preserve failed results, and choose the next test for a reason. Those habits matter in penetration testing, help-desk work, systems administration, incident response, certification labs, and nearly every technical role where reality declines to follow the manual.
This guide shows you how to use a Kioptrix level without turning the session into a frantic race for root access. You will build a safer lab, investigate connectivity failures, read scan results with restraint, test hypotheses, debug broken tools, use walkthroughs without surrendering the lesson, and finish with notes another learner could actually reproduce.
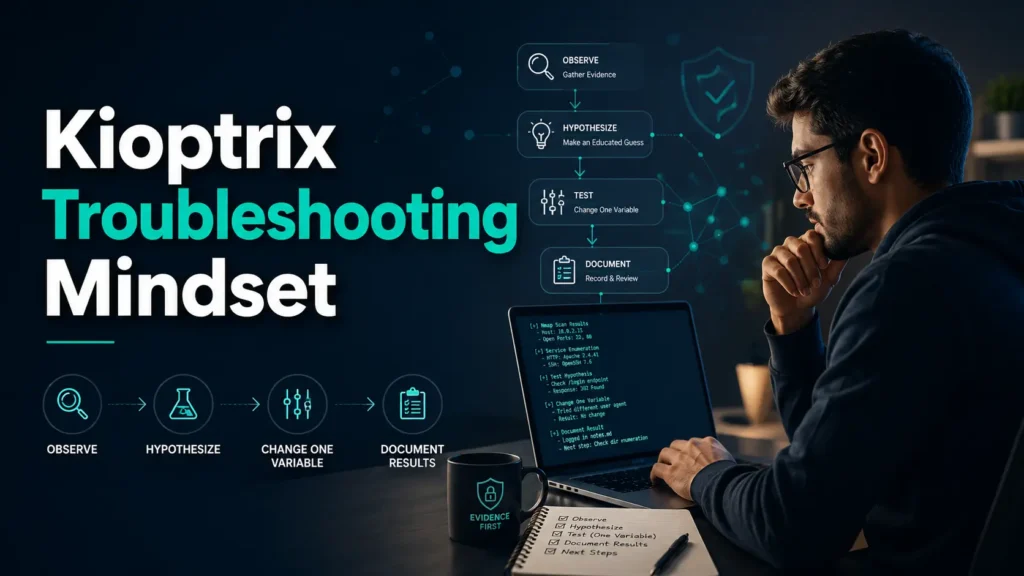
SEE THE SIGNAL
Turn scan output and error messages into useful evidence instead of terminal wallpaper.
CONTROL THE TEST
Change one condition at a time so success and failure both teach you something.
REPRODUCE THE PATH
Build notes that explain decisions, not merely the commands that happened to work.
The goal is not to look fast in the terminal. It is to become difficult to confuse. 🧭
Article snapshot
This guide is for cybersecurity beginners, IT support professionals, junior penetration testers, and certification learners who want a repeatable troubleshooting method. It solves the common problem of running tools without understanding what their results mean. By the end, you will be able to plan an isolated Kioptrix session, investigate failures systematically, document decisions, and judge progress by reasoning quality rather than command count.

Build the Lab Safely Before You Test Anything
A deliberately vulnerable machine should be treated like an open jar of laboratory bacteria: useful in the correct container, deeply unwelcome beside lunch. Before running a discovery scan, make sure the target cannot casually communicate with your household devices, workplace systems, or the public internet.
Kioptrix contains outdated services and intentionally weak configurations. Those weaknesses are the teaching material. They are also the reason your first troubleshooting exercise should be the network boundary itself.
Use a Host-Only or Otherwise Isolated Virtual Network
For a basic two-machine lab, place the attacker virtual machine and the Kioptrix target on a private virtual segment that does not expose the target to the physical network. In many desktop hypervisors, a host-only network is the simplest choice. An internal network can also work, although it may require extra configuration if you want the host computer to communicate with the guests.
The attacker machine may need temporary internet access for package installation or research. That does not mean the target needs it. A cautious setup uses separate virtual adapters or enables internet access only when required, then returns the practice environment to its isolated state.
Record the Known-Good State Before Troubleshooting
Write down the hypervisor, adapter mode, subnet, attacker IP address, target IP address if known, and snapshot name. This may sound like administrative garnish, but it prevents a common beginner spiral: debugging a scan while forgetting that an adapter was changed twenty minutes earlier.
- Confirm both virtual machines are powered off before changing adapter modes.
- Attach both machines to the same isolated virtual network.
- Boot the target and allow it enough time to finish starting.
- Boot the attacker machine and inspect its assigned address and subnet mask.
- Take a clean snapshot before attempting exploitation.
- Remove shared folders, clipboard sharing, and unnecessary host integration.
- Keep personal documents and credentials out of the lab machines.
The Authorization Boundary Is Part of the Exercise
Practice only on systems you own or have explicit permission to test. The same command can be an educational experiment inside your lab and an unauthorized act when aimed elsewhere. Good technical judgment includes knowing where the test must end.
Safety and authorized-use notice
Use this material only with deliberately vulnerable systems that you own or are expressly authorized to test. Keep Kioptrix isolated from production systems, public networks, work devices, personal data, and shared household equipment. If you cannot explain the lab boundary clearly, pause before scanning.
Key takeaway
A safe lab is not merely preparation for the real lesson. It is the first lesson: define the system, define the boundary, and record the state before changing anything.
Readers building their first environment may also find the internal guides on creating a safe hacking lab at home, planning a Kioptrix home-lab network layout, and understanding NAT, host-only, and bridged adapters useful before continuing.
The First Mystery: Is the Target Missing or Merely Invisible?
The first Kioptrix problem is often not exploitation. It is absence. The target appears to boot, yet your attacker machine cannot find it. You run another scan, then a louder scan, then a scan copied from a forum. The terminal fills with activity while the actual question remains untouched.
“I cannot see the target” is not a diagnosis. It is a symptom containing several possible failures. The machine may not have booted. Its network adapter may be disconnected. It may have received an address on another subnet. Host discovery probes may be ignored. Your scanning command may target the wrong range. Each explanation predicts different evidence.
Separate Boot, Network, and Discovery Problems
Begin at the lowest uncertain layer. Look at the target console. Does the machine finish booting, or is it waiting for input? Does the hypervisor show the virtual cable as connected? Is the attacker interface up? What subnet has the attacker received?
Only after those checks should you ask whether the target is responding to discovery traffic. A host can be reachable even when a particular discovery method reports nothing. Conversely, a hostname in a cache or ARP table does not prove every service is accessible.
Compare Independent Signals Instead of Repeating One Command
Use several low-impact observations that answer slightly different questions. Inspect the attacker’s interface and route. Check the neighbor or ARP table. Watch whether new entries appear while probing the subnet. Compare a discovery scan with a targeted attempt that assumes the host is online.
The purpose is not to launch every tool in Kali Linux. It is to collect independent signals. When two methods disagree, the disagreement is often the most useful part.
| Observation | What It May Mean | Next Controlled Test |
|---|---|---|
| Attacker has no address on the expected subnet | Adapter or virtual DHCP configuration may be wrong | Inspect adapter mode and renew the interface configuration |
| Target console never completes boot | The problem is not network discovery yet | Review import settings, virtual hardware, and boot messages |
| ARP entry appears but discovery scan reports no host | The host may be present while a probe type is ignored | Run a focused scan that does not depend on preliminary host discovery |
| Attacker and target are on different private ranges | The machines may be attached to different virtual networks | Compare adapter names and network assignments |
| Target appears after changing several settings | The cause is unknown because too many variables moved | Revert and repeat one change at a time |
A Failed Scan Is Still Evidence
A failed scan may tell you that the target is not responding, the route is wrong, the probe is unsuitable, permissions are limited, or the command is malformed. It does not automatically prove the target is offline.
Write the result in neutral language. “No hosts returned from this discovery method” is more accurate than “Kioptrix is broken.” Precise language keeps your next decision attached to reality.
The Evidence Loop
1. OBSERVE
State exactly what happened.
2. EXPLAIN
List plausible causes.
3. TEST
Change one variable.
4. COMPARE
Match expected and actual results.
5. DECIDE
Keep, reject, or revise the hypothesis.
Do not skip from observation to action. The hypothesis in the middle is what turns activity into troubleshooting.
Enumeration Without the “Scan Everything” Reflex
Once the target is visible, beginners often replace uncertainty with volume. They launch broad port scans, version detection, scripts, directory discovery, vulnerability checks, and several service-specific tools in quick succession. The resulting files are large, impressive, and surprisingly difficult to reason about.
Good enumeration is not defined by how much output you collect. It is defined by whether each test reduces uncertainty.
Start With One Precise Question
Your first question might be: “Which TCP services appear reachable from the attacker machine?” That question has a clear scope. Once answered, you can ask what each service appears to be, whether the identification is credible, and what information can be gathered without changing the target.
This staged approach makes anomalies visible. If a quick scan and a full-port scan disagree, you have something specific to investigate. If version detection changes between attempts, you can inspect timing, banners, protocol behavior, and scanner confidence rather than accepting the latest label as truth.
Treat Open, Closed, and Filtered as Different Claims
An open port suggests that an application is accepting connections. A closed port indicates the host responded but no service accepted that connection. A filtered result usually means the scanner could not determine the state because traffic was blocked or responses were absent.
Those labels are not decorative. They imply different next steps. Repeating an application-level test against a closed port is unlikely to help. A filtered result may justify checking the lab path or trying a different probe. An open port invites protocol-specific inspection.
Validate Service Banners Before Trusting Them
Service identification is an inference created from banners, protocol responses, fingerprints, and timing. Older systems can return incomplete or misleading information. Administrators can also modify banners, and compatibility layers may imitate another product.
Record both the scanner’s claim and the evidence supporting it. “Scanner labels port 80 as Apache based on the HTTP response” is stronger than copying a version string into an exploit search box and treating the match as certain.
Stop Collecting Output When It No Longer Changes the Hypothesis
Enumeration can become a hiding place. Running another scanner feels safer than deciding what the current evidence means. A useful stopping rule is simple: if a new tool is likely to repeat information you already possess, explain what additional uncertainty it will resolve before launching it.
Key takeaway
Every enumeration command should complete this sentence: “I am running this because I need to learn whether…” If the sentence has no clear ending, the command probably needs to wait.
For a more structured technical routine, see the internal guides to building a Kioptrix reconnaissance routine, using a fast enumeration routine for vulnerable machines, and choosing between Nmap and RustScan for Kioptrix.

Turn Every Result Into a Testable Hypothesis
A tool result becomes useful only after you translate it into a claim you can examine. This is the hinge between command familiarity and troubleshooting skill.
Suppose an HTTP service returns an old-looking default page. A weak conclusion is, “The web server is vulnerable.” A better observation is, “The server returns a default page and identifies itself with an older-looking header.” Possible hypotheses include an unmaintained server package, an intentionally altered banner, a partially configured site, or a legacy application behind the server.
Use the Five-Field Method
- Observation: What did you directly see, receive, or measure?
- Hypothesis: What explanation could account for that observation?
- Test: What controlled action would support or weaken the explanation?
- Result: What actually happened?
- Next decision: What will you keep, reject, revise, or investigate next?
The method is intentionally plain. It prevents the common habit of recording a command and its output while omitting the reason either mattered.
Rank Hypotheses by Evidence, Risk, and Cost
Not every possible explanation deserves equal attention. Rank candidates using three questions. How well does the current evidence support the idea? How risky or disruptive is the test? How much time will the test consume?
Checking an interface address is fast, low risk, and highly relevant to a discovery failure. Reimporting the target virtual machine is slower and changes more conditions. Reinstalling the attacker operating system because one command failed is the technical equivalent of replacing the kitchen because the toaster tripped a breaker.
Decide What Would Disprove the Idea
Beginners often search only for confirmation. If they suspect a service version is vulnerable, every similar exploit title feels supportive. Strong troubleshooting asks the opposite question: what evidence would show this explanation is wrong?
If your hypothesis is that the target is on the wrong subnet, finding both machines on the same subnet with successful ARP communication weakens that idea. If you believe a tool lacks permission, running an appropriate low-risk permission check may confirm or reject it. A hypothesis that cannot lose is not a useful hypothesis.
Short Story: The Scan That Worked for the Wrong Reason
Maya had spent forty minutes trying to find her Kioptrix machine. She changed the target adapter, restarted Kali, edited the virtual DHCP settings, disabled a host firewall, and replaced her discovery command. On the next attempt, the target appeared.
For ten seconds, the terminal felt like a victory parade. Then she realized she had no idea which change had mattered.
She restored the clean snapshot and repeated the process slowly. The firewall change did nothing. The scan syntax had been fine. The target and attacker had simply been attached to similarly named but different host-only networks.
The second attempt took longer than accepting the accidental success, but it produced a reusable lesson: record the network name and alter one variable at a time. Weeks later, that habit helped her diagnose a work printer problem without rebooting half the office.
Hypothesis worksheet
Observation: State the result without guessing at the cause.
Possible explanation: Write one plausible cause, not six tangled together.
Expected result: Describe what you should see if the explanation is correct.
Single-variable test: Choose the smallest test that changes one condition.
Decision: Keep, reject, or revise the explanation.
The Exploit Search Trap: Why a Matching Version Is Not Enough
Finding a service version and locating an exploit with a similar number creates a powerful sense of progress. The names align. The search result looks promising. The path to root appears to have switched on its landing lights.
Yet a version match is only the start of vulnerability validation. The target may use a different operating system build, architecture, configuration, module, patch level, or compilation option. The exploit may depend on credentials, a writable path, a particular request sequence, or network behavior absent from your lab.
Separate Identification From Vulnerability Confirmation
Identification asks, “What software appears to be running?” Vulnerability confirmation asks, “Does the target satisfy the conditions required for this weakness?” Exploitation asks, “Can the weakness be demonstrated safely and repeatably within the authorized lab?”
Collapsing these stages produces false confidence. It also makes failure hard to interpret. When an exploit does not work, you cannot tell whether the software was misidentified, the vulnerability conditions were absent, the exploit code was incompatible, the payload failed, or the connection could not return.
Read the Notes Before Compiling or Launching Anything
- What exact product and version range does the advisory describe?
- Which operating systems or architectures were tested?
- Does exploitation require authentication or a specific module?
- Does the code contain hard-coded addresses, ports, paths, or payload assumptions?
- What outcome should indicate success?
- What errors commonly indicate incompatibility rather than safety?
- Will the test alter files, crash a service, or destabilize the virtual machine?
- Can you restore the target from a snapshot immediately?
Treat Exploit Failure as a Diagnostic Branch
“Exploit failed” is too broad to be useful. Divide the attempt into stages: preparation, compilation, delivery, target processing, payload execution, and return connection. Identify the last stage for which you have evidence.
If compilation fails, the target has not yet entered the story. If delivery succeeds but the service closes the connection, inspect the target conditions and request format. If code execution may have occurred but no session returns, examine payload compatibility, callback addressing, local listening state, and virtual routing.
Key takeaway
A matching version number is a lead, not a verdict. Confirm prerequisites, predict the expected behavior, and identify the stage that failed before choosing another exploit.
The internal comparison of Metasploit versus manual Kioptrix testing can help you choose a learning approach, while the no-session troubleshooting guide focuses on the diagnostic gap between a detected target and a working session.
When the Tool Fails, Debug the Method Before Replacing It
A tool error creates an emotional shortcut: perhaps another tool will work. Sometimes substitution is sensible. Often it merely moves the same misunderstanding into a different interface.
Before switching, identify what failed. Was the command parsed? Did the file exist? Were permissions sufficient? Did the connection reach the target? Did the target respond? Did the tool interpret that response correctly? Each stage has a different repair.
Read the First Meaningful Error, Not the Last Dramatic Line
Long terminal output often ends with a generic failure message. The useful clue may appear much earlier: a missing library, an invalid option, a refused connection, an unsupported protocol, or a path that does not exist.
Capture the command, the working directory, the tool version, and the first meaningful error. Search the error text before searching the Kioptrix level name. Machine-specific searches tend to reveal walkthrough steps. Error-specific searches are more likely to teach the underlying issue.
Locate the Failure Stage
| Stage | Typical Evidence | Useful Question |
|---|---|---|
| Syntax | Unknown option, malformed argument, usage text | Does this tool version support the command I entered? |
| Environment | Missing package, library, interpreter, or file | Is the local runtime complete and am I in the expected directory? |
| Permission | Permission denied, raw-socket restriction, inaccessible file | What exact privilege does the operation require? |
| Network delivery | Timeout, unreachable route, refused connection | Can a simpler client reach the same service? |
| Target processing | Application error, reset, unexpected status | Did the target understand the request format? |
| Payload or session | Request accepted but no expected session | Are callback details, architecture, and payload assumptions correct? |
Change One Variable Between Attempts
Changing the command, payload, target port, listener, and network adapter at once can produce a successful attempt without an explanation. When practical, hold all but one condition steady.
Label attempts in your notes. “Attempt 3: same command, corrected target address” is far more useful than a block of terminal history. Your future self should not have to perform archaeology under fluorescent light.
Preserve Failed Commands and Their Context
Deleting failed attempts creates a polished story but weakens learning. Keep concise failure records with the command, result, cause if known, and next decision. These notes reveal recurring mistakes, such as scanning the wrong interface, using stale target addresses, assuming a listener started, or copying syntax from another tool version.
Show me the nerdy details
A troubleshooting attempt can be modeled as a chain of assumptions: local syntax, local dependencies, privilege, name or address resolution, route, transport connection, application protocol, target state, exploit prerequisite, payload execution, and return path.
The earliest broken assumption usually invalidates every later conclusion. For example, a missing local compiler means an exploit has not failed against the target. It has not been tested. Likewise, a payload that cannot connect back does not prove code execution did not occur.
Mark each link as confirmed, uncertain, or contradicted. This produces a small dependency map and prevents you from debugging the far end of a chain whose first link is already broken.
Root Is Not the Finish Line: Reconstruct the Evidence Chain
Root access is satisfying because it is visible and final-looking. The prompt changes. The target yields. Yet the educational value depends on whether you can explain how the path was discovered and reproduce it from a clean state.
A session can succeed through luck, copied instructions, leftover files, a stale service state, or several simultaneous changes. Without reconstruction, the successful path may remain a magic trick performed by your previous self.
Identify the Decisive Observation
Ask which observation genuinely opened the successful path. It may have been a service fingerprint, a web page behavior, an unusual permission, a reachable share, or a local configuration clue. Distinguish that signal from commands that merely appeared earlier in the terminal history.
Then write why the observation mattered. “Port 80 was open” is incomplete. “The HTTP service exposed a legacy application behavior that justified a specific verification test” explains the decision.
Separate Necessary Steps From Incidental Steps
You may have run twelve scans before choosing the successful route. That does not mean all twelve were required. Rebuild the process using the smallest defensible sequence: discovery, focused enumeration, validation, controlled access, local inspection, privilege escalation, and proof.
This is not about pretending you were more efficient than you were. Keep the exploratory history, but distinguish it from the reproducible route. Exploration explains how you learned. The concise chain explains what the evidence ultimately supported.
Revert the Machine and Repeat From Clean Notes
Restore the clean snapshot and follow only your notes. Do not rely on shell history, open browser tabs, or a remembered command fragment. Every missing detail will reveal itself quickly.
During reproduction, verify that addresses, paths, ports, prerequisites, and expected results are documented. If another learner could perform the same authorized exercise using your notes, you have moved from accidental success to technical understanding.
Key takeaway
Root proves that one path worked once. Reproduction proves that you understand the path well enough to explain, test, and repeat it.
When you are ready to turn the session into a portfolio-quality artifact, use the internal guides on writing a Kioptrix penetration-test report, creating a technical write-up, and presenting Kioptrix Level 1 in a cybersecurity portfolio.
Build a Troubleshooting Journal That Captures Decisions
Terminal history remembers what you typed. It does not remember what you believed, what surprised you, or why you changed direction. A troubleshooting journal supplies that missing layer.
The journal does not need ornamental formatting. It needs consistent fields, timestamps around meaningful changes, and enough evidence to reconstruct the reasoning.
Record Observation, Hypothesis, Test, Result, and Decision
Use one entry for each meaningful branch. Keep raw command output in separate files when necessary, then reference those files from the journal. This keeps the reasoning readable while preserving evidence.
| Time | Observation | Hypothesis | Test | Result and Next Decision |
|---|---|---|---|---|
| 09:10 | No host returned from initial discovery | Target may be on another virtual segment | Compare adapter network names | Names differ; move target to the attacker’s isolated segment |
| 09:18 | Target appears in neighbor table | Host is present even though the first probe failed | Run focused service discovery against the observed address | Several TCP services respond; continue with targeted enumeration |
| 09:34 | Version scanner reports an old service | Service may fall within a known vulnerable range | Verify banner and read advisory prerequisites | Version appears plausible; architecture still unverified |
Add a “Wrong Because” Note
When a hypothesis fails, record why. “Wrong” closes the branch. “Wrong because both machines were on the same segment and bidirectional traffic was observed” preserves the evidence that closed it.
These notes become a personal library of corrected assumptions. Over time, you will see whether you repeatedly confuse filtered ports with absent hosts, mistake a banner for proof, overlook local dependencies, or abandon a tool before reading its error.
End Every Session With One Unresolved Question
An unresolved question gives the next session a starting point. It might be, “Why did the service scanner identify two possible versions?” or “What evidence would distinguish payload failure from a blocked return path?”
This prevents the next session from beginning with random command recall. You return to a live thread rather than a cold terminal.
Session summary card
What I confirmed: List only claims supported by evidence.
What I ruled out: Name the failed hypotheses and why they failed.
What changed: Record adapters, packages, files, credentials, target state, or snapshots.
What I borrowed: Label hints, documentation, or walkthrough clues honestly.
Next question: Write the single uncertainty that deserves the next test.
The internal Kioptrix reconnaissance log template, technical journal guide, and pentesting note-taking comparison offer additional ways to organize this evidence.
Use the Walkthrough Delay Rule Without Wasting the Evening
A walkthrough can teach, rescue, or quietly replace your thinking. The difference lies in timing and how much information you consume.
Refusing all help is not automatically disciplined. Spending three hours on a misspelled address rarely produces three hours of learning. The goal is to delay machine-specific guidance long enough to define the problem, collect evidence, and try controlled tests.
Set a Timebox for Independent Investigation
Choose a period appropriate to your experience and schedule. A beginner might spend thirty to forty-five focused minutes on a clear obstacle. A more experienced learner may choose longer. The important part is not the exact number. It is deciding the boundary before frustration bends the session into random activity.
During the timebox, require yourself to create at least one observation, two plausible explanations, and one controlled test. This ensures that asking for help follows an investigation rather than replaces it.
Search the Error Before Searching the Machine Name
Searching the exact error message helps preserve the general lesson. Searching “Kioptrix Level 1 answer” tends to reveal the entire route, including facts you had not yet earned through observation.
Start with official tool documentation, package documentation, protocol references, and general troubleshooting discussions. Move toward machine-specific hints only when the general sources do not resolve the uncertainty.
Consume One Clue, Then Close the Guide
Read only enough to correct the next decision. A good hint might reveal that you overlooked a service, misunderstood a result, or skipped a prerequisite. Close the guide, return to your notes, and reproduce the insight independently.
Label borrowed clues. Honesty does not diminish the exercise. It helps you measure which discoveries are becoming independent skills and which still require support.
Use This Walkthrough Decision Table
| Situation | Best Next Move | Why |
|---|---|---|
| You cannot state the problem clearly | Do not open a walkthrough yet | You need an observation before a hint can teach anything |
| You have an exact error message | Search the error and tool documentation | The lesson may apply far beyond Kioptrix |
| You tested several ranked hypotheses and recorded results | Read one narrow hint | You have enough context to understand the clue |
| You are exhausted and repeating commands | Stop the session or review notes | Fatigue turns troubleshooting into noise |
| You read a complete solution | Revert and reproduce without the page open | Reconstruction converts borrowed information into practice |
Key takeaway
The best hint does not hand you a command. It points toward the assumption that deserves another look.
For a deeper strategy, read the internal article on avoiding Kioptrix walkthrough dependence and the guide to recognizing unproductive rabbit holes during lab practice.
When to Stop, Revert, or Seek Help
Persistence is valuable until it stops producing information. A disciplined troubleshooter knows when to continue, when to restore a known state, and when to ask another person to inspect the reasoning.
Stop Immediately When the Lab Boundary Is Unclear
Pause if the vulnerable target appears on your household or workplace network, if you accidentally select a public address range, if the adapter mode is uncertain, or if sensitive files are present on either virtual machine. Resolve the boundary before continuing.
Also stop if an exploit repeatedly destabilizes the target and you do not understand the expected effect. Revert to a clean snapshot, review the prerequisites, and decide whether the test is necessary for your learning goal.
Revert When the Machine State Becomes Unknowable
Restore a snapshot when you have changed several configurations without notes, installed uncertain software, left background listeners running, modified target files, or cannot tell whether an earlier attempt altered the service.
A snapshot is not a substitute for thinking. It is a way to recover experimental control. Record why you reverted so the reset does not erase the lesson.
Ask for a Reasoning Review, Not Just the Next Command
When seeking help, share the authorized lab context, your observation, the hypotheses you considered, the tests you ran, and the exact point of uncertainty. Ask, “Which assumption looks weakest?” rather than “What command gets root?”
This makes it easier for a mentor or study partner to help without solving the entire machine. It also demonstrates the kind of communication valued in professional technical work.
Use a Five-Question Stop Check
- Am I still working inside a clearly isolated, authorized environment?
- Can I state the current problem in one neutral sentence?
- Did my last two actions test different hypotheses?
- Do I know what changed since the last known-good state?
- Would a short break or note review produce more value than another command?
MITRE ATT&CK is not a Kioptrix answer sheet. It can, however, help you connect isolated lab actions to broader adversary behaviors and defensive concepts. Use it after understanding what happened in your own session, not as a substitute for observing the target.
Key takeaway
Stop when safety, state, or reasoning becomes unclear. A controlled reset or a well-framed question is progress, not defeat.
FAQ
Is Kioptrix suitable for complete cybersecurity beginners?
Kioptrix is suitable for beginners who already understand basic Linux navigation, IP addresses, ports, and virtual machines. Someone completely new to networking may benefit from learning subnets, interfaces, routing, and common service concepts first. The internal networking fundamentals guide can provide that foundation.
Which Kioptrix level should a beginner start with?
Most learners begin with the earliest Kioptrix release or the level commonly labeled Level 1. The naming of downloaded images can be confusing, so confirm the machine description and checksum where available. Start with the level that matches your current networking and Linux comfort rather than choosing by pride.
Do I need Kali Linux to work through Kioptrix?
No. Kali Linux is convenient because many security tools are preinstalled, but another Linux distribution can work if you install and understand the required tools. The troubleshooting habits in this guide are operating-system independent.
Why can’t my scanning machine find the Kioptrix virtual machine?
The most common causes include different virtual networks, a disconnected adapter, an incorrect subnet range, incomplete target boot, or a discovery method that receives no response. Verify the virtual adapter names, attacker address, subnet, route, target console, and neighbor table before assuming the image is broken.
Should I use Metasploit or attempt manual exploitation first?
Use the approach that matches the learning objective. Manual validation exposes more prerequisites and failure stages. Metasploit can teach module selection, payload handling, and framework troubleshooting. A useful sequence is to understand the vulnerability conditions manually, then compare framework behavior without treating either method as a magic button.
Is it acceptable to read a Kioptrix walkthrough when I get stuck?
Yes, provided you first define the problem and test reasonable explanations. Read one clue, close the guide, label the clue in your notes, and reproduce the step independently. A walkthrough becomes harmful when it replaces observation and decision-making.
What should I document during a Kioptrix lab?
Document the lab boundary, machine addresses, relevant services, observations, hypotheses, controlled tests, errors, important state changes, borrowed hints, evidence supporting the final route, and unresolved questions. Store large command output separately and link it to the reasoning notes.
How do I know whether an exploit failed or the target is not vulnerable?
You usually cannot know from a generic failure message alone. Identify whether failure occurred during preparation, delivery, target processing, payload execution, or the return connection. Confirm the product, version range, architecture, configuration, and exploit prerequisites before concluding the vulnerability is absent.
Is Kioptrix still useful even though its software is old?
Yes, for foundational practice in virtual networking, service enumeration, evidence tracking, exploit validation, Linux privilege escalation, note-taking, and troubleshooting. It is not a replacement for modern Active Directory, cloud, API, container, or current web-application training. Treat it as one instrument in the orchestra, not the entire concert hall.
Run One Evidence-First Kioptrix Session in 15 Minutes
You do not need a free weekend, twelve tools, or a dramatic exploit to begin building a stronger troubleshooting mindset. You need one short session in which the quality of each decision matters more than the amount of output.
Prepare Three Columns Before Opening the Terminal
Create a page titled with the date, Kioptrix level, snapshot name, and virtual network. Add three columns: What I Observed, What It Might Mean, and What I Will Test Next.
This simplified format is enough for a fifteen-minute session. It inserts a small but vital pause between receiving a result and launching another command.
Follow This Fifteen-Minute Plan
- Minutes 0–3: Confirm the isolated adapter, attacker address, route, target boot state, and clean snapshot.
- Minutes 3–6: Perform one low-impact discovery test and record the exact result.
- Minutes 6–9: Write two possible explanations for the result, including one explanation that could prove your first instinct wrong.
- Minutes 9–12: Run one controlled test aimed at distinguishing those explanations.
- Minutes 12–15: Record what changed, what you now believe, what remains uncertain, and the next test you would run.
Judge the Session by Decision Quality
- Could you explain why each tool or command was selected?
- Did you predict what a successful result should look like?
- Did you distinguish direct evidence from your interpretation?
- Did you change only one meaningful variable at a time?
- Did you preserve a failed hypothesis and explain why it failed?
- Could another learner continue from your notes?
You may finish without root access, a shell, or even a complete port inventory. That is fine. If you corrected one false assumption with evidence and can explain the correction, the session produced transferable skill.
Carry the Habit Beyond Kioptrix
The same method applies when a printer disappears, a package refuses to install, a web application returns an unexpected status, a VPN drops, a script behaves differently on another machine, or a security finding cannot be reproduced.
Observe without exaggerating. Form explanations that can lose. Test the smallest meaningful difference. Preserve the result. Decide what the evidence permits you to say next.
Your next action
Open a blank note, create the three columns, and spend fifteen minutes investigating only connectivity and initial discovery. Do not search for a machine-specific walkthrough. End by writing one sentence: “My first assumption was ___, but the evidence showed ___.” That sentence is the beginning of a troubleshooting mind that can survive unfamiliar systems.
Last reviewed: 2026-07