

Mastering the Kioptrix Import: From Chaos to Baseline
Stop the “Setting-Panel Guessing Game” and build a stable lab environment.
A Kioptrix VM image import can go sideways in under 10 minutes, and not because the lab image is “bad.” More often, the real damage starts when a beginner clicks the wrong import path, guesses at the disk controller, or changes network settings before establishing a clean first boot.
That is the frustration this setup creates: the files look old, the hypervisor looks confident, and every error message sounds bigger than it really is. What should have been a simple Kioptrix Level lab setup suddenly turns into a swamp of OVF files, VMDK disks, and boot-order confusion.
This guide helps you import a Kioptrix VM correctly the first time. Identify the artifact, preserve the original state, and test the simplest path first. Because most import failures aren’t fixed with more tweaking—they are fixed with better sequence.
Table of Contents
Why “Import” Fails Before the VM Even Boots
The file is not the problem until you prove it is
Most first-time users accuse the image file immediately. It is an understandable impulse. The archive looks old, the forum post looks older, and the hypervisor you are using was probably updated sometime after the VM image first learned to walk. But in practice, the earliest failure point is usually not corruption. It is mismatch. Wrong file type. Wrong import method. Wrong controller. Wrong network expectation. The image gets blamed like a stagehand when the director forgot page one of the script.
The important mental shift is this: do not begin with “How do I fix the VM?” Begin with “What exactly do I have, and what is the least invasive way to test it?” That question saves time because it preserves evidence. If you start renaming disks, changing controllers, upgrading hardware compatibility, or reattaching files before the first clean attempt, you erase the baseline. Once that baseline is gone, troubleshooting becomes a guessing contest in a fog machine.
I learned this the expensive way years ago with an old practice image that I “helpfully” cleaned up before first boot. I changed the network, removed an attachment that looked redundant, and told myself I was being efficient. Forty minutes later, I had a broken VM and no trustworthy record of what I had changed. The machine had become a crime scene I personally contaminated. If that mood feels familiar, first-lab anxiety around Kioptrix is more common than most beginners think.
Why Kioptrix images break differently in VirtualBox vs VMware
Oracle VirtualBox and VMware Workstation Pro do not always interpret imported appliances in exactly the same way. VirtualBox’s own manual says OVF support is still an ongoing process and does not guarantee support for every appliance created by other virtualization software. It also distinguishes between multi-file OVF packages and single-file OVA archives, which matters more than beginners are often told.
That single detail explains a lot of “but the file is fine” frustration. A lab image exported from one ecosystem may import cleanly in one hypervisor and stumble in another, not because the image is fake, but because appliance metadata, controller expectations, or packaging assumptions do not line up neatly. Old practice VMs are time capsules. Modern hypervisors are tidy librarians. Time capsules and tidy librarians do not always get along.
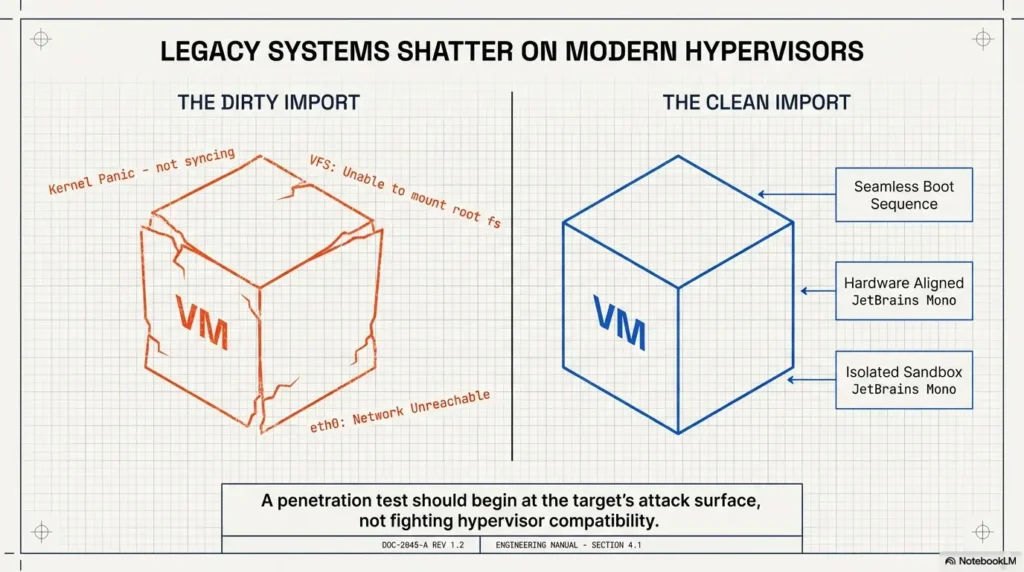
The quiet culprit: old lab images meeting modern hypervisors
Older vulnerable lab images often assume older defaults: older virtual hardware, older guest expectations, older disk-controller behavior, slower boot patterns, and less polished appliance packaging. A modern host system tends to expect cleaner metadata and more predictable configuration. That gap is where many mysterious import problems are born.
This is why a disciplined first run matters. You are not trying to make the VM elegant on day one. You are trying to establish whether the original image, in the closest thing to its expected environment, will start at all. Elegance comes later. Baseline first. Cosmetics last.
- Prove the file type before assuming corruption
- Preserve the original VM state for comparison
- Treat the first boot as a test, not a makeover
Apply in 60 seconds: Create a note with the original archive name, extracted files, and hypervisor version before you click anything.
First Decision: Know What You Downloaded Before You Click Anything
OVA, OVF, VMDK, and ZIP are not interchangeable
This is the section half the internet skips, which is precisely why half the internet ends up annoyed. A ZIP file is usually just packaging. An OVA is typically a single archive that bundles appliance content together. An OVF is a descriptor file, usually accompanied by one or more disk files such as VMDK. A loose VMDK by itself is often a virtual disk that may need a manually created VM around it rather than a full appliance import.
VirtualBox’s documentation is very explicit here: OVF appliances may appear either as several files, including an .ovf descriptor plus disk images, or as a single .ova archive, and those variants are handled differently in practice. It also notes that OVA can be unpacked because it is essentially a TAR-style archive.
So before you touch the hypervisor UI, inspect the files. After extraction, ask:
- Do I see a single
.ovafile? - Do I see an
.ovffile plus one or more.vmdkfiles? - Do I see a
.vmxfile, suggesting a VMware-native configuration? - Do I only have a disk file and no appliance descriptor?
Those four questions are not glamorous, but they are the hinge on which the whole import swings.
How to tell whether you should import, open, or build a new VM around the disk
If you have an .ova or .ovf, you usually start with the hypervisor’s import path. If you have a .vmx, that is often a sign you should open the existing VM configuration in VMware rather than wrapping it in a fresh appliance workflow. If you only have a .vmdk, you may need to create a new virtual machine and point the machine to that existing disk instead of using “Import Appliance.”
That last case is where beginners often go wandering into the wallpapered maze. They keep trying “Import” because the word sounds universal. It is not. Sometimes the right move is not import at all. Sometimes it is open. Sometimes it is create-new-but-use-existing-disk. Those are three different doors, and the wrong one can produce very theatrical error messages.
Here’s what no one tells you: many setup guides skip the file-format step that causes half the confusion
People like to write tutorials from the middle of the story. “Open VirtualBox, click import…” Fine. But what if the user downloaded a ZIP containing a VMX and two VMDKs? What if the archive contains an OVF descriptor but the user never extracted it? What if the disk exists but the descriptor is missing? That is not a minor detail. That is the setup.
One of the most useful habits in lab work is refusing to act on vague nouns. “The VM file” is vague. “The extracted directory contains one OVF, two VMDKs, and no VMX” is precise. Precision is boring for about 90 seconds. Then it becomes beautiful.
- Yes/No: You extracted the download if it arrived as ZIP or TAR
- Yes/No: You identified whether you have OVA, OVF, VMX, or only VMDK
- Yes/No: You know which hypervisor you are using first
- Yes/No: You copied the original files to a stable folder location
Next step: If any answer is “No,” stop and fix that before launching the import workflow.
Show me the nerdy details
OVF is a descriptor-based appliance format, while OVA is generally a single packaged archive of that appliance. A VMX file, by contrast, is a VMware configuration file. Import problems often happen when a user applies an OVF workflow to a VMX-based VM, or assumes a raw VMDK is a self-contained appliance.
Hypervisor Match-Up: Pick the Right Import Path the First Time
VirtualBox path: when “Import Appliance” works and when it does not
In VirtualBox, “Import” is appropriate when you actually have an OVF or OVA appliance. The current VirtualBox manual describes the import flow clearly: choose the OVF or OVA file, review appliance settings, and finish the import. It also notes that disk images are copied and unpacked during import, which can take several minutes. That last sentence matters because a slow import is not automatically a failed one.
What “Import Appliance” is not for: raw extracted fragments that are missing the descriptor, a lone virtual disk that needs to be attached to a newly created VM, or a VMware-native configuration set that makes more sense in VMware first. If VirtualBox throws an unsupported-format or inaccessible-media complaint during an appliance import, pause before declaring the lab dead. You may simply be using the wrong entry point.
VMware path: when to open the VMX and when to create a custom machine
VMware Workstation Pro is perfectly comfortable managing virtual machines, but the crucial distinction is whether you are opening an existing VMware configuration or importing an appliance format. If the extracted files include a .vmx, that is often your invitation to open the VM directly rather than re-stage it as something else. VMware’s documentation organizes these workflows separately under creating, using, and configuring VMs, which is a quiet clue that the tool expects different routes depending on what you actually possess.
If you only have a disk file, create a custom VM and point it at the existing disk. If you have OVF/OVA, use the import path designed for appliance packages. If you have VMware-native files, resist the temptation to “upgrade” them into a different workflow before proving they open.
Why forcing the wrong workflow creates fake “corruption” errors
A surprising number of corruption errors are not corruption errors. They are interpretation errors. The hypervisor cannot find what the workflow promised would be there, or the metadata describes hardware differently from what the host now expects. The message looks dramatic. The cause is often mundane.
I once watched a perfectly good practice image get declared “ruined” because the user imported the outer archive instead of the extracted appliance. The machine was innocent. The folder structure was the villain wearing a false mustache.
Use the workflow that matches the artifact. That sentence sounds modest. It will rescue a lot of lost Saturdays.
Before You Power On: Fix the Settings That Matter Most
CPU, RAM, and chipset settings that are worth checking once
Do not overcomplicate this. Kioptrix-style practice images are not asking for luxury accommodations. You are usually checking for obvious mismatch, not building a race car. Confirm that the VM has reasonable memory, that it is assigned a sane number of CPUs, and that nothing exotic was automatically selected by the hypervisor during import. Your first goal is compatibility, not optimization.
If the imported settings look strange, document them before changing them. This is especially important when importing from older appliances whose defaults may no longer match what a modern hypervisor would choose for a fresh VM. Write down the original controller, chipset, network mode, RAM, and CPU count. It takes under 2 minutes and saves you from inventing your own confusion later.
IDE vs SATA vs SCSI: why old virtual disks can get temperamental
This is one of those details that feels tiny until it is suddenly the whole story. Older lab images were sometimes built around assumptions about a specific virtual disk controller. If the disk gets attached under a different controller type, the guest may not find it the way it expects. The resulting symptom could look like a boot failure even though the disk is present.
Beginners often change controller type because a forum comment sounded very confident. Forums are full of confidence. Confidence is free. Reproducibility is the expensive thing.
Check:
- Which controller the imported VM currently uses
- Whether the disk is attached to the expected controller
- Whether the disk appears as accessible in the hypervisor UI
- Whether you changed controller type before first boot, which muddies the waters
BIOS order, controller mapping, and the one missing checkbox that can waste an hour
The boot order still matters. If the VM is trying removable media first, or if the disk is present but not marked in a bootable path the guest expects, you can end up chasing ghosts. A “no bootable medium” message often means the hypervisor cannot see a bootable disk in the expected place, not that the entire VM image is unusable.
Before first power-on, perform one quiet little audit:
- Disk present and accessible
- Correct controller type
- Boot order includes the attached system disk
- No accidental empty optical drive set as the only obvious boot target
- Check the disk path first
- Check the controller second
- Check boot order third
Apply in 60 seconds: Take one screenshot of the storage/controller panel before you power on.
| Situation | Best move | Time cost |
|---|---|---|
| Imported appliance looks normal | Boot once without tweaking | Low |
| Disk appears inaccessible | Verify file path and controller | Low to medium |
| No bootable medium error | Inspect boot order before changing hardware | Low |
Neutral action: Follow the least-invasive path first and record what you changed.
Network Mode Comes First, Not Last
NAT, Host-Only, and Bridged are not just convenience settings
Networking is not a decorative preference. It is part of the lab’s safety boundary. In a practice environment with intentionally vulnerable images, you should decide the network goal before first boot. Do you want basic host-to-guest communication? Internet access? A contained lab segment? The answer determines the mode.
For many first-time Kioptrix setups, Host-Only or another clearly isolated lab network is the calmest starting point. NAT may be acceptable in some controlled cases depending on your learning goal, but it changes what the VM can reach and how it behaves. Bridged is the one that deserves the most caution because it places the guest more directly onto the surrounding network environment. For a deliberately vulnerable practice box, that should never be a casual click. If you need a fuller breakdown of those tradeoffs, a separate guide on VirtualBox NAT, host-only, and bridged networking pairs well with this stage.
NIST’s guidance on full virtualization is broad rather than lab-specific, but the principle is sturdy: virtualization introduces security concerns that require deliberate configuration and risk-aware handling, not default-button optimism.
For a practice lab, why isolation usually matters more than instant connectivity
Beginners often make networking decisions based on convenience. “I just want it to work.” Perfectly human. Unfortunately, “just work” and “safe lab boundary” are not always the same sentence. If your immediate task is to confirm the VM imports and boots, you usually do not need an exposed, internet-facing, or loosely controlled network arrangement. You need a contained environment where you can observe the machine without giving it extra paths to wander.
The irony is delicious and a little rude: the network mode chosen to make things easier often makes troubleshooting harder. When the machine fails to respond, you do not know whether you have an import issue, a guest issue, a routing issue, a firewall issue, or a hypervisor adapter issue. Isolation narrows the story. Narrow stories are easier to debug.
Let’s be honest… most “it won’t connect” problems start with choosing the wrong network goal
Write the goal in one sentence before selecting the adapter mode. Example:
- Goal A: I only need a contained local lab to confirm import and boot.
- Goal B: I need host-to-guest communication for lab exercises.
- Goal C: I intentionally need a more complex network layout later, not during first import.
That tiny sentence prevents the classic beginner spiral of jumping straight to bridged mode because it sounds “more real.” A practice lab does not earn extra points for drama. Safe, repeatable, boring networking is a gift.
Show me the nerdy details
From a troubleshooting standpoint, network isolation reduces variables. During first import validation, the fewer external dependencies you introduce, the easier it is to separate boot problems from connectivity problems. That is especially useful with older guest images whose network tools, drivers, or defaults may not behave like modern systems.
| Tier | Network goal | Best use |
|---|---|---|
| Tier 1 | No network / fully minimal | Pure boot validation |
| Tier 2 | Host-only isolated lab | Most first-time practice setups |
| Tier 3 | NAT with caution | Controlled scenarios needing outbound reach |
| Tier 4 | Bridged | Only when you understand the exposure implications |
Neutral action: Start at the lowest tier that satisfies your immediate lab goal.
Don’t Touch This Yet: Settings Beginners Change Too Early
Do not upgrade virtual hardware before first boot
This is one of the most common well-intentioned mistakes. A prompt appears suggesting updated compatibility or newer virtual hardware. Your inner neat freak perks up. Resist. On an old practice image, the correct first question is not “What is newest?” It is “What is most likely to preserve expected behavior for one clean test?”
Upgrading hardware compatibility before first boot can insert extra variables into an already fragile story. If the VM then fails, you no longer know whether the original image had a problem or your modernization did.
Do not “clean up” unknown disk attachments before documenting the original state
If you see multiple attachments and one looks odd, do not delete it in a fit of minimalist virtue. Some old images carry quirks that are not pretty but are functionally relevant. At minimum, screenshot the original storage layout before touching it. Better yet, note every attachment and its controller.
I know the temptation. A strange-looking optical drive, an extra disk entry, a network adapter with a cryptic label. It all begs to be tidied. But first-boot troubleshooting hates tidy impulses. It prefers evidence.
Why premature tweaking makes troubleshooting harder, not smarter
Early changes create branching timelines. In timeline A, the original VM may have booted. In timeline B, your helpful edit broke it. In timeline C, the edit fixed one issue while hiding another. Once you are wandering among branching timelines, you are no longer troubleshooting. You are doing interpretive dance with settings panels.
Preserve the original state. Attempt one clean boot. Record the result. Then make one change at a time if needed.
- Skip hardware upgrades at the start
- Document odd storage mappings before editing
- Change one variable at a time after the baseline
Apply in 60 seconds: Rename your notes section “Baseline state” and list the untouched settings there.
First Boot Checklist: What a Healthy Import Actually Looks Like
What success looks like on screen in the first two minutes
A healthy first boot is often less cinematic than beginners expect. You may see old boot messages, a slow handoff, dated kernel text, or a pause that feels long by modern standards. None of that automatically signals failure. If the hypervisor keeps the VM running, the disk is being read, and the guest proceeds through recognizable boot stages, you are often in perfectly acceptable territory.
Success in the first 2 minutes usually looks like some combination of:
- The VM remains powered on without immediately resetting
- Boot text advances instead of freezing instantly
- A login prompt or service initialization appears
- The virtual disk shows activity during startup
That may sound underwhelming. Good. Underwhelming is often what success looks like in old labs. Not every machine enters the room playing trumpets.
Login prompt, kernel messages, and harmless warnings vs real failure signals
Old guest systems can produce warnings that look alarming to fresh eyes. Date-related messages, service startup complaints, and clunky boot text are not unusual in aged images. What matters is whether the system reaches a stable, usable state for lab work.
Real failure signals include:
- Immediate “no bootable medium” or repeated boot-loop behavior
- Explicit inaccessible-disk or unsupported-format errors
- The hypervisor aborting the VM because a required file is missing
- A black screen that never changes and shows no evidence of guest progress
Even then, define “never” carefully. Old images can be slow. On one practice setup, I stared at what I thought was a dead boot for long enough to contemplate my life choices and a second cup of coffee. It was not dead. It was simply old, stubborn, and unwilling to perform for my schedule.
How to separate “old OS behavior” from an actually broken import
Ask three grounded questions:
- Is the VM process still running normally in the hypervisor?
- Is the virtual disk showing reads during the boot attempt?
- Has the on-screen state changed at all in the last minute or two?
If the answer is yes across the board, patience may be smarter than panic. If the answer is no, and the state is frozen or error-bound, you likely have a configuration issue worth investigating.
Input 1: How many minutes has the screen been unchanged?
Input 2: Is disk activity visible in the hypervisor? Yes or No.
Output: If the screen is unchanged for 2+ minutes and there is no disk activity, switch from waiting mode to troubleshooting mode.
When It Refuses to Start: Read the Error Message Like a Technician
“No bootable medium,” “inaccessible disk,” and “unsupported format” mean different things
These messages are not interchangeable. Treat them like signs on different roads.
- No bootable medium often points to boot order, missing disk attachment, wrong controller path, or a guest that cannot see the system disk as presented.
- Inaccessible disk often suggests a file-path issue, moved file, permissions problem, broken attachment reference, or missing extracted component.
- Unsupported format usually signals that the workflow does not match the artifact, or that the hypervisor cannot parse what it was given under that import path.
The first error message is frequently the cleanest clue you will get. Later messages tend to become muddier because users start changing things. This is why screenshots and notes matter. Capture the first complaint before you “try stuff.”
UUID conflicts, moved files, and snapshot leftovers
If you copied a VM folder, duplicated disks, or moved extracted files after the import began, the hypervisor may complain about identifiers or missing paths. This is not exotic. It is housekeeping. Unfortunately, housekeeping problems often dress like arcane wizard curses.
Another subtle source of confusion is assuming snapshots should behave normally in exported appliances. VirtualBox explicitly notes that OVF does not describe VM snapshots and that exported disk images are flattened to the current state. That is a useful reminder not to build your expectations around snapshot preservation when dealing with appliance imports. Once you do reach a stable point, a more deliberate Kioptrix snapshot strategy becomes far more valuable than random checkpointing.
Here’s what no one tells you: the first error message is often the cleanest clue you will get
Write it down exactly. Not “it said something about disk.” Not “some UUID thing.” Exact wording. If possible, include the moment you saw it: during import, at power-on, after splash screen, after changing storage settings, and so on. Small sequencing details matter.
Operator-style troubleshooting is not louder than beginner-style troubleshooting. It is slower. That is the whole trick.
Show me the nerdy details
Flattened export state means an appliance import may not preserve the internal history implied by prior snapshots. In practice, this matters because learners sometimes expect imported state to reflect an old branching history when what they really have is a current-state appliance representation.
Common Mistakes That Turn a Simple Import Into a Mess
Importing the archive instead of the extracted VM files
This is the kind of mistake that feels almost unfair because it is so easy to make. You download a ZIP, click import, select the ZIP, and then the hypervisor behaves like you handed it a folded umbrella instead of a passport. Extract first. Then inspect the contents. If the extracted result is an OVA, import that. If it is OVF plus disks, import the descriptor. If it is VMX-based, open the VMware configuration or create accordingly.
Using bridged networking without understanding lab exposure
Bridged mode is not inherently evil. It is simply more consequential. On an intentionally vulnerable lab VM, that consequence should be chosen deliberately, not inherited from a random tutorial written like every reader lives on a private island guarded by six firewalls and a suspicious goose.
Attaching the wrong disk controller because a forum comment sounded confident
One of the small tragedies of technical communities is that bad advice often arrives with excellent posture. Old guest images can be sensitive to storage presentation. Change the controller only when you have reason, and record the before-and-after state. Confidence without notes is just theater.
Assuming a black screen means failure when the VM is simply booting slowly
Age changes the tempo of machines. What feels broken may simply be slow. Not infinitely slow, not excuse-everything slow, but slow enough that your modern instincts can misread it. Give the VM a fair first boot window. Observe disk activity. Observe state changes. Let evidence steer you.
- Exact file types present after extraction
- Hypervisor name and version
- Disk controller type and network mode
- Exact first error message
- Whether this was the untouched first boot or after changes
Neutral action: Gather these facts before you search, post, or compare advice.
Who This Is For / Not For
This is for first-time lab users who want a clean, repeatable Kioptrix setup
If you are building an authorized Kioptrix-style practice environment for the first time and want to avoid the usual import ambushes, you are the right reader. This guide assumes you are trying to set up a local lab in a careful, ethical way and that your main need is not speed, but clarity.
This is for learners moving between VMware and VirtualBox without guessing
It is also for the common traveler who starts in one hypervisor, reads advice for another, and ends up in a technical border crossing with the wrong paperwork. That happens constantly. It is fixable. Usually, the answer is not brilliance. It is correctly identifying the artifact and matching it to the workflow.
This is not for production virtualization, enterprise hardening, or internet-exposed deployment
This guide is not a production deployment manual, not an enterprise security standard, and not a justification for exposing deliberately vulnerable systems to a live network. OWASP’s Web Security Testing Guide frames security testing as a disciplined practice with methodology and boundaries, which is the spirit this article follows: authorized lab work, clear documentation, and no casual blurring between training boxes and real environments.
That distinction matters. In training, the goal is controlled learning. In production, the goal is resilience and risk management. Those are cousins, not twins.
Build the Habit, Not Just the VM
Document the original image name, checksum, hypervisor version, and network mode
The VM import is not just a setup task. It is the first chapter of your lab record. The habit you build here will make later enumeration, validation, and reporting cleaner. Record the original archive name, extracted contents, hypervisor version, chosen network mode, storage controller, and the result of the untouched first boot.
If a later section of your practice notes says, “The service was reachable only after I changed the network adapter,” that sentence becomes valuable because you documented what came before. If your notes say only “it worked eventually,” you have a diary. Not a lab record. A simple Kioptrix recon log template can keep those early observations from dissolving into memory fog.
Save a baseline snapshot only after the first confirmed clean boot
Do not rush to snapshot the moment the VM appears in the hypervisor list. Snapshot after you confirm that the imported machine boots in the intended baseline configuration. That is the snapshot worth keeping. Anything earlier may preserve a mistaken setup rather than a usable lab state.
Why disciplined setup notes make later enumeration and reporting far easier
There is a quiet chain reaction here. Good import notes produce cleaner boot validation. Cleaner boot validation produces better network assumptions. Better network assumptions produce better enumeration notes. Better enumeration notes produce a report that sounds like a careful practitioner instead of a person throwing screenshots like confetti at a PDF. When you reach that stage, a clearer Kioptrix enumeration report structure and broader report writing tips for Kioptrix labs will save you from a surprising amount of rewrite pain.
And because this article promised practicality, here is the simple form of that discipline:
- Record what you downloaded
- Record what you extracted
- Record what workflow you used
- Record what the untouched first boot did
- Record every change after baseline, one by one
Keep the original archive untouched in a stable folder.
Confirm whether you have OVA, OVF, VMX, or only VMDK.
Use import, open, or create-new-with-existing-disk as appropriate.
Choose the safest lab network that fits the immediate goal.
Perform one untouched first boot and note the result.
Save a baseline snapshot only after confirmed clean startup.
- Baseline notes make troubleshooting faster
- Baseline snapshots make recovery cleaner
- Baseline discipline improves later reporting quality
Apply in 60 seconds: Create a folder named kioptrix-baseline-notes and drop your first screenshots there now.
Short Story: the ten-minute import that became a whole afternoon
I once helped someone who swore the lab image was broken beyond redemption. The VM would not boot, the network looked haunted, and every new setting seemed to make the machine angrier. We stepped back and rebuilt the timeline. First, they imported the outer archive instead of the extracted files. Then they changed the network to bridged because a video made it look faster. Then they upgraded hardware compatibility before first boot because the prompt felt official. Then, when storage looked odd, they removed an attachment “that didn’t seem important.”
By the time I saw the VM, the original state had evaporated. So we started over. Fresh extraction. Correct file identification. Safer network mode. One untouched boot. The machine came up with all the dramatic reluctance of an old theater curtain, but it came up. Nothing magical had happened. We had simply stopped editing the evidence and started respecting sequence. That is the whole article in miniature: a clean process beats a frantic personality every single time.

FAQ
How do I know whether to use Import Appliance or create a new virtual machine manually?
Use Import Appliance when you actually have an .ova or .ovf appliance. Create a new VM manually when you only have a disk file, such as a .vmdk, and need to attach that existing disk to a newly defined machine. If you have a .vmx, that often points toward opening an existing VMware configuration rather than using appliance import.
Why does Kioptrix boot in one hypervisor but fail in another?
Because imported appliance metadata, controller expectations, and legacy defaults are not always interpreted identically across hypervisors. Old images can be especially sensitive to these differences. That does not automatically mean the image is corrupt.
Should I use NAT, bridged, or host-only networking for Kioptrix?
For many first-time authorized lab setups, host-only or another clearly isolated mode is the safest starting point because it reduces exposure and troubleshooting noise. NAT may fit some controlled goals. Bridged should be chosen only with clear intent and an understanding of what exposure it creates.
What does “no bootable medium found” usually mean during import?
It often means the VM does not see a bootable disk where it expects one. Common causes include wrong boot order, missing disk attachment, inaccessible disk path, or a controller mismatch that prevents the guest from recognizing the system disk as presented.
Do I need to extract the downloaded file before opening it in VMware or VirtualBox?
Usually yes if the download arrived as a ZIP or similar outer archive. After extraction, inspect whether the real contents are OVA, OVF plus disks, VMX plus disks, or only a raw virtual disk. The correct workflow depends on the extracted contents, not the outer packaging.
Can I change the virtual disk controller if the VM does not boot?
Yes, but only after documenting the original state and attempting one untouched first boot. Controller changes can solve real compatibility issues, but they also introduce new variables. Treat them as a measured troubleshooting step, not a reflex.
Why is the imported VM showing an inaccessible disk error?
Common reasons include moved files, broken file paths, missing extracted components, or a storage reference that no longer points to a valid disk. Check the storage panel carefully before changing other settings.
Should I update the VM hardware compatibility version before first boot?
Usually no. For an old practice image, it is smarter to confirm the baseline boot first. Hardware upgrades may help later in some cases, but they should not be mixed into the initial proof-of-life test.
Is a slow or blank first boot normal for older vulnerable lab images?
Sometimes, yes. Slow startup alone is not proof of failure. Watch for disk activity, state changes, and whether the hypervisor keeps the VM running normally. A truly static black screen with no progress over time is more suspicious.
When should I take a snapshot of the imported Kioptrix VM?
After the first confirmed clean boot in the baseline configuration you intend to keep. That gives you a trustworthy restore point instead of freezing a setup that may already contain mistakes.
Next Step
The curiosity loop from the beginning closes here: the VM image usually does not fail because it is ancient, spooky, or secretly cursed. It fails because sequence was ignored. File type first. Workflow second. Network boundary third. Baseline boot before tinkering. That is the whole quiet machinery.
So here is the honest 15-minute move: re-open your Kioptrix setup folder, identify the real file type, choose the matching hypervisor path, set an isolated lab network, and run a single untouched first boot while taking notes. That one disciplined pass will teach you more than an hour of frantic setting changes. After the machine is stable, the natural next stops are a Kioptrix enumeration workflow, a more complete Kioptrix lab report, and eventually a structured Kioptrix level walkthrough only after you have built your own baseline observations first.
Last reviewed: 2026-03.