
Portable Kali, fewer weekend disasters
Kali Persistent USB With Secure Boot:
Practical Setup Without Bricking Your Weekend
A Kali persistent USB sounds beautifully simple: carry your security lab in your pocket, boot it when needed, and keep your notes, settings, tools, screenshots, and reports after every reboot. Then Secure Boot enters the room wearing steel-toed boots.
This guide is for students, help-desk learners, IT admins, and lab builders who want a portable Kali workspace without turning their main Windows laptop into a firmware puzzle box. We will separate what works reliably from what sounds clever in a forum thread at 1:13 a.m.
The goal is not to force Kali past every device control. The goal is to choose the safest setup path for the machine you actually own, the data you might store, and the time you do not want to lose.
Know the boot reality
Understand why Secure Boot often blocks the straightforward Kali USB path.
Avoid storage mistakes
Pick the right USB, verify the target disk, and make persistence actually persist.
Carry it safely
Use encryption, update with a plan, and keep lab work away from real trouble.
Best outcome: a boring, repeatable Kali setup that saves your work and does not ambush your laptop. 🧭
Snapshot
This article is for cybersecurity beginners, IT generalists, OSCP-style lab builders, and Windows users who want Kali on a USB with saved settings. You will learn which setup path fits your device, how persistence works, where Secure Boot causes friction, when encrypted persistence is worth it, and what to check before changing firmware settings.
Table of Contents
Before You Act: Build a Lab, Not a Liability
Kali Linux is a professional security testing distribution. That makes it useful, educational, and easy to misunderstand. A persistent USB does not make testing more authorized, more private, or more acceptable on networks you do not own.
Use this guide for personal labs, school labs, employer-approved testing, CTFs, authorized troubleshooting, and defensive learning. If your plan begins with “I wonder what happens if I try this on the coffee shop Wi-Fi,” stop there. That is not a lab. That is a legal pothole with a blinking cursor.
What this guide can and cannot do
This article can help you compare Kali USB setup paths, understand Secure Boot limitations, reduce the chance of wiping the wrong drive, and troubleshoot common persistence problems.
It cannot guarantee your firmware will boot Kali, recover lost BitLocker keys, bypass company policy, repair a damaged USB, or protect careless handling of sensitive data. When firmware, encryption, school-owned hardware, corporate devices, client data, or legal boundaries are involved, confirm the right path with the device owner, IT team, instructor, or qualified professional.
Portable does not mean permitted
A Kali persistent USB can hold Wi-Fi profiles, VPN files, screenshots, passwords accidentally saved in browsers, shell history, logs, reports, exploit notes from practice machines, and client evidence. Treat it less like a spare thumb drive and more like a keyring with a tiny operating system attached.
For a safer practice path after you build the USB, pair this guide with a contained home environment such as a safe hacking lab at home. The quieter the boundaries, the better the learning.
Key takeaway
A Kali USB is a lab tool, not a permission slip. Keep it inside networks, systems, and exercises where you have clear authorization.
Secure Boot Reality Check: The Part Most Guides Bury
The phrase “Kali persistent USB with Secure Boot” sounds like one tidy project. In practice, it is three separate questions wearing the same coat:
- Can your laptop boot from USB?
- Can Kali Live boot while Secure Boot is enabled?
- Can the same USB save your files, settings, and tools after reboot?
Those are not the same problem. USB booting is a firmware setting. Persistence is a storage setup. Secure Boot is a trust and signing control that decides whether a bootloader and operating system are allowed to start.
Why Kali may not boot with Secure Boot on
Kali’s official installation guidance says Secure Boot should be disabled because the Kali Linux kernel is not signed and will not be recognized by Secure Boot. You can review the official wording in the Kali Linux installation documentation.
For a personal lab machine, temporarily disabling Secure Boot may be a reasonable choice if you understand the tradeoff and record the original setting. For a company laptop, school-managed endpoint, or device protected by strict policy, it is usually the wrong move.
“With Secure Boot” can mean three things
When someone asks for Kali with Secure Boot, they often mean one of these:
| What the reader means | What it usually involves | Beginner-friendly? |
|---|---|---|
| Boot Kali after temporarily disabling Secure Boot | Change firmware setting on a personal device, boot Kali USB, restore setting later if needed | Often manageable with caution |
| Keep Secure Boot enabled and use custom keys | Advanced Secure Boot key management, signing, recovery planning, and firmware-specific behavior | Not ideal for beginners |
| Use Kali without touching Secure Boot | Run Kali in a VM, WSL-style workflow, approved lab machine, or cyber range | Usually safest for managed hardware |
The better question than “Can I force it?”
The better question is: which setup gives you reliable learning without weakening the machine you depend on?
For a student with a personal laptop and recovery keys saved, a live USB with encrypted persistence may be fine. For a help-desk worker using a corporate laptop with BitLocker and endpoint management, a VM is cleaner. For an OSCP-style learner building a repeatable practice routine, consistency matters more than novelty.
Key takeaway
Do not measure success by whether you can make Kali boot on the most restricted machine nearby. Measure success by whether your lab starts reliably, saves your work, and respects device policy.
Choose Your Setup Path Before You Flash Anything
Most Kali USB frustration begins before the ISO is even downloaded. The reader chooses “USB persistence” because it sounds portable, then later discovers that Secure Boot, BitLocker, firmware menus, slow storage, or school policy changes the whole plan.
Pick the path first. Flash second. Your future self will send a small bouquet.
Path A: Standard Kali Live USB with persistence
This is the main practical path for a personal lab machine. You create a Kali Live USB, add a separate persistence partition, boot the “Live USB Persistence” menu entry, and verify that files survive reboot.
Use this path when you want portability, you do not want to dual boot, and you can safely manage the laptop’s boot settings. This setup is useful for class notes, wireless adapter testing in authorized labs, tool configuration, small reports, and repeatable practice work.
Path B: Encrypted persistence for carrying real work
If the USB leaves your desk, encrypted persistence deserves serious attention. A persistent Kali drive may contain more than casual files. It may store credentials, API tokens, VPN profiles, screenshots, lab reports, client-sensitive notes, browser sessions, and Wi-Fi artifacts.
Encryption does not solve every risk, but it does turn a lost USB from “anyone can browse my lab history” into “they need the passphrase first.” That is a useful line in the sand.
Path C: VM when Secure Boot cannot move
If Secure Boot must stay enabled, a Kali VM is often the better answer. It avoids firmware changes, keeps the main OS intact, and is easier to snapshot, roll back, and document.
For a comparison of virtualization options, read VirtualBox vs VMware vs Proxmox. If your workflow mixes Windows tools with Kali, a hybrid approach such as WSL2, Kali, and VMware may be more practical than trying to win a firmware argument.
| Setup path | Best for | Main risk | Best next step |
|---|---|---|---|
| Live USB with persistence | Personal lab laptop, students, portable practice | Secure Boot may need disabling | Record firmware settings and create persistence carefully |
| Live USB with encrypted persistence | Anyone carrying notes, reports, VPN files, or credentials | Lost passphrase means lost data | Use a strong passphrase and backup non-sensitive work separately |
| Kali VM | Managed devices, cautious learners, repeatable lab work | USB Wi-Fi adapter access can require extra setup | Use snapshots and a contained lab network |
| Full install to external drive | Advanced users who want a normal installed OS on removable storage | More disk and bootloader complexity | Document disk selection and backup before installing |
The 10-Minute Preflight That Prevents Expensive Mistakes
The preflight is not glamorous. It is also where you prevent the ugliest errors: wiping the wrong drive, triggering BitLocker recovery, discovering the USB is too small, or realizing your laptop does not expose a useful boot menu.
Confirm firmware mode and boot menu access
Before flashing anything, confirm whether your machine uses UEFI, whether Secure Boot can be changed by the owner, and which key opens the boot menu. Common boot-menu keys include F12, F9, Esc, F8, or F11, depending on the vendor.
Do not guess while holding a half-written USB. Write down the original firmware settings first. If something changes, you need a breadcrumb trail back to normal.
Check BitLocker before firmware changes
Some Windows systems protected with BitLocker may ask for a recovery key after firmware, boot, or security setting changes. That does not mean Kali broke Windows. It means Windows noticed a boot environment change and wants proof that you are allowed in.
Before experimenting, confirm you can access the BitLocker recovery key through the Microsoft account, work account, school account, or IT process that manages the device. Do not tap through recovery screens as if they are a video game dialogue box. They are not.
Choose the right USB drive
Kali’s official persistence examples can work with modest storage, but practical use benefits from more space. A 32GB USB 3.x drive is a sensible floor for basic learning. A 64GB drive gives more breathing room for notes, browser cache, packages, and reports.
Cheap no-name drives are where good labs go to molt into sadness. Persistence writes data repeatedly, so speed and reliability matter. You do not need a luxury drive, but you do want one that can survive more than a handful of write cycles and backpack rides.
- Minimum practical choice: 32GB USB 3.x drive for light persistence and basic tools.
- Better daily choice: 64GB drive for updates, notes, screenshots, and class work.
- Advanced choice: external SSD for heavier use, faster package work, and larger reporting folders.
Back up, even if “it’s just USB”
Imaging tools can wipe the wrong target if you select the wrong disk. That is the moment where a quick lab project becomes a kitchen-table incident response drill.
Unplug unnecessary external drives before flashing. Identify the USB by brand, capacity, and drive letter or device path. If two drives look similar, stop and label them physically.
Preflight checklist
- I know whether the laptop is personal, school-managed, or company-managed.
- I have recorded the original Secure Boot and boot-order settings.
- I can access the BitLocker recovery key if this is a Windows device.
- I have unplugged unrelated external drives before flashing.
- I know the USB brand, size, and drive letter or device path.
- I have chosen Live USB, encrypted persistence, or VM before downloading tools.
Flash Kali Without Picking the Wrong Disk
Flashing the Kali image is the loudest part of the setup because it rewrites the USB. The task is simple, but the margin for careless clicking is thin.
Download the Live image, not the Installer image
For a persistent USB, start with the Kali Live image. The Installer image is for installing Kali onto a disk. Mixing those up causes confusion before persistence has a chance to work.
Use official Kali download pages and verify the image when possible. Third-party ISO mirrors, old tutorial bundles, and mystery downloads create unnecessary risk. A lab should be spicy because the practice machine is tricky, not because the ISO came from a dusty corner of the internet.
Etcher vs Rufus on Windows
Kali’s Windows USB documentation mentions Etcher as a simpler imaging option and Rufus as a popular option with advanced settings. It also notes that Rufus’s integrated persistence option is not the officially supported persistence method for all Kali images.
That does not mean Rufus is bad. It means beginners should not treat a persistence slider as a universal promise. For reliability, follow Kali’s documented persistence process after creating the bootable USB.
The wrong-disk warning is not decoration
Before you click Flash, Start, or Write, check the target again. Look at the USB size. Look at the drive letter. Look at the manufacturer. If your laptop has a 1TB internal drive and your USB is 64GB, the target should not smell like a 1TB internal drive.
After flashing, the USB may show strange partitions in Windows. That can be normal. Do not format random partitions just because Windows offers to “fix” them with the confidence of a raccoon in a toolbox.
First boot verification
Boot the USB once before adding persistence if you are unsure about hardware compatibility. Confirm the boot menu appears, the desktop loads, keyboard and touchpad work, and any required network adapter is recognized.
If Secure Boot blocks the USB, do not keep retrying the same path. Decide: personal device and documented temporary disable, or no firmware change and use a VM.
The Persistence Partition: The Small Detail That Saves Your Work
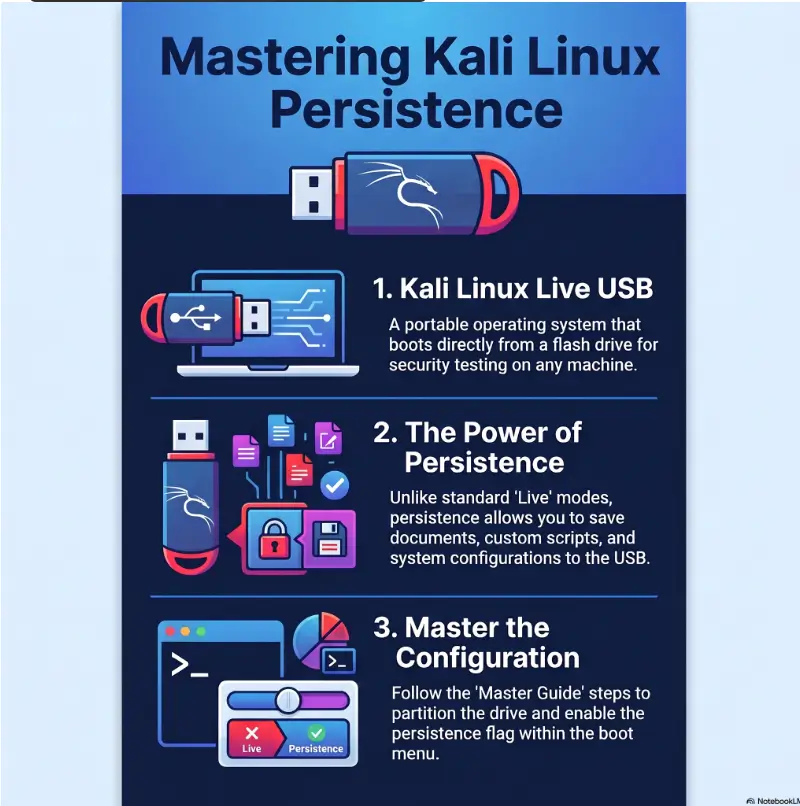
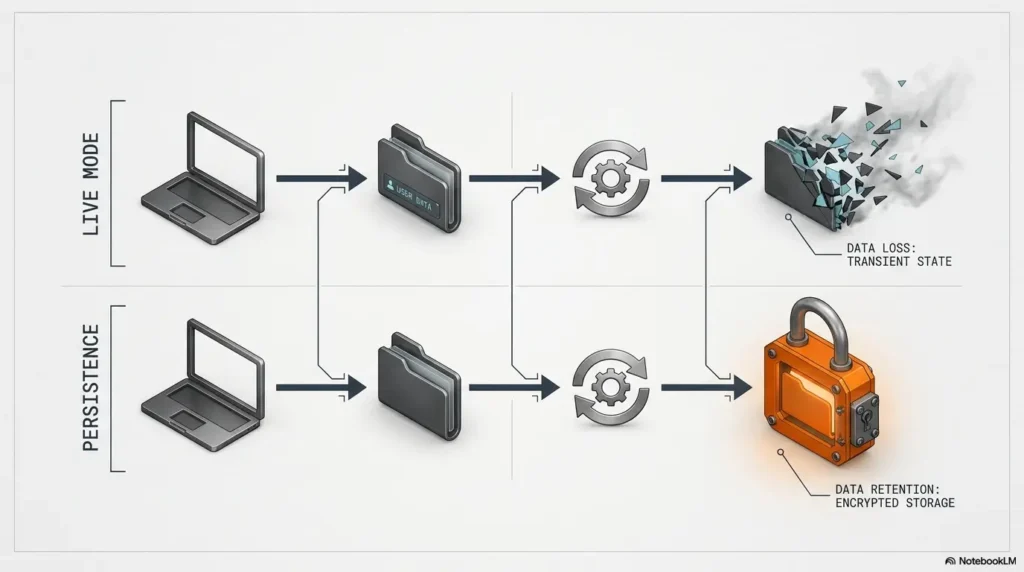
A Kali Live USB without persistence is temporary by design. You can boot it, work in it, and reboot into a fresh session. That is useful for clean testing, but terrible if you expected your notes, tools, and settings to remain.
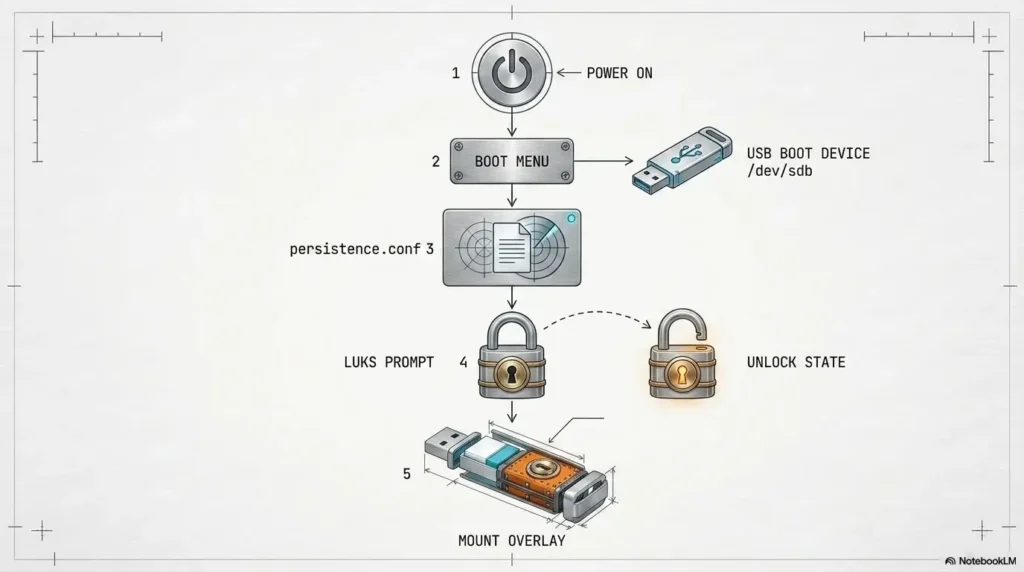
Persistence works by storing changes in a separate partition on the USB drive. Kali’s documented process creates an ext4 filesystem labeled persistence and places a persistence.conf file inside it with / union as the key instruction.
Label matters: persistence
The partition label is not decorative. Kali looks for the correct persistence setup at boot. A partition with the wrong label, wrong filesystem, or missing configuration file may sit there politely while your files vanish after reboot.
When troubleshooting, check the boring pieces first: the partition exists, it is formatted correctly, it is labeled correctly, and it contains the right configuration file.
persistence.conf is the switch
The persistence.conf file tells the live system how to use the persistent storage. In the standard full-system persistence setup, the line / union is the tiny hinge on a surprisingly large door.
If that file is missing, misspelled, empty, saved in the wrong place, or created on the wrong partition, your boot may look normal while persistence quietly fails.
Choose the persistence boot entry
After setup, you still need to boot into the correct menu option. If you choose plain Live mode, you may not load the persistence layer. This is one of the most common “my files disappeared” moments.
Test persistence with a simple file. Create a text file on the desktop, reboot, choose the persistence boot option, and check whether it remains. Do that before installing tools or writing class notes.
Key takeaway
Persistence is not magic storage. It is a specific partition, a specific label, a specific config file, and a specific boot choice.
Show me the nerdy details
Standard Kali persistence usually layers saved changes over the read-only live system at boot. That is why the live ISO itself remains mostly stable while your persistent partition stores changes such as documents, configuration files, package additions, logs, and desktop settings. The / union instruction tells the live system to merge the persistent storage across the filesystem rather than limiting persistence to one narrow folder.
This also explains why updates can feel odd on a live USB. Package changes may persist, but some boot-level components are still tied to the image you originally wrote. If a kernel update matters, a fresh ISO plus a planned backup may be cleaner than trying to nurse an old USB forever.
Encrypted Persistence: When the USB Leaves Your Desk
Unencrypted persistence is convenient until the drive disappears into a couch, classroom, taxi, hotel tray, or borrowed backpack pocket. Then convenience becomes a small cold stone in the stomach.
Encrypted persistence uses a LUKS-encrypted persistent partition, so saved data is protected by a passphrase. Kali provides separate official guidance for this setup through its encrypted persistence documentation.
What encryption protects
Encryption helps protect saved files and settings if someone physically obtains the USB drive. That can include reports, notes, screenshots, SSH configuration, VPN files, browser profiles, tool output, and classwork.
For any real-world work, encrypted persistence should be the default unless you have a specific reason not to use it.
What encryption does not protect
Encryption does not make unauthorized testing legal. It does not protect a weak passphrase. It does not fix a compromised host machine. It does not prevent you from accidentally saving sensitive data in the wrong place.
It also creates a hard rule: if you lose the passphrase, your persistent data may be gone. That is a feature when a thief has the drive. It is less charming when you are the person who forgot the passphrase.
Real-world example: The drive in the library
A cybersecurity student builds a Kali USB for a weekend study group. It works beautifully. Browser bookmarks, a custom terminal theme, class notes, and screenshots from practice machines all survive reboot.
On Monday, the USB is gone. Maybe it fell under a library desk. Maybe it stayed in a borrowed laptop bag. The student remembers one saved VPN file, two screenshots with private lab IP notes, and a browser session that should have been logged out.
If the persistence was unencrypted, the problem is exposure. If it was encrypted with a strong passphrase, the problem is inconvenience and replacement. Same missing USB. Very different Monday.
Encrypted persistence decision checklist
- Use encrypted persistence if the USB leaves your desk.
- Use encrypted persistence if you store reports, notes, VPN files, SSH keys, or client evidence.
- Use unencrypted persistence only for disposable lab practice with no sensitive saved material.
- Do not store your only copy of important work on the USB.
- Do not use a memorable-but-weak passphrase from your social media, pet name, school name, or favorite keyboard pattern.
Troubleshooting: When It Boots Once, Then Betrays You
Kali USB problems often feel mysterious because three systems overlap: firmware, the live operating system, and the persistence partition. The fix is to separate them instead of poking everything at once.
Kali Persistent USB Troubleshooting Flow
1. Does it boot?
If no, check boot menu, USB port, UEFI mode, and Secure Boot.
2. Did you choose persistence?
If no, reboot and select the persistent live entry.
3. Is the partition correct?
Check label, filesystem, and config file location.
4. Is storage full?
Clear cache, move reports, or rebuild with more space.
Persistence does not save files
Start with the simplest test. Create a file, reboot, choose the persistent boot option, and check whether the file remains. If it does not, walk through the setup in order.
- Did you boot plain Live mode instead of Live USB Persistence?
- Does the persistence partition exist?
- Is the partition label exactly
persistence? - Is the filesystem compatible with the documented process?
- Is
persistence.confon the persistence partition? - Does the file contain the expected
/ unionline?
USB does not appear in the boot menu
Try a different USB port, especially if the laptop has both USB-A and USB-C ports through adapters. Check whether USB boot is enabled in firmware. Some systems hide removable boot options until you disable Fast Startup in Windows or use the advanced startup menu.
If the USB appears on one machine but not another, the problem may be firmware compatibility rather than the drive itself. That is a clue, not an insult from the motherboard goblin.
Secure Boot blocks the USB
Use a clean decision tree. On a personal device, you may temporarily disable Secure Boot if you accept the risk and have recovery information. On a managed device, do not change boot security settings. Use an approved VM, lab computer, or hosted cyber range instead.
If you are tempted by custom Secure Boot keys, pause. That is an advanced route with firmware-specific recovery concerns. It deserves careful study before you treat it as a weekend shortcut.
Windows asks for BitLocker recovery
If Windows asks for a BitLocker recovery key after firmware changes, do not guess. Retrieve the key through the account or organization that owns the device. If it is a work or school laptop, contact the proper admin channel.
This is one reason the preflight matters. The recovery key is easy to respect when you have it. It becomes a locked gate when you assumed you would not need it.
Safer Daily Use: Make the USB Boring on Purpose
A good Kali USB routine should feel almost dull. Boot, work, save, shut down cleanly, store safely. The less drama, the more your brain can spend on actual security practice.
Boot only on trusted machines
A persistent USB is not a magic clean room. If you boot it on random computers, you inherit risks from random computers. Use your own machine, a dedicated lab box, or a machine explicitly assigned for training.
Public computers, borrowed laptops, and unknown desktops should not become your Kali host unless you are in a controlled classroom or lab with clear permission.
Separate classwork, CTFs, and client work
One USB for everything feels efficient until your folders become a junk drawer with root privileges. Keep practice work separate from any professional or client-related material.
If you write reports, use a consistent naming system and evidence folder habit. You can strengthen that workflow with a Kali pentest report template or a structured note system such as note-taking systems for pentesting.
Patch with a plan, not panic
Persistent USBs can handle many package updates, but they are not always as clean as a normal full installation. Package changes, logs, and cache can consume space quickly. Kernel-level updates may be better handled by writing a fresh Kali ISO and restoring needed data from backup.
A simple monthly rhythm works well for learners: back up notes, check available space, update packages, test tools, and document any breakage. If your USB starts behaving like a haunted filing cabinet, rebuild from a fresh ISO rather than arguing with it for three evenings.
Key takeaway
A persistent USB is not a permanent kingdom. Treat it as a portable workspace you can rebuild, not a fragile museum you must preserve forever.
Cost, Tool, and Service Choices Without Wasting Money
A Kali persistent USB can be inexpensive, but “cheap” and “low-risk” are not always the same. The real cost is not just the drive. It is your time, data, and the laptop you do not want to disturb.
Good / Better / Best setup table
| Tier | What to buy or use | Best for | Watch out for |
|---|---|---|---|
| Good | 32GB USB 3.x drive, standard persistence | Beginner labs, short classes, disposable practice | Limited space, no protection if lost |
| Better | 64GB USB 3.x drive, encrypted persistence | Students and IT learners carrying notes or reports | Passphrase management and backup discipline |
| Best | External SSD or VM with snapshots, plus encrypted storage | Heavy lab work, repeatable OSCP-style practice, advanced tooling | Higher cost, more setup decisions |
| Policy-safe alternative | Kali VM on approved hardware | Work or school devices where Secure Boot cannot change | USB Wi-Fi adapter passthrough may need extra setup |
Free DIY vs paid help
Most learners can build a Kali persistent USB with official documentation, patience, and a spare evening. Paid help is rarely needed for a personal lab unless you are stuck on firmware recovery, BitLocker access, or a device you cannot risk breaking.
For a school club, bootcamp, or small business training lab, paying for help may be worthwhile if someone must standardize several machines, document recovery steps, and keep work inside policy. Buy back risk, not ego.
| Scenario | DIY is enough when | Get help when |
|---|---|---|
| Personal laptop | You own it, have backups, and can access recovery keys | Firmware changes cause recovery prompts or boot failure |
| School laptop | The instructor or policy explicitly allows the setup | Boot settings are locked or device management is present |
| Work laptop | IT has approved the exact workflow | You are considering changing Secure Boot or boot order alone |
| Study group | Each learner uses personal hardware and disposable lab data | You need repeatable setup instructions for multiple users |
What to ask before buying a drive
- Is the drive at least 32GB, preferably 64GB for regular use?
- Does it support USB 3.x speeds?
- Is it from a reputable storage maker or seller?
- Will it physically fit beside your laptop’s other ports?
- Will you carry it outside the house, and therefore need encrypted persistence?
- Would a VM actually be cheaper than spending hours fighting firmware?
If your main goal is learning tools rather than booting hardware, start with essential Kali Linux tools for Kioptrix and a VM. Hardware portability is useful, but methodology is what makes the practice stick.
FAQ
Can Kali persistent USB work with Secure Boot enabled?
Usually not through the straightforward official path. Kali’s official installation guidance says Secure Boot should be disabled because the Kali Linux kernel is not signed and will not be recognized by Secure Boot. Advanced custom-key approaches exist, but they are not beginner-friendly and can make recovery painful.
Is Kali persistence the same as installing Kali to a USB drive?
No. A persistent Live USB starts from the live image and stores changes in a separate persistence area. A full install to a USB drive behaves more like a normal installed operating system on external storage, with more setup complexity and different bootloader concerns.
Should I use encrypted persistence?
Yes, if the USB stores reports, notes, credentials, VPN profiles, SSH configuration, screenshots, browser sessions, or anything tied to real work. If the USB is purely disposable for a short classroom exercise, standard persistence may be enough.
How much USB storage do I need?
A small drive can work for basic examples, but 32GB is a more practical starting point. For regular use, 64GB gives more room for updates, notes, tool output, screenshots, and browser cache. Heavy users may prefer an external SSD or a VM.
Why did my files disappear after reboot?
The usual causes are booting the non-persistent menu option, missing persistence.conf, wrong partition label, failed mount, wrong filesystem, or testing on a USB that was created with an unsupported shortcut method. Reboot and choose the persistent boot entry before assuming the setup failed.
Can I update Kali on a persistent USB?
Many package updates can work, but treat the USB as a portable workspace, not a forever install. Back up notes and reports first. If kernel-level changes or major breakage appear, re-imaging from a newer Kali ISO and restoring needed data may be cleaner.
Is this safer than dual booting Kali?
Often, yes, for the main internal drive. A live USB can avoid repartitioning the Windows disk. However, firmware changes, BitLocker prompts, lost USB data, and careless storage habits still create risk. Safer does not mean careless-proof.
What if my laptop is company-managed?
Do not change boot security settings on your own. Use an approved VM, a dedicated lab machine, a cloud lab, or an employer-provided cyber range. Managed hardware often has encryption, monitoring, and policy controls for good reasons.
Your 15-Minute Setup Matrix: Decide Before You Touch Firmware
The cleanest Kali persistent USB setup begins with a note, not a command. Before downloading tools, write a three-column matrix: device, Secure Boot status, and best path.
Example one: personal laptop, Secure Boot can be disabled by owner, best path is Kali Live USB with encrypted persistence. Example two: work laptop, Secure Boot locked, best path is Kali VM only. Example three: study group desktop, no sensitive data, best path is standard persistence with a rebuild plan.
Copy this setup matrix
| Device | Secure Boot status | Best path |
|---|---|---|
| Personal Windows laptop | Can disable temporarily, recovery key available | Kali Live USB with encrypted persistence |
| Company-managed laptop | Locked or policy-controlled | Approved VM or cyber range |
| Old spare laptop | Owner-controlled, no critical data | USB persistence or dedicated lab install |
That single note closes the loop. Instead of asking “How do I make Kali work with Secure Boot?” you are asking the better question: “What is the least risky way to get a reliable Kali lab on this device?”
Take 15 minutes now. Identify the device, check who controls it, confirm recovery access, and choose the setup path. Then build the USB. A calm preflight is worth more than three heroic recovery attempts after midnight.
Last reviewed: 2026-07