Ethical lab learning · Kioptrix practice · Personal methodology
How to Build a Personal Checklist From Kioptrix Level Practice Experience
without becoming dependent on walkthroughs
Kioptrix can feel like a small room with too many doors. One port whispers, one service grins in the dark, one error message looks useless until it suddenly becomes the hinge of the whole exercise. For beginners, that can be thrilling. It can also become a blur of copied commands, scattered screenshots, and half-remembered victories.
A personal checklist turns that blur into a learning instrument. Not a cheat sheet. Not a magic exploit recipe. A checklist is the quiet handrail that helps you move from “I followed a writeup” to “I can explain what I noticed, why I tested it, what evidence changed my mind, and what I would do differently next time.”
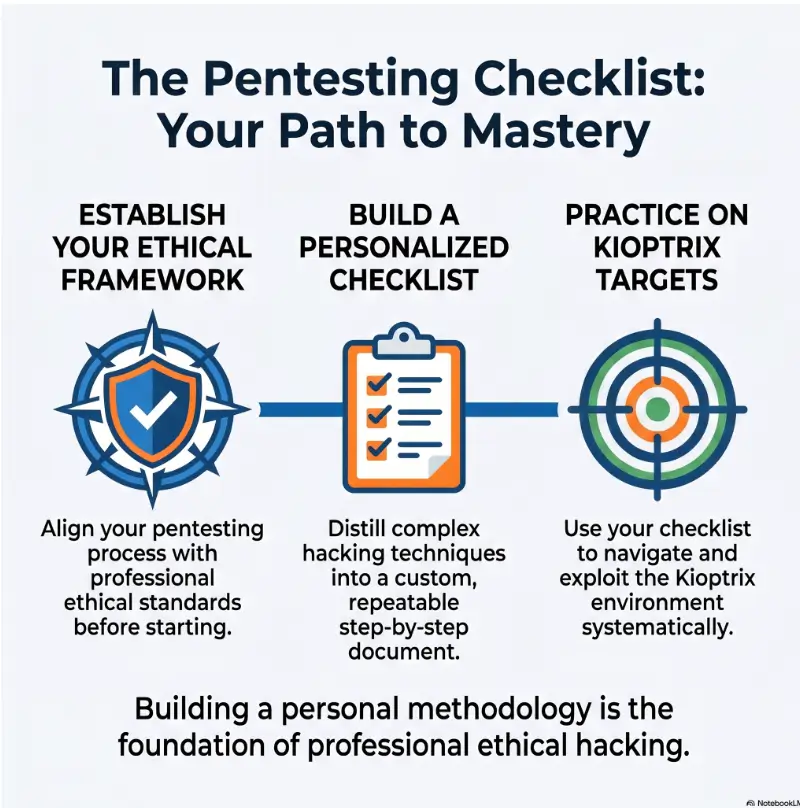
This guide shows you how to build that checklist from real Kioptrix Level practice experience, while keeping your work ethical, organized, and useful beyond one vulnerable machine. Think of it as turning your lab notebook from a sock drawer into a cockpit.
Better lab structure
Organize setup, discovery, evidence, decisions, cleanup, and review without drowning in notes.
Less walkthrough addiction
Use writeups carefully, without letting them replace your own reasoning muscles.
Reusable thinking
Build habits that transfer to other vulnerable VMs, CTF labs, and future security study.
Core promise: by the end, you will have a one-page Kioptrix debrief template you can use after your next authorized lab session. 🧭
Snapshot
This article is for beginner cybersecurity learners, junior IT pros, CTF hobbyists, and help-desk technicians using Kioptrix in an authorized home lab. It helps you convert repeated lab actions into a practical checklist for setup, enumeration, evidence capture, decision-making, reflection, and safer study habits.
Table of Contents
Before You Act: Keep the Lab Fence Bright
Kioptrix is designed for hands-on vulnerability assessment practice in a controlled lab. That boundary matters. A personal checklist should begin with permission, scope, and containment before it mentions discovery, enumeration, privilege review, or proof capture.
This article is educational. It does not authorize testing against systems you do not own or explicitly have permission to assess. It also avoids exploit recipes because the real goal here is learning structure, not teaching people to swing tools at the open internet like a garden rake in a server room.
Before you act
Use this checklist only inside authorized labs, your own isolated virtual machines, or environments where you have written permission. Do not transfer Kioptrix habits directly to work networks, school networks, client systems, public IP ranges, cloud accounts, or shared Wi-Fi without clear authorization and scope.
Define what authorized practice means before touching a tool
Your first checkbox should not be “scan target.” It should be “confirm this is my lab.” That sounds dull until it saves you from developing sloppy instincts.
A clean Kioptrix practice boundary usually includes a known vulnerable VM, a trusted source for the download, a dedicated attacker VM, an isolated or host-only network, and a written note that this session is for local learning only. You are not proving bravery. You are proving discipline.
- Confirm the vulnerable VM source and intended lab purpose.
- Confirm the target IP belongs to your lab network.
- Confirm your attack machine is not pointed at your home router, workplace, or public address range.
- Confirm snapshots or backups exist before risky changes.
- Confirm notes and screenshots stay inside your lab documentation folder.
Keep Kioptrix notes separate from real-network habits
Kioptrix teaches useful thinking: observe, test, document, question, repeat. It can also teach bad habits if you treat a deliberately vulnerable machine as a model for real-world systems.
Older vulnerable VMs may include outdated services, intentionally weak configurations, and clues designed for training. That is the point. Your checklist should mark those clues as lab observations, not universal rules.
Key takeaway
A good Kioptrix checklist teaches repeatable thinking, not blind pattern matching. Write down what you observed, what you inferred, and what evidence supported the next step.
Use official learning sources as guardrails
When you want context around web testing, lab safety, and cybersecurity learning paths, use credible sources as your guardrails. You do not need to turn every lab into a standards document, but it helps to know where responsible practice lives.
Build the Checklist Around Decisions, Not Commands
A command-centered checklist ages quickly. Tool flags change, defaults shift, versions move, and tutorials grow moss. A decision-centered checklist survives because it asks better questions.
Instead of writing, “Run tool X,” write, “Identify open services and record evidence.” Instead of writing, “Try exploit Y,” write, “Validate whether the observed version, configuration, and behavior support this hypothesis.” That tiny language shift is the difference between memorizing choreography and learning to hear the music.
Replace “run this tool” with “what am I trying to learn?”
Beginner checklists often look busy but think very little. They are full of tool names, terminal crumbs, and screenshots. The page feels productive, yet the learner cannot explain why the step mattered.
A stronger checklist asks a purpose question before every action. What am I confirming? What would change my next step? What evidence would prove this path is worth more time?
| Weak checklist item | Stronger checklist item | Why it helps |
|---|---|---|
| Run a scanner | Identify exposed services and record version clues | Focuses on evidence, not tool worship |
| Check web page | Review web service behavior, visible technology, errors, and login surfaces | Creates a reusable observation habit |
| Try privilege escalation | Review user context, permissions, misconfigurations, and evidence before testing a path | Prevents random guessing |
| Take screenshots | Capture only proof, decision points, and unusual evidence | Keeps notes clean and useful |
Capture purpose, evidence, decision, and next action
Every meaningful lab step can be reduced to four parts: purpose, evidence, decision, and next action. This is simple enough to remember under pressure and strong enough to support deeper learning.
- Purpose: What am I trying to learn?
- Evidence: What did I observe?
- Decision: What does that observation suggest?
- Next action: What will I test, review, or rule out next?
This structure also helps when you get stuck. Instead of staring at the screen with the noble despair of a medieval monk, you can ask, “Which part is missing?” Often, the missing part is evidence.
Commands age faster than reasoning
Commands are not useless. You still need tools. But commands without reasoning become brittle. When a flag behaves differently, a service responds oddly, or a machine is not shaped like the walkthrough, your checklist collapses.
Reasoning lasts longer. If your checklist says, “Confirm what this service exposes before choosing a test path,” you can adapt across tools, labs, and platforms. That is the kind of note your future self will not want to throw into the sea.
Key takeaway
If a checklist item cannot explain why the step exists, rewrite it. The purpose is not to collect commands. The purpose is to train decisions.
Map Your Kioptrix Flow Into Repeatable Phases
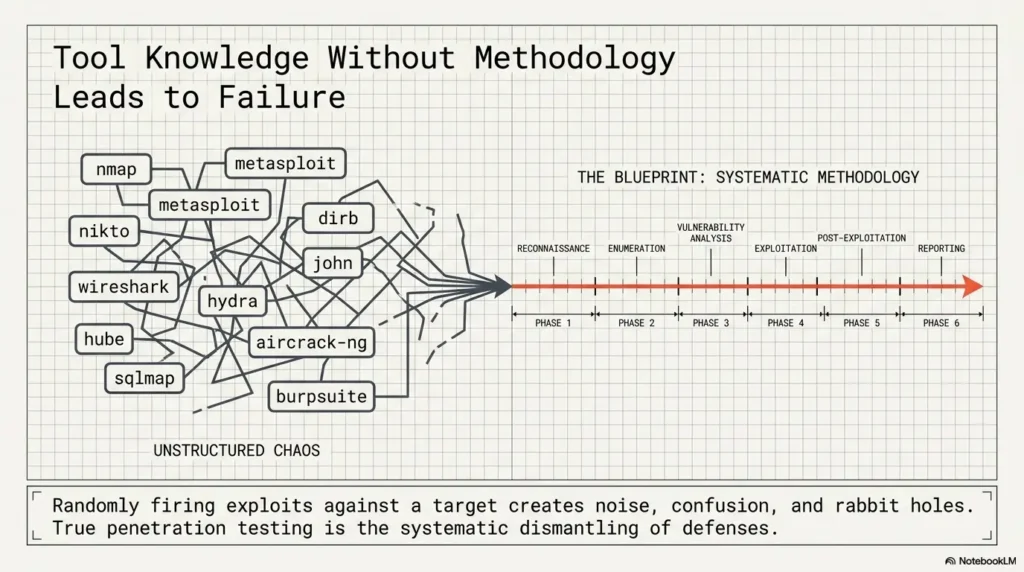
A personal checklist works best when it follows the natural rhythm of a lab session. Kioptrix practice is not one giant event. It is a sequence of phases: setup, discovery, enumeration, hypothesis, validation, privilege review, proof capture, cleanup, and reflection.
The phases give your brain shelves. Without them, every note lands in the same dusty pile.
The Kioptrix checklist loop
1. Boundary
Confirm authorization, lab network, target identity, and isolation.
2. Setup
Check snapshots, folders, note template, and timebox.
3. Discover
Find services, record clues, and avoid early tunnel vision.
4. Evidence
Summarize version clues, errors, paths, permissions, and dead ends.
5. Decide
Choose the next test based on evidence, not panic or habit.
6. Reflect
Record what you noticed late, what you missed, and one upgrade.
Phase 1: lab setup and target confirmation
Setup is not glamorous, but it prevents false starts. Many beginners lose their first hour because the vulnerable VM is not reachable, the network mode is wrong, the target IP is stale, or the note folder is a haunted attic.
Your setup checklist should be short and almost boring. That is its charm.
- Create a dedicated folder for the session.
- Confirm the lab machine boots correctly.
- Confirm the attacker VM and target VM are on the intended isolated network.
- Record the target IP, date, VM name, and session start time.
- Start a fresh note template before collecting results.
Phase 2: discovery, service mapping, and evidence capture
Discovery answers the first practical question: what is here? At this stage, do not rush toward exploitation. Your job is to build a map of what the machine appears to expose.
For Kioptrix-style practice, that usually means recording open ports, service names, version clues, web behavior, authentication surfaces, visible technologies, unusual errors, and anything that seems out of place. Your checklist should nudge you to summarize instead of hoard raw output.
Phase 3: hypothesis, validation, privilege review, and cleanup
A hypothesis is a testable idea. “This looks old” is not enough. “This service version and configuration may support a known weakness, so I need to confirm the version and behavior before spending more time” is better.
After validation, your checklist should guide you through privilege review, proof capture, cleanup, and reflection. Root access, when achieved in a lab, is not the end of learning. It is the point where the lesson becomes available.
The First Draft Should Be Embarrassingly Simple
Your first Kioptrix checklist does not need a polished dashboard, a color-coded command palace, or a note-taking system that requires its own training course. It needs to be simple enough that you actually use it when confused.
Start with five columns: step, purpose, evidence, decision, and next action. This works in a plain text file, spreadsheet, Notion page, Obsidian note, Google Doc, or paper notebook.
Use five columns: step, purpose, evidence, decision, next action
| Column | What to write | Example style |
|---|---|---|
| Step | The broad action you took | Mapped exposed services |
| Purpose | Why the step mattered | Identify attack surfaces inside the lab |
| Evidence | What you observed | Ports, banners, response behavior, errors |
| Decision | What the evidence suggests | Prioritize web service review before deeper paths |
| Next action | The next safe test or review | Inspect pages, inputs, and technology clues |
Keep each checkbox small enough to complete under pressure
A checkbox should be small enough to answer clearly. “Do recon” is too large. “Record open services and one sentence about each” is usable.
When a checkbox becomes too broad, split it into smaller decisions. This is especially helpful for busy adults practicing after work, help-desk technicians studying between shifts, and students who only have short windows of focus.
- Too broad: “Enumerate web.”
- Better: “Record visible pages, forms, server clues, interesting directories, and errors.”
- Too broad: “Try privesc.”
- Better: “Record current user context, permissions, scheduled tasks or scripts, SUID-like clues where relevant, and unusual writable paths.”
Your first checklist will be messy, and that is useful
Messy notes are not failure. They are raw material. The trick is to revise the checklist after the session, not while your brain is still chasing clues down digital alleyways.
During the session, capture enough to preserve thinking. After the session, clean the template. This separation keeps practice moving and prevents note perfection from becoming procrastination wearing a tiny crown.
Key takeaway
Do not build the perfect checklist before practicing. Practice once, debrief honestly, then improve one section. A checklist becomes personal through revision.
Real-world example: the note that saves the next session
A beginner finishes a Kioptrix session and writes, “Web was important.” That note feels true, but it is too vague to help later.
A better version says, “I spent too long staring at service names and not enough time comparing web responses, visible technology, and error behavior. Next time, after initial service mapping, I will spend 15 focused minutes on web evidence before jumping between paths.”
The second note is not glamorous. It will not impress strangers in a forum thread. But it gives your future self a lever. That is what a checklist is for.
If you are still setting up your practice space, start with a safe foundation first. This guide on how to build a safe hacking lab at home can help you keep Kioptrix practice isolated, authorized, and less chaotic.
Once your lab is working, your next upgrade is documentation. A simple note-taking system for pentesting practice can make your evidence, failed paths, screenshots, and reflections much easier to reuse.
If you want a broader structure beyond one checklist, review this Kioptrix lab workflow to connect setup, enumeration, evidence capture, decision-making, and post-lab review into one repeatable routine.
Evidence Notes Are the Hidden Upgrade
Evidence notes are where beginners quietly become better. Not because they collect more information, but because they learn to sort information by usefulness.
A screenshot folder with 80 images may feel thorough. A short note explaining which three observations changed your next decision is usually more valuable.
Screenshot less, summarize more
Screenshots matter when they preserve proof, unusual output, or a result you may need in a report. They are less useful when they replace thinking.
Your checklist should ask for a short summary beside important screenshots. What does this image prove? Why did you capture it? What decision does it support?
- Capture proof of target identity and lab scope.
- Capture unusual errors or visible clues you may forget.
- Capture successful milestones in a lab-safe way.
- Do not screenshot every ordinary page just because it exists.
- Name files so they make sense later.
Record version clues, service banners, errors, and dead ends
A good evidence note does not need to be long. It needs to be precise. “Old web stack maybe relevant” is fog. “Web service shows legacy behavior, visible technology clues, and error responses worth checking against known lab-era patterns” is more useful.
Dead ends deserve a place too. Many learners delete failed paths because they feel embarrassing. Do the opposite. Record what you tested, what happened, and why you are setting it aside.
| Evidence type | What to capture | Why it matters |
|---|---|---|
| Version clue | Service version, technology hint, or response header | Supports or weakens a hypothesis |
| Behavior clue | Login behavior, error message, redirect, forbidden page | Shows how the service reacts |
| Permission clue | User context, readable paths, writable areas in lab | Helps with privilege review |
| Dead end | What you tried and why you paused it | Prevents repeated waste |
| Proof point | Milestone screenshot or short result summary | Supports reporting and review |
Turn every “why did this work?” moment into a future prompt
The best study prompts often arrive after the lab, when the adrenaline fades and the question finally has room to breathe.
When something works and you do not fully understand why, mark it. Later, turn it into a research prompt: “What service behavior made this path plausible?” or “Which clue should have made me investigate this earlier?” This is where Kioptrix becomes more than a solved box.
Show me the nerdy details
A useful lab note separates raw output from interpreted evidence. Raw output is what a tool, page, or system returned. Interpreted evidence is what that output means for your decision process.
For example, a service name alone is weak evidence. A service name plus version clue plus observed behavior plus a reason to prioritize or deprioritize it is stronger evidence.
This distinction matters because checklists should reduce cognitive load. They should help you decide what deserves time, what needs confirmation, and what should be parked for later review.
Do Not Copy Walkthroughs Into Your Checklist
Walkthroughs can be helpful. They can also become a velvet trap. They make the answer feel close, clean, and inevitable. Your own lab session rarely feels that tidy.
If you copy a walkthrough into your checklist, you are not building a checklist. You are preserving someone else’s finished path after all their uncertainty has been edited out.
Why walkthrough-shaped notes collapse on the next box
A walkthrough is usually linear because the author already knows the route. Your practice is not linear. You will test, pause, misunderstand, circle back, and occasionally accuse your VM of personal betrayal.
Walkthrough-shaped notes fail because they teach sequence without judgment. They tell you what happened, but not why another path was ignored, why a clue was meaningful, or how to recover when the next machine does not match the pattern.
Separate universal habits from Kioptrix-specific clues
Some habits travel well. Scope confirmation, service mapping, evidence notes, timeboxing, cleanup, and reflection are useful across many labs.
Other clues may be specific to Kioptrix, an older vulnerable VM, a particular service version, or a deliberately designed path. Put those in a “lab-specific observations” section so they do not masquerade as universal wisdom.
| Universal habit | Lab-specific clue |
|---|---|
| Confirm target belongs to your authorized lab | A particular VM uses an intentionally old service |
| Record service behavior before choosing a path | A specific banner points to a known training route |
| Review failed attempts after the session | A particular directory or page matters on one machine |
| Capture proof and clean up notes | A single exploit path worked because of that lab’s design |
A safer rule for using walkthroughs without ruining learning
Use walkthroughs in layers. First, try to solve the next decision, not the whole machine. Second, read only enough to get unstuck. Third, close the walkthrough and explain the clue in your own words.
If you cannot explain the clue without looking back, you have not learned it yet. No shame. Just write the question down and revisit it.
Key takeaway
A walkthrough should answer a narrow learning question. It should not become the skeleton of your personal checklist.
Common Mistakes That Make Checklists Useless
A checklist can fail even when it looks neat. The problem is usually not formatting. The problem is that the checklist records activity but not judgment.
Here are the mistakes worth catching early.
Mistake 1: writing tool names instead of learning goals
Tool names are fine as supporting notes, but they should not be the heart of the checklist. A tool is the flashlight. The checklist should say what you are trying to see.
Rewrite tool-heavy items into evidence goals. “Use a web scanner” becomes “Identify web server behavior, visible paths, errors, and technology clues.”
Mistake 2: skipping failed paths because they feel embarrassing
Failed paths are not stains. They are breadcrumbs. When you record them cleanly, they prevent repeated work and reveal how your assumptions operate under pressure.
- What did I test?
- What evidence made it seem worth testing?
- What happened?
- Why am I pausing or rejecting this path?
- What would make me return to it later?
Mistake 3: mixing setup notes, exploit notes, and reflection notes
When every note lands in one place, review becomes painful. Separate your notes into setup, observations, decisions, proof, cleanup, and reflection.
This does not require fancy software. A few clear headings can rescue the whole session.
Mistake 4: treating root access as the finish line
In a lab, success is not only access. Success is understanding. If you cannot explain the chain of observations that led there, your checklist should mark the session as incomplete.
After success, ask what you missed, which step was lucky, which clue deserved attention earlier, and how you would report the finding in plain language.
Mistake checklist
- My checklist lists commands but not why I used them.
- I delete failed paths instead of reviewing them.
- I cannot separate raw output from evidence.
- I keep all notes in one giant scroll of doom.
- I stop learning as soon as I get the final lab result.
- I cannot explain what I would do differently next time.
Free vs Paid Tools: What Is Worth Paying For?
You can build an excellent Kioptrix checklist with free tools. The paid question is not “What looks professional?” It is “What reduces friction enough that I will practice consistently?”
For most beginners, the best setup is modest: a stable virtualization tool, a note-taking system you understand, a clean folder structure, and a way to capture screenshots. Do not buy a spaceship to cross a puddle.
When a free setup is enough
A free setup is usually enough when you are learning lab basics, practicing one vulnerable VM at a time, building your first checklist, or trying to understand whether cybersecurity practice fits your life.
Free or low-cost options can cover note-taking, virtualization, screenshots, file organization, and basic documentation. Spend your early energy on routine, not shopping.
When paid tools or services may be worth considering
Paid tools may help when you need cross-device sync, better search, structured knowledge bases, advanced lab hardware, professional reporting features, or a guided training platform. They can save time, but they cannot replace thinking.
Before paying, ask whether the tool supports your checklist habit. Does it make evidence easier to find? Does it reduce setup friction? Does it help you review patterns? Or is it just another shiny cupboard for unfinished notes?
| Setup tier | Best for | What to compare | Watch out for |
|---|---|---|---|
| Good: free basics | Beginners, students, casual CTF learners | Ease of notes, screenshots, folder naming, VM stability | Messy organization and lost evidence |
| Better: organized study stack | Consistent learners, career changers, help-desk workers | Search, templates, backups, cross-device review | Tool tinkering replacing practice |
| Best: career-focused documentation workflow | OSCP-minded learners, portfolio builders, junior security candidates | Report export, evidence library, repeatable templates, version history | Overbuilding before mastering basics |
Questions to ask before buying a course, tool, or platform
- Will this help me practice more consistently?
- Will it improve evidence capture, review, or reporting?
- Can I export my notes if I leave the platform?
- Does it teach decision-making, or only recipes?
- Does it fit my current skill level?
- Can I get 80 percent of the value with a simpler free option?
For broader career mapping, the NIST NICE framework can help you understand cybersecurity work roles and learning direction without getting trapped in tool-only thinking.
Create Personal Stop-and-Think Gates
A stop-and-think gate is a deliberate pause before a risky, noisy, or assumption-heavy step. It keeps your checklist from becoming a runaway train with a terminal window.
These gates are especially useful for beginners because they interrupt the urge to do “one more thing” without evidence.
Stop before exploitation: do I understand the service and risk?
Before testing an exploitation path in an authorized lab, pause and write the evidence that supports it. If your note says only “because a walkthrough did it,” you are not ready to add it to your checklist as a learned habit.
- Which service or behavior supports this path?
- What version or configuration clue matters?
- What have I ruled out?
- What is the safest way to test inside my lab?
- What will I record if the test fails?
Stop before privilege review: what evidence supports this path?
Privilege review can become chaotic if you jump from one idea to another. Your checklist should slow you down just enough to document context: who you are, what permissions you have, what files or services appear relevant, and what assumptions you are making.
This is not about writing a novel. It is about leaving a trail your future self can understand.
Stop after success: what would I miss on a different machine?
After a successful lab path, your brain wants a victory lap. Take one. Then come back and ask the harder question: what part of this success was transferable?
If the answer depends on one Kioptrix-specific clue, mark it as specific. If the answer depends on evidence discipline, service mapping, careful note review, or timeboxing, move it into your universal checklist.
Key takeaway
Stop-and-think gates are not hesitation. They are steering. They help you turn action into judgment.
Build Your One-Page Kioptrix Debrief
The debrief is where the checklist becomes yours. It happens after a session, while memory is still warm but the screen is no longer shouting.
Keep it to one page if possible. A one-page debrief forces you to choose the important lessons instead of preserving every crumb.
Open a blank document and create nine sections
Use these nine sections after one completed Kioptrix session. You can expand them later, but start small.
- Lab boundary: target, network, authorization, and isolation note.
- Session goal: what you intended to practice.
- Setup notes: VM status, network mode, snapshots, folders.
- Discovery summary: services, versions, visible surfaces, first impressions.
- Key evidence: the clues that changed your decisions.
- Failed paths: what you tested and why you paused it.
- Successful chain: a plain-English summary, not a recipe.
- Cleanup: snapshots, files, notes, and lab reset items.
- One checklist upgrade: the single improvement you will make next time.
Fill it after one completed lab, not during ten unfinished ones
Completion teaches differently from dabbling. If you start ten labs and finish none, your checklist may become a museum of open loops.
Choose one Kioptrix session. Finish as much as you ethically and safely can inside the lab. Then debrief that one session carefully. The learning will be cleaner.
Use the final line for one upgrade before the next practice session
The final line is the most important part of the debrief: “Before my next session, I will improve one thing.”
Maybe you add a web evidence section. Maybe you create a screenshot naming pattern. Maybe you add a dead-end log. Keep it small enough to do before the next session begins.
One-page debrief template
Today I practiced: ______
The most useful clue was: ______
I noticed this too late: ______
One failed path taught me: ______
Before next session, I will upgrade: ______
For learners who want to connect lab work to safer professional practice, the CISA cybersecurity resources page can be a useful next stop for broader defensive context.
FAQ
Best checklist format for Kioptrix practice
The best format is the one you will actually use during confusion. A five-column format works well: step, purpose, evidence, decision, and next action. You can keep it in a text file, spreadsheet, note app, or document.
What should I write down during enumeration?
Write down exposed services, version clues, response behavior, visible web paths, login surfaces, errors, unusual permissions, and dead ends. More importantly, write why each clue matters or why you decided to pause it.
How detailed should each lab note be?
Detailed enough that you can understand your decision a week later. Avoid dumping raw output without explanation. A short interpreted note is often more valuable than a long pile of unfiltered text.
When should I look at a walkthrough?
Use a walkthrough when you have a specific learning question, not when you simply feel uncomfortable. Read only enough to get unstuck, then close it and explain the clue in your own words.
How do I review failed attempts productively?
Record what made the path seem plausible, what you tested, what happened, and why you stopped. Failed paths often reveal assumption patterns, and assumption patterns are prime checklist material.
Can one checklist work across multiple vulnerable VMs?
Yes, if the checklist is built around decisions rather than Kioptrix-specific clues. Keep universal habits in the main checklist and machine-specific observations in a separate section.
What should I remove from a checklist as my skill improves?
Remove items that have become automatic and keep items that prevent costly mistakes. For example, you may not need reminders about basic folder setup forever, but scope confirmation and evidence review should stay.
How do I keep lab notes ethical and contained?
Label the work as authorized lab practice, keep notes in a dedicated folder, avoid applying lab steps to real systems without permission, and separate educational observations from operational instructions.
Your Next 15 Minutes: Make the Checklist Real
The best checklist is not the one with the most sections. It is the one that changes your next practice session.
Set a 15-minute timer. Open a blank document. Create five headings: Boundary, Discovery, Evidence, Decisions, Reflection. Under each heading, write three checkboxes. Keep them plain. Keep them useful. No decorative fog machine required.
Then add one final line: “After this session, I will improve one checklist item.” That line is the hinge. It turns Kioptrix from a solved machine into a repeatable learning system.
15-minute starter checklist
- Confirm the target is inside my authorized lab.
- Create a clean folder and note file for this session.
- Record services and one sentence about each.
- Write evidence before choosing the next path.
- Log failed paths instead of deleting them.
- End with one improvement for next time.
Last reviewed: 2026-07