Open the practical working record to connect this guide to your scope, evidence and next decision.
Use tool output to answer a defined question
Record the request context and expected behavior before selecting a tool. Distinguish discovery, input handling, authentication and authorization. Unexpected status codes require interpretation and do not alone establish exploitability. Keep the target and request budget within the lab agreement, and identify any assistance used. Reference and scope.
Beginner Web Security • Authorized Labs Only
Kali Linux Web Attack Basics for Beginners:
A Safe Lab-First Roadmap
Build an authorized web-testing exercise around one explicit security expectation at a time.
This guide explains the foundations behind ethical web testing without handing you a sack of unexplained attack commands. You will learn how to build a safe lab, read HTTP traffic, use an intercepting proxy, evaluate scanner results, recognize common weakness categories, and record evidence without confusing odd behavior with a confirmed vulnerability.
The goal is not to turn a beginner into a reckless button-clicker. It is to help a student, junior defender, developer, or career changer develop a professional testing habit that is legal, repeatable, and useful to the person responsible for fixing the application.
Build safely
Create an isolated, disposable practice environment before testing anything.
Think clearly
Read requests, sessions, roles, and responses before trusting tool output.
Report professionally
Turn observations into evidence, realistic impact, remediation, and a safe retest.
Your first useful security skill is not exploitation. It is knowing exactly where you are allowed to look. 🔐
Snapshot
Who this is for: cybersecurity beginners, IT students, junior defenders, developers, and ethical-hacking learners. What it solves: the confusion between installing Kali, understanding web applications, and testing them safely. What you can do next: build an isolated lab, capture one authorized request, test a harmless hypothesis, and write a concise finding.
On this page
Before You Act
This article provides general education for controlled security labs. It does not authorize testing, provide legal advice, or replace an organization’s written rules of engagement. Use security tools only on systems you own or have explicit permission to assess. Confirm scope, timing, allowed techniques, data-handling rules, emergency contacts, and stop conditions before sending test traffic.
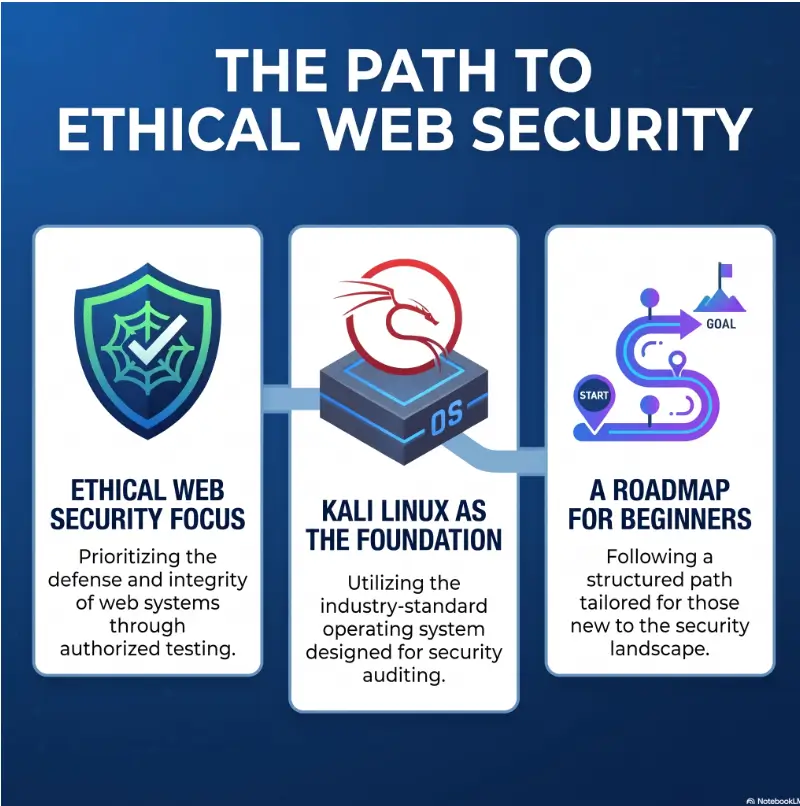
Permission First: The Boundary That Changes Everything
A security tool is not illegal merely because it can test a system. The decisive question is whether you are authorized to use it against the particular target, in the particular way, at the particular time.
That distinction is why a request sent to your private training application can be an educational exercise, while the same request sent to a stranger’s website may become unauthorized activity. Technical similarity does not create legal or ethical equivalence.
Written authorization versus casual approval
“Sure, take a look” is not a strong testing agreement. It leaves unanswered questions about subdomains, cloud services, third-party integrations, test accounts, production data, automated scanning, traffic limits, and who should be contacted if something breaks.
A useful authorization document identifies the asset owner, the named testers, the approved targets, the testing window, permitted techniques, excluded systems, data-handling expectations, and an emergency stop contact. For a home lab, you can write the same information in a notebook. The habit matters even when you are the owner.
The five-question authorization check
- Do I own this system, or do I have explicit written permission from someone who can authorize the test?
- Is the hostname, IP address, application, API, and account included in the stated scope?
- Are automated scans, authentication tests, uploads, and availability-impacting actions addressed separately?
- Do I know the test window, rate limit, stop conditions, and emergency contact?
- Can I prove the authorization if an administrator, provider, or investigator asks?
Key takeaway
A target being visible on the internet does not make it available for testing. Search results, public IP addresses, exposed login pages, and interesting error messages are not permission slips.
Why public vulnerability programs still have boundaries
A public bug-bounty or vulnerability disclosure program may authorize good-faith research, but only under its published policy. One program may permit testing a web application while excluding social engineering, denial-of-service activity, employee accounts, physical locations, or third-party services.
Read the policy immediately before each testing session. Scope can change, assets can move, and an old screenshot is a poor substitute for the current terms.
Build the Lab Before You Touch the Tools
The safest beginner environment contains a Kali virtual machine, an intentionally vulnerable target, and an isolated virtual network. The target should be designed for legal practice, not a forgotten device you happened to find on your router.
Virtual machines are especially helpful because snapshots let you return the environment to a known state. A broken lab becomes a ten-second reset rather than a Saturday afternoon spent rebuilding everything while quietly questioning your career choices.
A simple isolated network layout
Use a host-only or otherwise isolated virtual network for practice traffic. Host-only networking still includes the host computer; an internal network between the lab VMs provides a stricter boundary when host access is unnecessary. Keep the vulnerable target away from your home network, workplace network, public internet, shared storage, personal password manager, and real accounts.
A beginner who needs a fuller setup walkthrough can use the offline lab setup guide together with the home lab network layout. Before beginning, confirm your VM interfaces rather than assuming the default is isolated.
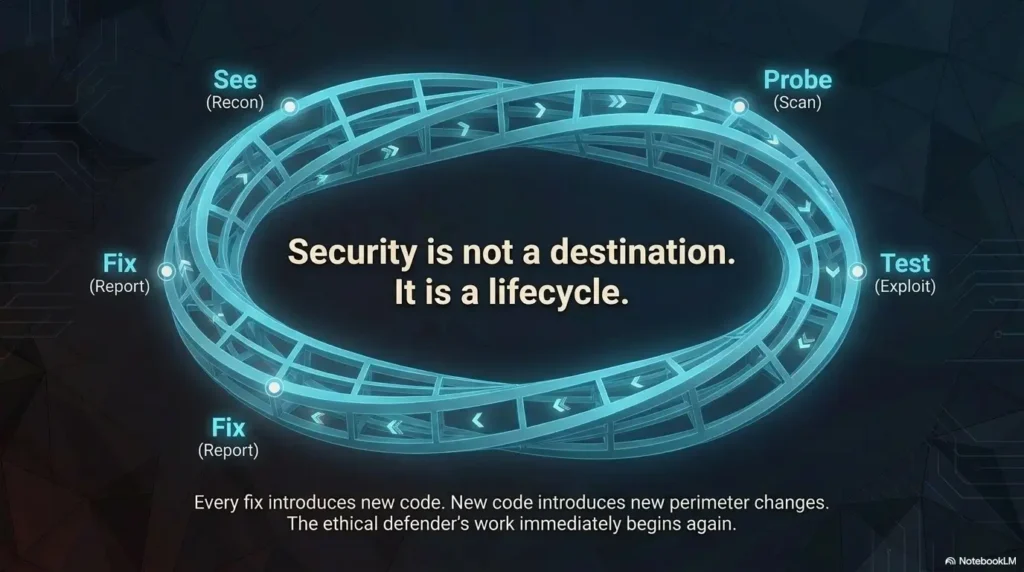
The Safe Web Testing Loop
1. Authorize
Write down the exact target and permitted activity.
2. Isolate
Use disposable VMs, snapshots, and a contained network.
3. Observe
Browse normally and capture a behavioral baseline.
4. Verify
Test one harmless, controlled hypothesis at a time.
5. Document
Record evidence, impact, cleanup, and a safe retest.
Lab readiness checklist
- The target is intentionally vulnerable and licensed or provided for training.
- The Kali VM and target VM can communicate with each other.
- The target cannot accept unsolicited connections from the public internet.
- No personal files, real credentials, payment details, or private API keys are present.
- A clean snapshot exists for both machines.
- You have a folder ready for notes, screenshots, and exported proxy history.
- You know how to shut down or disconnect the lab immediately.
Good, better, and best beginner setups
| Setup | What it includes | Best for | Main tradeoff |
|---|---|---|---|
| Good | Kali VM, one training target, host-only network, manual notes | Students testing whether web security suits them | Fewer recovery and documentation conveniences |
| Better | Separate browser profile, snapshots, proxy, structured evidence folders | Regular weekly practice | More setup time before the first exercise |
| Best | Dedicated lab host, several isolated targets, versioned notes, repeatable reset process | Career changers building a long-term portfolio | Higher hardware, storage, and maintenance needs |
Free software is enough for most beginner exercises. Spend money only when a paid hypervisor, larger storage drive, additional memory, commercial proxy feature, or structured training service solves a specific limitation you can name.
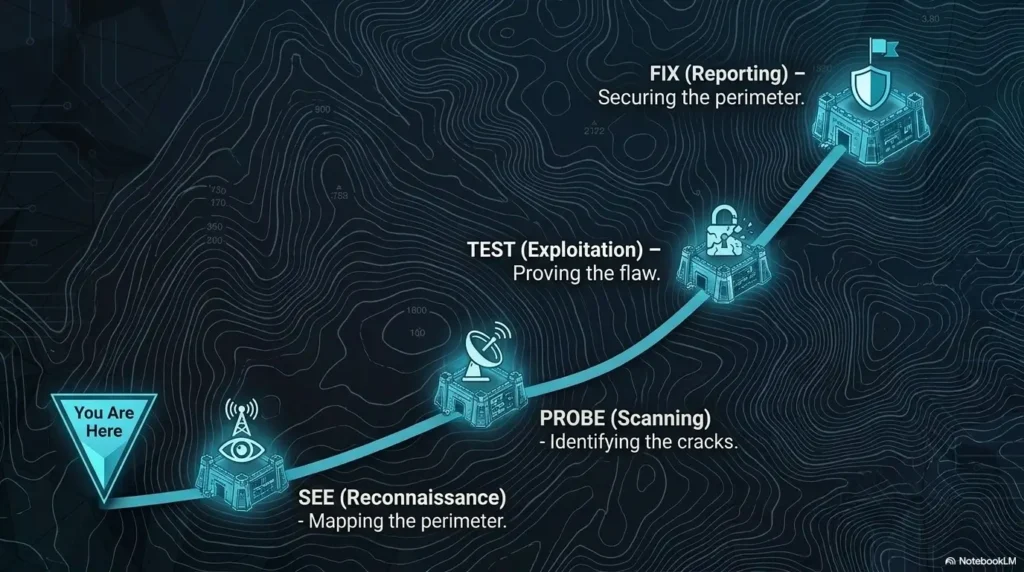
Read the Web Conversation Before Testing Anything
A web application is a conversation between a client and a server. The browser sends a request containing a method, path, headers, cookies, and sometimes a body. The server replies with a status code, headers, and content.
Beginners often stare at the rendered page and miss the quieter clues beneath it. A button may send a background request. A user role may be represented by a server-side session. A form field may be ignored by the browser but accepted by the application. Security testing begins by reading these exchanges.
Methods, headers, cookies, parameters, and status codes
| HTTP element | What it tells you | Beginner question |
|---|---|---|
| Method | The intended action, such as retrieving or submitting data | Does the action match what the interface appears to do? |
| Path | The requested resource or application route | Does the path change between users or roles? |
| Headers | Context about content, origin, caching, and client behavior | Which headers are set by the browser, proxy, or server? |
| Cookies | Session identifiers and other state information | Does the cookie change after login, logout, or role switching? |
| Parameters | Values supplied in the URL or request body | Which values are cosmetic, and which affect server behavior? |
| Status code | A summary of how the server handled the request | Does the response body agree with the status code? |
Sessions and authentication are related, not identical
Authentication answers, “Who are you?” Session management answers, “How does the application remember you?” Authorization answers, “What may you do?” Mixing these questions makes access-control testing muddy.
A successful login does not prove that later authorization checks are correct. Likewise, a session cookie changing does not prove that the previous session was invalidated. Observe each control separately.
Find the trust boundary inside an ordinary request
A trust boundary appears whenever information moves between components with different levels of control. Browser input crosses into the application. Application data reaches a database. A server requests content from another service. A low-privilege account asks for a protected object.
Your job is not to assume that crossing the boundary creates a vulnerability. Your job is to ask what validation, identity check, permission check, encoding, or destination restriction should exist at that point.
Key takeaway
Do not begin with “Which attack can I run?” Begin with “What control should protect this transition, and what evidence would show that the control failed?”
Your First Kali Workflow: Observe, Map, Verify, Record
Kali contains many utilities, but a professional workflow is not a tour of menu categories. It is a sequence of decisions that narrows uncertainty while controlling risk.
Step 1: Observe normal behavior and establish a baseline
Open the authorized target in your dedicated lab browser. Visit the landing page, create a disposable test account if the exercise permits it, log in, log out, and use the main features normally.
Record expected status codes, visible navigation, cookie changes, redirects, form fields, and role differences. A baseline helps you distinguish application behavior from proxy errors, stale sessions, browser extensions, or your own mistaken assumptions.
Step 2: Map pages, actions, identities, and data
- Public pages available without authentication
- Registration, login, logout, and account recovery flows
- Actions available to each test role
- Objects owned by one user but not another
- Parameters that select records, filters, files, or destinations
- State-changing requests such as profile edits or preference updates
- Error messages and unexpected redirects
For a practical browser-centered routine, see the Kali browser workflow. When you later expand into service discovery, the HTTP enumeration guide offers a related lab-only process.
Step 3: Verify one hypothesis at a time
A hypothesis should be narrow and testable. For example: “The server may rely on a browser-supplied display preference without validating the value.” That is more useful than “This page looks vulnerable.”
Change one harmless value inside the disposable lab, send the request once, and compare the response with your baseline. Restore the original value before moving on. If several things change simultaneously, you will not know which change mattered.
Illustrative example
A student sees a different page after editing a harmless profile preference through an intercepting proxy. Excited, she labels it an access-control vulnerability.
She then repeats the original request and receives the same page. The application had simply rotated a session token during a normal profile update, and her first comparison used an expired browser tab.
By rebuilding the baseline, changing only one value, and repeating the test in a fresh session, she discovers that the preference affects presentation but grants no additional access.
The lesson is useful precisely because no vulnerability was found: disciplined verification prevented an inaccurate report and showed her which evidence was missing.
Intercepting Proxies: Where the Application Reveals Its Logic
An intercepting proxy sits between your dedicated lab browser and the authorized training application. It lets you view requests and responses, pause a request, make a controlled edit, and review the sequence of an entire user journey.
The proxy does not magically explain the application. It provides a better window. You still need to decide what is normal, what control should exist, what changed, and whether the result is repeatable.
Configure a separate lab browser
- Use a browser profile reserved for training.
- Do not sign in to personal email, cloud storage, banking, or social accounts.
- Route only the lab browser through the proxy.
- Use the proxy’s lab certificate only inside the dedicated profile when required.
- Clear cookies and site data between exercises that require a fresh state.
- Confirm the target hostname or IP before forwarding paused requests.
Start with harmless request edits
Good first edits include a display name in a disposable account, a non-sensitive preference, a sort order, a page number, or another value chosen by the lab instructions. Observe whether the server accepts, rejects, normalizes, or ignores the modification.
Avoid destructive inputs, mass requests, password guessing, file uploads, data extraction, or changes that affect other users. A beginner session should teach interpretation, not create an incident.
Use proxy history to reconstruct a user journey
Look at the complete sequence around login, profile updates, checkout simulations, or role changes. The important request may not be the one attached to the visible button. Modern interfaces often send several background requests.
Label requests in your notes by action rather than by number alone: “login submission,” “session renewal,” “profile retrieval,” and “preference update” are easier to revisit than “request 38.”
Key takeaway
The most valuable proxy habit is not altering traffic. It is preserving enough context to explain what the request represents, which user sent it, and what should have happened.
Scanners and Tools: Useful Assistants, Terrible Autopilots
Automated scanners can identify missing headers, exposed files, known software signatures, configuration clues, and suspicious response patterns. They can also generate noise, trigger account protections, strain fragile services, and report issues that are not exploitable in the tested context.
Tool output is a lead, not a verdict. A polished report should never contain a scanner finding you cannot explain, reproduce safely, and connect to a failed control.
Passive review versus active testing
| Approach | Typical behavior | Beginner risk | Use it when |
|---|---|---|---|
| Manual observation | Reviews ordinary browsing traffic | Low inside a correct lab | You are building a baseline |
| Passive proxy checks | Analyzes traffic already generated | Low to moderate | You understand what data is being reviewed |
| Targeted active check | Sends limited test requests | Moderate | The lab permits it and you have a specific hypothesis |
| Broad automated scan | Sends many requests across many paths or checks | Higher | The target is disposable, scope is clear, and impact is acceptable |
Four questions before pressing “scan”
- What precise question is this scan intended to answer?
- How many requests might it send, and could the target become unstable?
- Could it create accounts, submit forms, change data, lock users out, or fill logs?
- How will I distinguish a reliable finding from a false positive?
Older training machines can react unpredictably to modern scanner assumptions. The guide to false positives in older labs explains why version clues and generic warnings require manual review.
Free tools versus paid tools and training
| Option | When it is enough | When an upgrade may help | What to compare before paying |
|---|---|---|---|
| Free community tools | Learning HTTP, manual mapping, note-taking, and small labs | You repeatedly hit a documented feature limit | Update policy, documentation, export formats, and safe defaults |
| Paid proxy or scanner features | Usually unnecessary for a first lab | You test larger authorized applications or need team workflows | Request controls, audit logs, collaboration, reporting, and licensing |
| Guided training service | Self-study is working and you can verify your progress | You need structure, feedback, or a defined learning path | Lab isolation, instructor quality, syllabus depth, refund terms, and access duration |
| Professional assessment | Not needed for a disposable learning target | A real business system needs an authorized security review | Scope, methodology, tester experience, insurance, reporting, retesting, and data handling |
Do not purchase a large scanner because a tutorial made it look impressive. Buy only when you understand the workflow you are trying to improve. Otherwise, the tool becomes an expensive fog machine.
Show me the nerdy details
A scanner usually compares observed behavior with signatures, heuristics, response differences, configuration expectations, or known issue patterns. Each method has uncertainty.
A version string may be inaccurate. A missing header may be irrelevant to the particular content. Two responses may differ because of timestamps, personalization, rotating tokens, caching, or rate controls rather than a security flaw.
Manual verification controls variables. Repeat the baseline request, change one condition, compare status, headers, length, content, timing, and application state, then repeat again. Consistency matters more than a dramatic single response.
Common Web Weaknesses Without the Hollywood Fog
Web vulnerabilities are often described using memorable labels. The labels are useful, but beginners learn faster when each category is tied to a failed security control.
Injection and cross-site scripting
Injection occurs when untrusted input reaches an interpreter in a form that changes the intended instruction. The missing control may involve parameterization, strict validation, safe APIs, or separation between data and commands.
Cross-site scripting occurs when untrusted data is placed into browser-executable context without suitable handling. The correct defense depends on where the data is inserted, so “filter suspicious characters” is not a complete remedy.
Broken access control
Access-control failures happen when the server does not correctly enforce who may read, create, modify, or delete a resource. Hiding a button is not authorization. The server must check identity and permission when processing the request.
A useful lab comparison uses two disposable accounts and non-sensitive objects. Observe whether each account can access only the objects and actions assigned to it.
Authentication and session failures
Weaknesses may appear in registration, login, recovery, multi-step verification, logout, token rotation, session expiration, or account-locking design. Aggressive password testing is not a beginner exercise and can create availability problems even in a lab.
Start by observing state transitions: what changes after login, whether logout invalidates the session, and whether sensitive actions require the expected identity context.
Misconfiguration and server-side requests
Security misconfiguration includes unsafe defaults, exposed administrative functions, verbose errors, unnecessary services, forgotten files, and weak deployment settings. A banner or version string may be a clue, but it does not by itself prove practical impact.
Server-side request problems arise when an application fetches a destination influenced by user input without adequate restrictions. Safe learning should remain inside a purpose-built lab with destinations provided by the exercise.
Key takeaway
A vulnerability name is shorthand. A finding becomes useful when you can identify the failed control, show repeatable evidence, explain realistic impact, and recommend a proportionate fix.
Three Beginner Tests That Teach More Than Fifty Tools
These exercises are intended for an isolated, deliberately vulnerable application. They are designed to teach comparison and reasoning rather than destructive technique.
Test 1: Compare anonymous and authenticated responses
- Visit a lab page while logged out and save the request and response.
- Log in with a disposable test account.
- Visit the same page and compare the method, cookies, redirects, status, and content.
- Log out and repeat the original request.
- Record what changed and what remained available.
This exercise teaches authentication state, session handling, caching, and the difference between a visible page and a protected server response.
Test 2: Compare object ownership using disposable data
Create two lab accounts if the exercise permits it. Give each account a harmless object, such as a training note or profile item. Observe how the server identifies the object and which account is allowed to view or edit it.
Change only the non-sensitive object reference specified by the lab. Do not collect private information, enumerate large ranges, or continue beyond the exercise. The learning objective is to see whether the server verifies ownership.
Test 3: Trace harmless unexpected input
Use a value that is unusual but not destructive, such as an empty optional field, a longer display label within the lab’s limits, or an unexpected sort choice. Observe whether validation occurs in the browser, on the server, or both.
Then disable JavaScript temporarily and revisit the form. Client-side validation may disappear, but a secure application should still enforce necessary rules on the server.
A focused 30-minute session plan
| Time | Action | Output |
|---|---|---|
| 0–5 minutes | Confirm isolation, scope, snapshot, and target identity | Written scope line |
| 5–12 minutes | Browse one feature normally through the proxy | Baseline request and response |
| 12–20 minutes | Change one harmless value and repeat | Controlled comparison |
| 20–25 minutes | Restore the original state and reproduce the result | Verification notes |
| 25–30 minutes | Write observation, evidence, risk, fix, and retest | Five-line finding |
Common Mistakes That Turn Practice Into Trouble
Mistakes involving scope and target identity
- Assuming a public hostname is legal to test
- Copying an IP address without confirming it belongs to the lab
- Using bridged networking when isolation was intended
- Following a redirect to an external identity, analytics, storage, or payment service
- Continuing after an unexpected production hostname appears
Stop when the target changes unexpectedly. Capture the hostname and request without interacting further, then verify whether it is inside scope.
Mistakes involving tools and copied commands
- Running a command copied from a walkthrough without reading its options
- Increasing threads or request speed because results seem slow
- Launching a broad scan before browsing the application normally
- Treating a version match as proof of exploitability
- Installing unknown scripts with excessive privileges
- Failing to record which tool version and settings produced the result
When copied commands fail, the useful response is not to add more force. Check the target, syntax, network path, permissions, tool version, and assumptions. The copy-and-paste troubleshooting guide provides a calmer diagnostic sequence.
Mistakes involving evidence and claims
- Saving only the unusual response and not the baseline
- Failing to note the test account, role, date, and application state
- Using screenshots that omit the relevant request or response detail
- Collecting more data than the finding requires
- Calling behavior “critical” without showing realistic impact
- Forgetting to restore changed settings or reset the lab
When to stop and seek help
Stop immediately if the target is outside scope, a test affects availability, an account locks unexpectedly, sensitive data appears, a third-party system becomes involved, or you cannot explain what the tool is about to do.
In a course, contact the instructor or lab owner. In an organization, contact the named security lead. For a real-world vulnerability, follow the owner’s published disclosure channel rather than attempting additional proof.
Turn Testing Into a Professional Finding
A useful security finding lets another person understand the failed control, reproduce it safely, judge the risk, fix it, and confirm that the fix works. Drama does not improve this process. Precision does.
The five-part finding structure
| Part | What to write | Example focus |
|---|---|---|
| Observation | A plain description of the failed control | A test user could access an object assigned to another test user |
| Evidence | Authorized environment, account roles, requests, responses, and repeatability | Baseline and modified request with sensitive values removed |
| Risk | A realistic outcome supported by the evidence | Unauthorized reading of similar user-owned objects |
| Remediation | The control that should be enforced | Verify authenticated ownership on every object request |
| Retest | A bounded method for confirming the fix | Repeat the two-account comparison and expect denial |
A beginner evidence template
- Environment: isolated lab name, target version, date, and snapshot
- Authorization: owner and permitted exercise
- Test identity: disposable username and role
- Baseline: expected request, response, and application state
- Change: the single harmless value or condition modified
- Observed result: status, content, state change, and repeatability
- Cleanup: restored values, deleted test data, or snapshot reset
For a longer reporting process, use the technical write-up guide and the lab report writing tips. Good documentation turns a fleeting lab result into a portfolio artifact and a reusable troubleshooting record.
Explain impact without exaggeration
Separate what you observed from what you infer. “The second test account viewed one disposable note owned by the first account” is an observation. “The same control may affect other user-owned records” is a hypothesis that requires confirmation.
Avoid claiming total compromise when your evidence demonstrates a narrow access-control failure. Overstatement makes remediation harder because engineers must first untangle the report.
Include a safe retest and cleanup plan
A retest should reproduce the original conditions while minimizing new data and traffic. State the expected secure result clearly, such as an access denial, normalized input, invalidated session, or restricted destination.
Afterward, remove test accounts and files where appropriate, restore altered preferences, save necessary evidence securely, delete unnecessary captured data, and return the lab to its clean snapshot.
FAQ: Kali Linux Web Testing for Beginners
Is Kali Linux illegal to use in the United States?
Kali Linux is a legitimate operating system used for security testing, education, administration, and research. Legality depends on what you do, which system you target, whether you are authorized, and whether your actions remain within the agreed scope. Consult a qualified legal professional for advice about a specific situation.
Can I scan my own website with Kali Linux?
Ownership helps, but you should also review hosting terms, cloud-provider rules, managed-service agreements, third-party plugins, payment systems, identity services, and shared infrastructure. A staging copy or isolated clone is usually safer for early testing.
Is a public IP address automatically legal to test?
No. Public accessibility is not authorization. A system can be reachable while remaining privately owned and protected by law, contract, or acceptable-use rules.
What is the safest vulnerable web application for beginners?
Choose an application explicitly designed for security training, supported by clear setup instructions, and hosted inside an isolated environment. Guided browser-based labs are another option because the provider controls the training target and exercise boundaries.
Do I need to learn Python before using Kali Linux?
No. Begin with Linux navigation, files, permissions, networking basics, HTTP, HTML forms, browser developer tools, and careful note-taking. Programming becomes useful later for understanding application logic and automating repetitive authorized tasks.
Is an intercepting proxy considered an attack tool?
It is a dual-use testing tool. Developers, quality teams, defenders, and security testers use proxies to inspect and debug traffic. Authorization and use determine whether the activity is appropriate.
Can an automated scanner damage a website?
Yes. Active scans may send substantial traffic, submit forms, create records, trigger account controls, consume resources, or expose fragile code paths. Test scanners in disposable labs before considering them for an authorized real system.
What should written testing authorization include?
It should identify the owner, testers, exact targets, permitted and prohibited actions, testing window, data rules, traffic constraints, third-party exclusions, emergency contact, stop conditions, reporting method, and retest expectations.
How do I report a vulnerability without creating additional risk?
Stop after obtaining the minimum evidence required by the approved policy. Do not extract unnecessary data or publicize details. Use the organization’s security contact, vulnerability disclosure policy, or approved reporting platform, and keep a record of what you sent.
Your Next 15 Minutes: Begin With One Request
Do not begin by installing another dozen tools. Open your isolated lab and complete one small cycle from permission to documentation.
- Write the exact target hostname or IP and confirm that it belongs to your training environment.
- Check the VM network mode and verify that a clean snapshot exists.
- Open one ordinary page through your intercepting proxy.
- Identify the request method, path, parameters, cookies, and response code.
- Write one sentence describing what the request does and one sentence describing the control you expect.
That single request is enough for today. Read it until it stops looking like noise and begins looking like a conversation. Once you can explain the conversation, the tools become instruments rather than fireworks.
The five-line finish
Observation: What happened? Evidence: What request and response prove it? Risk: What realistic harm could follow? Fix: Which control should change? Retest: What secure result should appear afterward?
Last reviewed: 2026-08
Technical guidance updated: 2026-10-13. Clarified that host-only networking includes the host computer and repaired table-of-contents navigation.
Keep proxy certificate trust inside the lab workflow
Prefer the proxy’s dedicated browser or a separate test profile. If an external browser needs a proxy CA certificate, follow the PortSwigger certificate instructions for that browser and trust store. Do not solve interception problems by disabling certificate verification for ordinary browsing.
Keep personal accounts and real customer sessions out of the test profile. At the end, stop interception, restore the profile’s proxy settings, and remove unnecessary test CA trust from any store you changed. Treat proxy projects as sensitive: they may retain cookies, authorization headers, request bodies, and responses after the browser window closes. Export only the evidence approved for sharing.
Editorial review: 16 October 2026. Examples are illustrative; this review does not represent an audit or live control test.
Kali web-testing question record
Use this when: you are an authorized beginner using tools to answer one bounded application question. Copy these fields into your notes and replace each prompt with a dated response. Keep assumptions and unresolved questions visible.
| Field | What to record | Your evidence / owner / next check |
|---|---|---|
| Permission and endpoint | Record the approved application, account and test boundary. | To complete |
| Expected behavior | Describe the security or business rule being examined. | To complete |
| Observed conversation | Preserve relevant request, response and resulting state safely. | To complete |
| Next check | State a permitted observation that distinguishes the remaining explanations. | To complete |
Next action: Explain one web exchange and its resulting state before adding another tool. Mark the relevant row confirmed, provisional or unresolved. Keep the supporting record, responsible person and next check beside it so another reader can continue the work without treating an assumption as a result.
This is a blank practice record, not a report of a test performed by Kioptrix. Add the actual versions, approved conditions and observations from your own session.
Worksheet change record — October 20, 2026
Added this kali web-testing question record with four article-specific fields and an evidence-based next action. Existing source notes retain their own review dates. This addition is not a fresh verification of every statement or a newly executed test.