


Mastering the Kioptrix Foundation
Most Kioptrix failures do not begin with Nmap. They begin five minutes earlier, with a quiet mistake in Kali Linux setup that makes a perfectly ordinary lab look strangely unresponsive.
A wrong adapter, a mismatched subnet, or a missing snapshot can make a target seem “hard” when it is really just elsewhere. Beginner lab users often lose hours troubleshooting tools or phantom behavior when the real friction is simple: the VM network was never truly ready for enumeration.
This guide helps you build a clean, repeatable Kioptrix Level Kali Linux setup checklist. We move into scanning with evidence instead of theater by isolating the lab, verifying network modes, and confirming IP discovery before the noise begins.
“In practice labs, the smallest mistake often wears the smartest disguise. So start with the floorboards, then trust what the lab can actually prove.”
Table of Contents
Why setup first matters more than your first scan
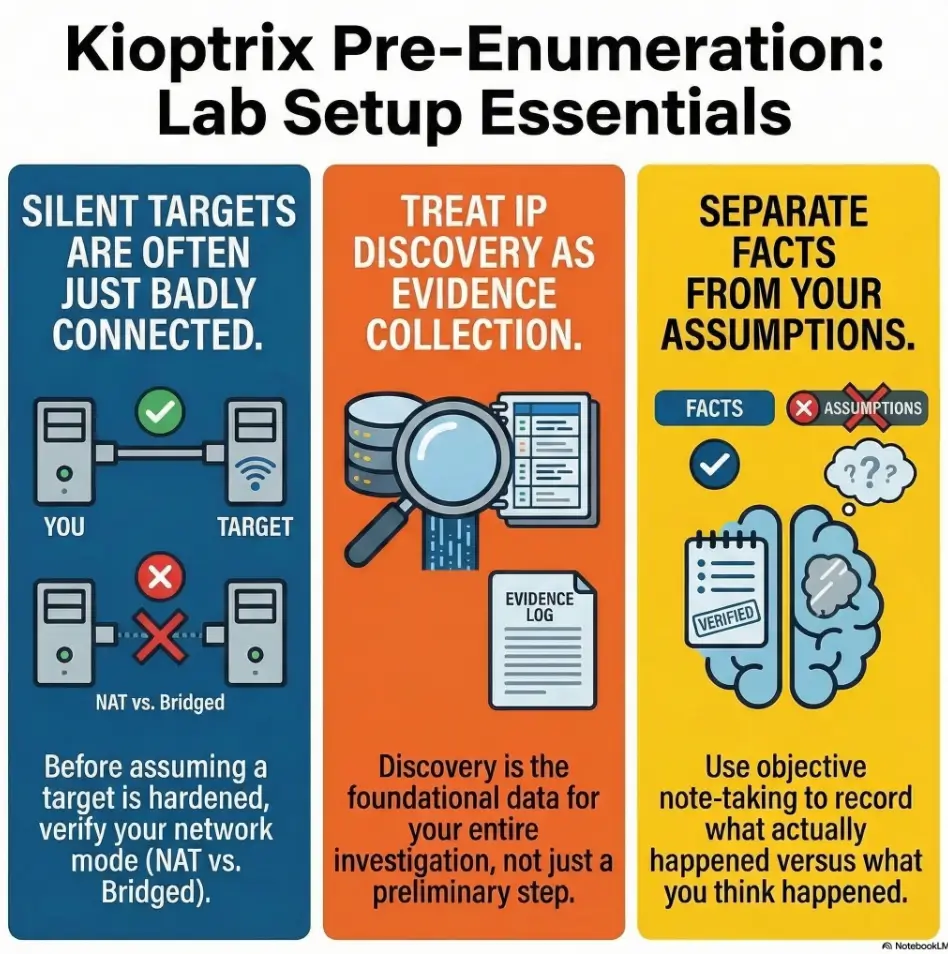
The quiet failure: bad lab wiring looks like “no vulnerabilities”
When a Kioptrix box does not answer, beginners often assume the machine is hardened, crashed, or somehow “too advanced.” In practice, the failure is usually much duller. The guest is on the wrong adapter. Kali got a lease, Kioptrix did not. The subnet is wrong by one sleepy-looking number. Your browser works, your terminal looks alive, and yet the target is standing in a different room entirely.
I learned this the impolite way years ago by spending almost an hour trying to interpret silence as a security clue. It was not a clue. It was a network mode mistake wearing a trench coat. That is the pattern this article tries to prevent.
What this checklist prevents before you waste an hour
This checklist is not about being precious. It is about reducing false negatives. If you verify the lab shape first, you avoid three expensive habits: scanning the wrong subnet, troubleshooting tools that are actually fine, and mistaking missing connectivity for “target behavior.” Those three errors can turn a 10-minute warm-up into a foggy 90-minute detour.
- Verify the lab before interpreting results
- Treat network mode as evidence, not background scenery
- Confirm the correct subnet before scanning anything wide
Apply in 60 seconds: Write down Kali IP, target IP, adapter mode, and virtualization platform before your first command.
Let’s be honest: most beginners blame the wrong thing
There is a very human urge to blame the interesting layer first. People suspect Nmap, firewall rules, weird kernel behavior, or a mystical Kioptrix quirk. Meanwhile, the VM was imported with a host-only adapter detached. The lab is like a piano with one leg missing, and we are debating the composer.
Lab boundaries first: what you should confirm before touching Kioptrix
Authorized use only: keep this inside a private lab
Kioptrix practice belongs inside an isolated, authorized environment. That means a local VM lab you control, not a public IP, not “just one quick scan” of something you do not own, and not a bridged experiment you barely understand. The safety part here is not ornamental. It is the floorboards. If you are still building that environment, a separate guide on creating a safe hacking lab at home can help you avoid sloppy boundaries from the start.
Which Kioptrix level you are actually running
“Kioptrix” is not one machine. Different levels behave differently, expose different services, and may be packaged a little differently depending on where you obtained them and how you imported them. Write down the exact VM name, source, and any notes that came with it. That sounds fussy until you later compare your ports with someone else’s walkthrough and realize you are not even in the same play. If you need a broader map, it helps to review the different Kioptrix levels before assuming your box should match someone else’s screenshots.
Host-only, NAT, or bridged: the network choice that changes everything
Your networking mode is not a decorative preference. Oracle’s VirtualBox documentation distinguishes host-only, NAT, and bridged as different network types with different visibility and reachability patterns. Host-only is usually the calmest choice for a contained practice lab because it keeps the traffic inside the machine and its guests. NAT can be useful, but it can confuse beginners because outbound access may work while peer discovery behaves differently. Bridged can place the VM more directly onto the surrounding network, which is exactly why it deserves extra caution in a practice lab. If you want a more practical side-by-side view, this comparison of VirtualBox NAT, host-only, and bridged behavior is useful background reading.
Snapshot now, regret less later
Take a fresh snapshot before you do anything noisy. This is the lab equivalent of putting a bookmark into a difficult novel. When something breaks later, and something usually does, you will have a known-good state to return to. I am in favor of curiosity. I am also in favor of not rebuilding a VM because one bright idea turned into three dull hours.
- Yes/No: Are both Kali and Kioptrix running as local VMs you control?
- Yes/No: Is the lab isolated from public or third-party systems?
- Yes/No: Did you record the exact Kioptrix level and platform?
- Yes/No: Did you take a clean snapshot before touching the target?
Neutral next action: If any answer is “No,” fix that before you enumerate.
Kali VM basics that should be boring, stable, and verified
Update Kali without turning your environment into a moving target
Kali’s official documentation recommends using apt update before installs and explains that Kali is a rolling release. It also warns against changing things mid-engagement if the tools already work, because rolling updates can occasionally introduce breakage. For a Kioptrix prep session, the sane move is simple: update deliberately, not impulsively, and avoid doing a big upgrade halfway through a lab because a package whispered your name.
My rule is boring on purpose. If this Kali VM is a lab workhorse, update it on your schedule, verify the core tools still behave, then freeze that state for the session. “I updated everything right before scanning” has the same energy as rearranging your kitchen during a power outage. If you are already in package limbo, the guide on Kali packages being kept back is often more relevant than another random forum tab.
Confirm your user privileges and sudo access
Before you do anything else, confirm that you can use sudo and that your user session behaves normally. You do not want your first privilege-related surprise to arrive halfway through a scan or while installing a missing package. This is a tiny check, but tiny checks are how labs stay honest.
Check disk space, RAM, and CPU before tools start misbehaving
Low RAM and cramped disk space create weird symptoms. Browser tabs lag. Scans feel inconsistent. Logs fail to save. The machine becomes a moody actor, and you end up diagnosing the mood instead of the cause. For a lightweight Kioptrix practice lab, you do not need a monster setup, but you do need one that is stable enough not to sabotage note-taking and basic discovery.
Time sync matters more than it seems
Time sync sounds like housekeeping until you start comparing logs, browser behavior, file timestamps, or screenshots. A drifted clock turns evidence into a jigsaw puzzle with two missing corners. If your host and guests are out of step, even your own notes will feel oddly haunted.
Show me the nerdy details
On a rolling-release security distro, package state matters. A clean lab prep habit is: verify repositories, run apt update before installs, perform full upgrades only when you can test afterward, and snapshot stable tool behavior. This reduces the chance that a package change, not the target, explains odd results.
Network mode check: the one setting that breaks enumeration before it begins
Host-only vs NAT vs bridged for a safe practice lab
Here is the practical version. Host-only is usually best when your goal is a quiet, contained lab where Kali and Kioptrix can see each other without drifting into the wider network. NAT is handy when a VM needs outbound internet, but it does not automatically make guest-to-guest discovery feel intuitive. Bridged mode can expose the guest more broadly on the network, which is why it deserves deliberate use rather than beginner optimism.
How to verify Kali and Kioptrix are on the same reachable segment
Do not trust the settings pane alone. Open Kali and verify the interface that is actually up. Then inspect Kioptrix from its console if possible, or discover it from Kali using a controlled local method. If Kali sits on one host-only network and Kioptrix sits on another, both machines can look perfectly fine while being perfect strangers. If you run into the classic case where the guest boots but never receives an address, this guide on Kioptrix VirtualBox host-only no IP is worth bookmarking.
VM adapter mismatches that make the target disappear
The classic lab failure is not “no network.” It is mismatched network. One adapter attached, one disabled. One host-only network created by VirtualBox, another by VMware. One VM cloned with stale assumptions. “Connected” is too generous a word for many of these states.
Here’s what no one tells you: “connected” does not mean “correctly connected”
A guest can have an IP address and still be wrong for your goal. NAT is the best example. You may have outbound internet from Kali, yet no sensible path to the target discovery method you expected. That is why a functioning browser inside Kali is not proof that your enumeration lab is ready. It proves only that one part of the machine is alive.
| Mode | Use it when | Trade-off |
|---|---|---|
| Host-only | You want a contained Kali ↔ Kioptrix practice segment | Less internet convenience |
| NAT | You need guest outbound access | Discovery assumptions get murkier |
| Bridged | You explicitly understand the surrounding network and need that behavior | Higher risk of sloppy exposure |
Neutral next action: Pick one mode for a reason, then test that reason.

IP discovery before scanning: find the target without guessing
Verify your own Kali IP address first
Before you hunt the target, identify yourself. Write down Kali’s active interface and IP address. This anchors everything that follows. If you do not know where you are standing, every later guess about the target becomes slightly theatrical.
Use arp-scan, netdiscover, or router views the smart way
In a contained lab, light-touch discovery makes sense. The goal here is not to impress the walls. The goal is to find the correct box with minimal confusion. If your lab has only two or three guests, keep the search narrow. Small sweeps beat dramatic sweeps when the real challenge is certainty.
How to spot the Kioptrix box among multiple lab machines
Look for context. New MAC appearance after boot. A predictable subnet. Service hints later on. If you cloned labs, naming conventions and boot order notes help more than people admit. I once labeled two nearly identical lab VMs with vague names that made perfect sense at midnight and no sense at breakfast. The machine was not hard to find. My naming was.
Don’t do this: scanning the wrong subnet and calling the box “dead”
This is one of the most common beginner mistakes because it feels productive. The terminal moves, the scan looks official, and the result is empty because the target was never there. Empty output is only meaningful after you prove your scope is correct. That is also why understanding the difference between Nmap -Pn and -sn matters earlier than many beginners expect.
- Confirm your own address first
- Keep the discovery range narrow and intentional
- Do not interpret silence until the subnet is verified
Apply in 60 seconds: Note Kali IP, interface name, and the exact subnet you intend to query.
Tool readiness: what Kali should have installed before enumeration starts
Nmap and NSE basics you will actually use
Nmap is the center of gravity for early enumeration, but the point is not to use every flag like a stage magician emptying a sleeve. The official Nmap guide explains that service and version detection interrogates discovered ports so you can learn what is actually running instead of relying only on port number guesses. That makes -sV a sensible next step after basic discovery, not a decorative flourish. If you are still building confidence with the fundamentals, this Nmap in Kali Linux for Kioptrix tutorial is a natural companion.
Netcat, curl, wget, and smbclient for quick verification
These tools matter because they let you confirm small things quickly. A banner. A response code. A file fetch. A basic SMB check. They are the pocket flashlight tools of the lab, and flashlights are underrated until the power goes out. When you want to validate web behavior without pulling in a bigger stack, curl-only recon on Kioptrix and wget mirroring for recon are both practical follow-ons.
Firefox or a browser with proxy options for web checks
If Kioptrix exposes HTTP, you want a browser ready to view the target as a user would, inspect headers, and later route through a proxy if needed. Not because you need a whole circus on day one, but because some clues are visual, plain, and easy to miss if you stay terminal-only out of principle.
Optional helpers: enum4linux, nikto, gobuster, whatweb
Helpful, yes. Mandatory, no. Beginners often install five extra tools to avoid facing one missing route. That is tool-sprawl, and it feels productive in the same way buying fancy notebooks feels like writing. Keep your optional stack lean until the target gives you a reason to widen it. For example, if SMB becomes clearly relevant, a focused enum4linux practical guide is more useful than spraying unrelated tools at the problem.
Minimal toolset vs tool-sprawl: what is enough for this lab
Enough is: a stable Kali VM, Nmap, basic network utilities, a browser, and a note workflow. More can come later. Early enumeration is a game of sequence, not volume. If you want a minimalist baseline, this list of essential Kali Linux tools for Kioptrix keeps the starting kit grounded.
- Virtualization platform and version
- Network mode for both VMs
- Kali IP and target IP
- Core tools available: Nmap, browser, smbclient, curl/netcat
- Snapshot name and timestamp
Neutral next action: Collect the environment facts before copying anyone else’s scan recipe.
Show me the nerdy details
Nmap’s version detection is especially useful after basic reachability because it asks the open service what it is, rather than assuming a port tells the full story. That is how you move from “port 80 exists” to “this specific service appears to be responding like X.”
Reachability tests that save you from fake dead ends
Ping first, but do not trust ping alone
Ping is a quick question, not a courtroom verdict. A missing ICMP reply does not prove the host is dead. It proves only that your current question did not get the answer you wanted. Some hosts ignore ICMP. Some paths distort your expectations. Some labs are simply miswired. The danger is not using ping. The danger is worshipping it.
Test common ports before launching a full sweep
Start small. A focused check against a few likely ports can tell you whether the target is alive, filtered, refusing, or merely not where you thought it was. That gives you signal early, which is a beautiful thing in any lab.
Read latency, resets, and silence like clues
A refused port is still evidence. Silence is evidence too, though often of a different kind. A quick response with refusal says a host may be there and actively saying “not this door.” A timeout can suggest filtering, wrong path, or a target that is absent from the expected segment. The shape of failure matters.
Tiny clue, big meaning: a refused port is still evidence
Beginners sometimes discard refused connections because they are not open ports. That is a mistake. A refusal still says something answered. It narrows the mystery. In lab work, narrowing the mystery is half the job.
If you have 1 target VM and 1 suspected subnet, start with the smallest viable check. If your first pass touches 256 addresses before you even confirmed the subnet, your scope is probably too loose for a beginner lab.
Neutral next action: reduce the range until each result means something.
Notes before noise: build a reporting habit before the first command
Create a simple note template for IPs, ports, banners, and hypotheses
You do not need an elaborate system. You need a system that survives confusion. A good note template has four lanes: facts, observations, hypotheses, and next actions. Facts are things like IPs, ports, service banners, timestamps, and screenshots. Observations are patterns. Hypotheses are your best current guess. Next actions are the one or two things you will test next. If you want a cleaner starting structure, an Obsidian OSCP enumeration template or a broader article on note-taking systems for pentesting can save you from inventing a messy system from scratch.
Screenshot rules that make writeups easier later
Capture the whole relevant window, not just the dramatic fragment. Include timestamps when practical. Name files so future-you does not have to become an archaeologist. “final2-reallyfinal.png” is a cry for help, not a workflow. A simple screenshot naming pattern makes this much less painful.
How to label evidence so you do not lose the trail
Use consistent naming. Something like date, VM, IP, and topic works well. If you later compare browser findings, service outputs, and shell results, you will thank yourself for choosing order over vibes.
Let’s keep it clean: messy notes create fake complexity
Bad notes create the illusion that the lab is more complicated than it is. I have watched five minutes of poor documentation manufacture forty minutes of confusion. In a beginner lab, clean notes are a force multiplier because they slow your imagination just enough to let evidence speak first. If you need a fuller workflow, this guide to Kali Linux lab logging is a strong next read.
- Record facts before theories
- Name screenshots consistently
- Keep one “next test” visible at all times
Apply in 60 seconds: Create a notes file with sections for IP, ports, web clues, SMB clues, and hypotheses.
Infographic: Kioptrix pre-enumeration flow
Read it left to right. If one box is uncertain, do not leap ahead. Walk back one square and verify.
Who this is for / not for
This is for beginners building a repeatable Kali-to-Kioptrix workflow
If you want a repeatable prep routine that works before the “real” enumeration begins, you are in the right place. This article is for the reader who would rather build a stable foundation than collect a pile of half-understood commands.
This is for students practicing inside authorized offline labs
If your lab is local, contained, and intentionally set up for practice, this checklist fits that world well.
This is not for live targets, public IPs, or “just testing” someone else’s box
This article is not a permission slip. It is a setup guide for authorized practice.
This is not for users looking for exploitation before verification
If your instinct is to skip reachability, skip notes, skip network sanity, and jump straight to payload fantasies, this guide will feel slow. That is fine. It is supposed to slow you down just enough to stop preventable mistakes.
Common mistakes that break Kioptrix enumeration before it starts
Forgetting to verify network mode after importing the VM
Importing or cloning a VM can quietly change assumptions. Never trust yesterday’s configuration to survive today’s import.
Treating missing ping replies as proof the host is down
Ping is useful, but not final. Missing ICMP is not the same as missing host.
Running scans before confirming the target IP
This is the beginner classic. The scan looks busy. The evidence stays thin. Busy is not the same as correct.
Skipping snapshots and losing a known-good state
Without a snapshot, every later oddity has two possible causes: the target, or something you changed. That doubles the fog.
Updating everything mid-lab and changing tool behavior
Kali’s rolling model is powerful, but it is not an invitation to redecorate your house while measuring the doorframes. Kali’s documentation specifically notes that updating during an engagement can introduce tool breakage, which maps neatly onto lab reliability too.
Don’t do this: install five extra tools when one missing route is the real bug
Extra tools can be wonderful. They can also become camouflage for a basic networking failure. When the lab is dark, do not buy more lamps before checking the breaker.
When the box still does not respond: a calm triage path
Start with layer one: is the VM actually powered on?
Yes, really. Check the obvious things without embarrassment. The obvious things are undefeated.
Check adapter attachment, subnet, and duplicate IP issues
If the VM is on, verify adapter state, network selection, and any duplicate addressing weirdness. These are not glamorous checks, but they are often the winning checks.
Verify local firewall behavior and virtualization platform quirks
Different virtualization platforms have their own odd corners. If you are mixing host-only concepts across tools, slow down and verify what the platform actually created. “I thought it meant…” is a very common lab genre.
Reboot order matters more than people admit
Sometimes the network settles cleanly only after a restart sequence. Host first, then virtualization platform, then the guests. I dislike ritual troubleshooting when it replaces thought. But I also respect the fact that stale virtual networking state can behave like a locked drawer until you jiggle the cabinet.
If nothing makes sense, return to the smallest test
Go back to the minimum: one interface, one IP, one target, one tiny check. Complexity is seductive because it feels intelligent. Simplicity is usually what gets you unstuck.
- Tier 1: VM powered on, adapter attached
- Tier 2: Kali interface verified, IP known
- Tier 3: Target discovered on expected subnet
- Tier 4: Light reachability evidence collected
- Tier 5: Focused service enumeration begins
Neutral next action: If you are not at Tier 3, do not pretend you are at Tier 5.
First enumeration plan after setup is confirmed
Run a focused discovery sweep, not a theatrical full storm
Once the lab is verified, keep the opening move disciplined. A small, intentional discovery pass is usually enough to confirm the target, identify the first interesting services, and preserve your attention. From there, a calmer Kioptrix recon routine or even a more general fast enumeration routine for any VM becomes much easier to apply correctly.
Start with top ports and service version detection
This is where Nmap earns its keep. Nmap’s official documentation explains that version detection helps determine what is actually running on discovered ports, not merely what port numbers suggest. That is a huge difference for a beginner, because it shifts you from assumption to evidence. If you later find that banners and detection output feel odd, a note on Nmap service detection false positives can help you interpret results more carefully.
Move from network evidence to service-specific checks
Once you know the host is real and some ports are speaking, let the service shape your next move. If you see web, inspect web. If you see SMB, verify SMB. Sequencing matters because every stage narrows the next question. For web paths, that often means moving naturally into Kioptrix HTTP enumeration. For SMB clues, it may mean checking SMB null session behavior on port 139 vs 445 before you assume the service is broken.
Why sequence matters on Kioptrix labs
Kioptrix is useful precisely because it teaches you that enumeration is a chain, not a fireworks display. The best labs are often quiet teachers. They punish impatience without raising their voice.
Short Story: A friend once messaged me in triumph because his first serious lab scan returned almost nothing. He assumed he had found a weirdly hardened box and was already planning exotic explanations. We walked backward instead of forward. The guest had internet through NAT, so Kali felt healthy.
The target had been imported with a different adapter expectation and sat on another virtual island. Ten minutes later, after aligning the network, the “mystery” dissolved into a perfectly ordinary beginner lab with visible services and a much kinder personality. The lesson was not that he had failed. It was that labs often reward humility first. Ask the small question before the clever one. The clever question will still be there in five minutes, and it will usually make more sense then.

FAQ
What is the best network mode for Kioptrix on Kali Linux?
For many beginners, host-only is the safest and clearest place to start because it keeps the practice environment contained and makes the lab relationship easier to reason about. NAT can work for some goals, but it can make discovery assumptions less intuitive. Bridged should be used deliberately, not casually. VirtualBox’s manual describes these network modes as distinct behaviors, not interchangeable decorations.
Can I use bridged mode for Kioptrix practice?
You can, but it is usually not the first recommendation for a beginner who wants a contained local lab. Bridged mode changes the environment in ways that deserve careful understanding.
Why can Kali not see the Kioptrix VM?
The most common causes are wrong network mode, mismatched adapters, wrong subnet assumptions, or failure to discover the target IP correctly. It is often a lab wiring issue, not a tool issue.
Do I need to fully update Kali before starting?
Not necessarily right before the lab. Kali’s documentation recommends update hygiene and also warns that rolling-release updates can sometimes break needed tools. A better approach is to update deliberately, test the environment, then lab on a stable snapshot.
Which tools should be installed before enumeration?
A stable baseline is enough: Nmap, a browser, basic utilities like curl or netcat, and SMB helpers if relevant. Optional tools can wait until the target gives you a reason.
Is ping enough to confirm the target is alive?
No. Ping is a quick signal, not final proof. Some hosts may not answer ICMP even when they are present and reachable in other ways.
How do I find the Kioptrix IP address in VirtualBox or VMware?
Start by confirming Kali’s address and the correct network segment. Then use controlled local discovery methods within that segment or inspect the guest console if available. The key is certainty, not drama.
Should I use enum4linux before Nmap?
Usually no. Nmap or similarly basic reachability checks should establish what is there first. Then service-specific tools can follow evidence instead of guesses.
What if my scan returns no open ports?
Pause and verify the foundation: target IP, subnet, adapter mode, host-only versus NAT assumptions, and light reachability clues. Empty results are meaningful only after the lab path is proven correct.
Can I practice Kioptrix on a laptop with low RAM?
Yes, in many cases, as long as the VMs are stable enough to boot, keep network state, and let Kali run the core tools comfortably. The bigger risk is not modest hardware. It is unstable hardware behavior that muddies your evidence.
Next step
Take a fresh VM snapshot, verify both IP addresses, and run one small discovery command against the correct subnet before doing anything heavier
The hook at the top of this article was simple: most early failures are setup failures wearing a clever mask. Now you have the antidote. Start by freezing a clean state. Confirm Kali’s interface and IP. Confirm where Kioptrix actually lives. Then run one small, meaningful discovery step against the right subnet. Not a storm. Not a performance. Just one clean move that gives you trustworthy evidence.
That is the real beginning of enumeration. Not the loudest command, but the first one you can defend. And once that foundation is solid, you can move on to more specific paths such as reading Kioptrix open ports correctly, a beginner-safe Kioptrix Level 1 walkthrough, or even the broader discipline of Kali Linux lab infrastructure mastery.
Last reviewed: 2026-03.