
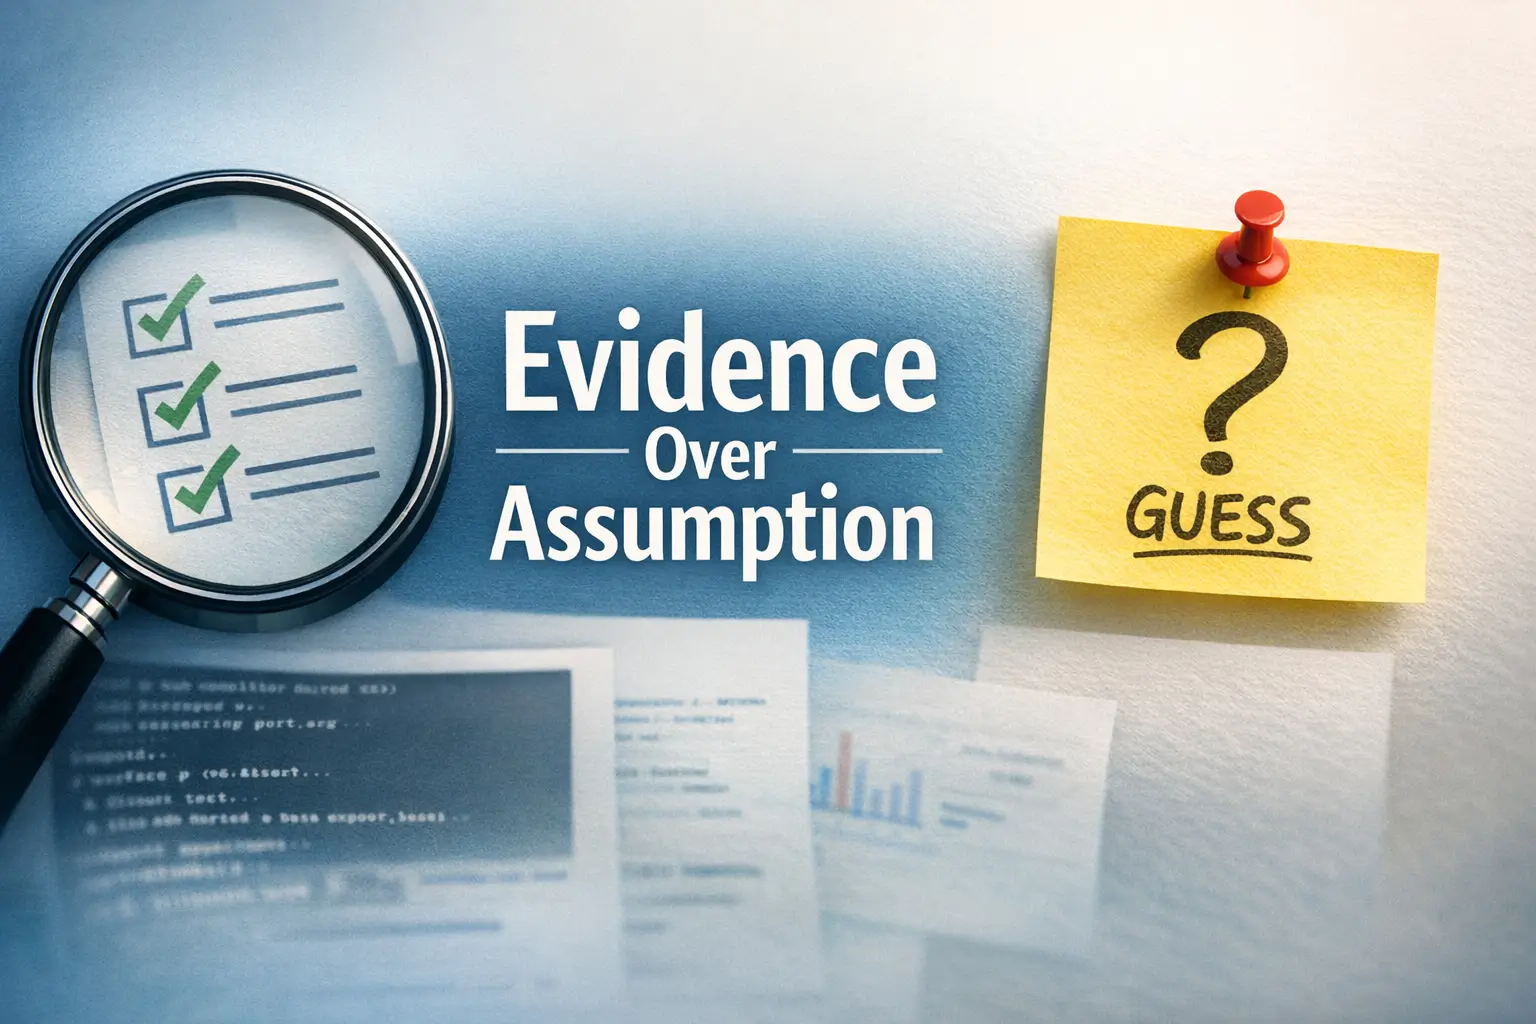

Precision Over Drama: The Kioptrix Reporting Standard
Most first Kioptrix practice report drafts do not fail because the lab work was weak. They fail because the evidence trail gets blurry. A service banner becomes a conclusion, a screenshot becomes a trophy instead of proof, and one promising result starts carrying more certainty than it can honestly hold.
That is the real friction here. When your notes are scattered and your scan output still feels half-translated, it is easy to write a report that sounds technical while quietly mixing enumeration, validation steps, and guesswork into one shaky story. The cost is credibility. Once a reader spots one overclaimed finding, even your solid evidence starts to look less solid.
“This post helps you build a cleaner habit: track what you observed, separate proof from interpretation, and write findings with limits that make them more trustworthy, not less.”
You will come away with a practical way to organize raw output, screenshots, confidence levels, and follow-up steps without turning your report into a junk drawer. The method is simple because beginner lab reporting needs discipline more than drama, and every section here is built around that sequence:
- 1. Observation
- 2. Validation
- 3. Interpretation
- 4. Limitation
So start there. Not with swagger. With traceable proof. Because a calm report beats an exciting one almost every time.
Table of Contents
- Separate facts from guesses
- Keep proof close to each claim
- Label uncertainty instead of hiding it
Apply in 60 seconds: Take one sentence in your draft that sounds absolute and add the exact output, screenshot, or limitation that supports it.

Start Here: What “Evidence Tracking” Actually Means in a First Practice Report
Evidence first, storyline second
Evidence tracking sounds grander than it is. In practice, it means writing your report so the reader can see the order of your reasoning. First you observed something. Then you tested it. Then you interpreted it. That is all. When beginners reverse that order, the report starts drifting. The story arrives before the proof, and suddenly a port scan is wearing a tuxedo and trying to pass as a verdict.
I made this mistake in one of my own early practice notes. I had a service banner, a version guess, and one successful response. In my excitement, I wrote the conclusion first and spent the next ten minutes trying to force the rest of the evidence to agree with it. That is not analysis. That is decorating a hunch.
The difference between a finding, a clue, and a guess
A lot of beginner confusion disappears once you sort results into three buckets:
- Finding: something you verified with reproducible evidence
- Clue: something suggestive that points to a next step
- Guess: something you think might be true but have not tested
That distinction matters because readers trust reports that know their own limits. A service banner may be a clue. A confirmed response pattern under a repeatable test may become a finding. A version assumption based on a tool guess alone is still a guess, no matter how nicely formatted the output looks. That is especially true when you have not yet learned to spot common banner grabbing mistakes or to recognize how service detection false positives can distort early conclusions.
Why beginner reports lose trust faster than they lose detail
Here is the small tragedy of many first reports: they are not too short. They are too certain. You can get away with missing detail more easily than you can get away with sounding overconfident. Once the reader sees one inflated claim, everything after it becomes harder to trust, even the solid parts.
A cleaner approach is simple. Let the evidence speak in a normal voice. Resist the urge to narrate every clue like it is a breakthrough. Save your drama budget for the moment you actually verify something.
- Yes / No: Can you point to exact output, a screenshot, or a reproducible step?
- Yes / No: Did you test beyond the first hint or banner?
- Yes / No: Could another learner repeat what you did from the report alone?
Neutral next step: If any answer is “No,” label it as a clue or an unverified lead, not a confirmed finding.
Who This Is For / Not For
This is for: first-time lab learners writing a practice report after enumeration
This guide is for the person who has run scans, taken screenshots, collected terminal output, and now faces the true final boss of the first lab: turning scattered proof into a readable report. If you are new to writing up enumeration, validation steps, or small chains of evidence, you are exactly where this article wants to meet you.
It is especially useful if your notes currently look like a suitcase packed in the dark. A few commands here, a screenshot there, a comment like “maybe vuln?” drifting by itself with no timestamp or context. We have all had that notebook page. It has the energy of a detective board built by an insomniac pigeon. If that feeling sounds familiar, the emotional side of the struggle is not unusual either. Many beginners hit the same wall described in first-lab anxiety in Kioptrix practice.
This is not for: red-team client deliverables, production incidents, or legal claims
This is not a template for client-facing assessments, production incidents, legal claims, or anything that requires formal methodology, peer review, or organizational standards. A practice report in a home lab can be honest and disciplined without pretending to be a compliance document or a consulting deliverable.
That distinction protects you in two ways. First, it stops you from overstating scope. Second, it keeps your learning report focused on the actual point: showing how you moved from observation to verification. There is no medal for writing your first lab note like you are presenting to six lawyers and a procurement committee.
If you only have screenshots and no notes, this still helps
Many beginners believe the report is doomed if they forgot to keep perfect notes during the lab. Not ideal, yes. Doomed, no. Screenshots can still be turned into evidence if you sort them by sequence, label them carefully, and reconstruct the chain with honest language. You may not recover every exact command, but you can still salvage clarity.
When I have had to rebuild from screenshots, the trick was always the same: do not fake memory. Write what the screenshot shows. State what it suggests. State what you no longer have enough proof to confirm. That honesty feels modest, but it increases trust immediately.
Show me the nerdy details
In practice reporting, scope language matters almost as much as technical accuracy. A report for a self-contained learning lab can focus on observation quality, reproduction steps, and reasoning discipline. A client deliverable needs documented methodology, constraints, impact framing, and review standards far beyond what a beginner practice note usually supports.
The Real Win: A Calm Report Beats an Exciting One
Why “I found something” is weaker than “I verified this condition”
Beginners often write like this: “I found a serious issue on the target.” It sounds strong. It also says almost nothing. What did you verify? Under what condition? Based on what output? The sentence is all trumpet, no bridge.
Compare that with: “The target responded on port 80, exposed a web service, and returned behavior consistent with the test condition shown below.” It is less flashy. It is also far more useful. Good technical writing is not a fireworks show. It is more like laying down stepping stones over shallow water. One solid placement at a time. If you need a contrast between noisy phrasing and useful phrasing, compare this mindset with a more structured technical write-up standard for Kioptrix-style reporting.
How overstating risk makes technical writing feel brittle
Once you start inflating the language, the report becomes fragile. Every sentence has to keep pretending certainty. You cannot admit a limit without breaking the mood you built. That is why so many exaggerated reports feel strangely stiff. They are balancing on a pile of maybe.
The calmer version is sturdier. It lets you say, “This suggests X, but I did not confirm Y.” That sentence does not weaken your work. It proves you understand the difference between evidence and appetite. In security learning, that distinction is half the craft.
Let’s be honest: most first reports try to sound smarter than the evidence allows
I say this gently because I have done it myself. There is a stage in early technical writing where we all try to sound like the person we imagine writes serious reports. The result is usually a cloud of abstract nouns hovering above one screenshot and a single successful command. It reads important. It also reads suspicious.
The grown-up move is not to sound bigger. It is to sound clearer. Replace “critical weakness” with the actual verified condition. Replace “severe exposure” with the specific behavior you observed. Replace “fully compromised” with the exact action you completed and the limitation that remains. Precision may feel less glamorous in the moment, but it ages beautifully.
| Signal you see | Best wording choice | Neutral next move |
|---|---|---|
| Tool hints or banner only | “Observed” or “suggests” | Run a validation step |
| Repeatable behavior under test | “Verified” or “confirmed under this condition” | Document exact proof |
| Partial chain, missing final proof | “Likely” or “not yet confirmed” | State the missing step explicitly |
Neutral next step: Read every finding title and remove any adjective that sounds bigger than the proof beneath it.
Evidence Ladder: Track What You Saw in the Right Order
Start with access conditions: host, network path, date, tool context
Every good finding begins before the interesting part. Start by recording the boring things. Yes, the boring things. They are the floorboards that stop the report from collapsing later. Note the target identifier, the date, the basic network path or reachability condition, and the tool context used to observe the result.
This matters because evidence without conditions becomes slippery on reread. A note that says “service responded” is much less useful than “service responded during enumeration from this host context on this date under these test conditions.” The difference is not decorative. It is what makes the observation reproducible. In labs like Kioptrix, that context often begins with a plain recon routine you can repeat every time and a stable view of the open ports you are actually working from.
Then record observable facts: open ports, banners, responses, error messages
Once the context is in place, move to the first layer of facts. Observable facts are the things you can show directly. Open ports. Banners. Response codes. Error messages. Prompt behavior. Returned text. These are not conclusions. They are the raw material conclusions are built from.
Keep them plain. Avoid interpreting too early. Write what you saw before you write what you think it means. One of the cleanest note habits is this: first line for observation, second line for interpretation. That small gap prevents a lot of accidental exaggeration.
Then separate validation steps from assumptions
The middle of the ladder is where reports usually wobble. Beginners often pile observations, assumptions, and tests into one paragraph. The reader cannot tell what happened first or which sentence is evidence versus inference. Separate them deliberately.
For example, if output suggests a service type, label that as a clue. If you then run a follow-up action that produces a specific response, label that as a validation step. If you still cannot prove the version, say so. You do not lose points for uncertainty. You lose trust when you pretend uncertainty is gone. That problem becomes even more obvious in web work, where the difference between Nikto findings and Nmap script output or between Dirb and Gobuster enumeration styles can change how much confidence a result really deserves.
End with confidence level: confirmed, likely, or unverified
Finish each evidence block by tagging your confidence level in normal language. You do not need a giant scoring framework. A simple three-step scale works well for first reports:
- Confirmed: verified with repeatable evidence
- Likely: supported by multiple clues, but missing final proof
- Unverified: interesting lead, not yet tested enough
This does two quiet but powerful things. It keeps your own thinking honest, and it helps the reader prioritize what is solid versus what is still exploratory. In practice reports, that is gold. A finding with a modest confidence label feels more trustworthy than a sweeping claim with no label at all.
- Record context before results
- Keep observations separate from interpretation
- Use simple confidence labels
Apply in 60 seconds: Add “Confirmed,” “Likely,” or “Unverified” to the end of each draft finding and check whether the wording truly matches the proof.

Screenshot Discipline: Capture Proof Without Turning the Report Into a Junk Drawer
What to screenshot every time
Screenshots are useful when they preserve a moment the reader needs to see. They are not useful merely because the terminal happened to be on your screen. Capture screenshots when they do one of four jobs: establish context, preserve a key output, show a meaningful transition, or document a result that would be cumbersome to quote in full.
For first practice reports, useful screenshots usually include target reachability, notable service responses, important validation results, and any visual state that clarifies what happened. If the screenshot helps the reader understand the step without guessing, it belongs. If it just proves that you have a monitor, probably not.
What not to screenshot unless it changes the reader’s understanding
You do not need a screenshot for every command. That way lies chaos. A report stuffed with redundant images becomes slower to scan and harder to trust because the proof is buried under repetition. Think of screenshots as exhibits, not wallpaper.
I once reviewed my own early notes and found six screenshots that all showed the same ongoing scan at slightly different percentages. That was not documentation. That was anxiety with file names. Keep the screenshots that move the case forward. Let the rest go.
Naming screenshots so your future self does not get lost
File naming is the sort of boring discipline that pays off like compound interest. You do not need a complex scheme, just a stable one. Include sequence, topic, and result in the file name. For example:
- 01-reachability-ping-response.png
- 02-web-service-banner.png
- 03-validation-response-condition.png
That naming style helps you reconstruct the chain later. It also makes drafting faster because you are not opening thirteen files called “Screenshot 2026-03-24 at 2.14.09 PM.” That file name is not a clue. It is a cry for help. If you want a sturdier convention, a dedicated screenshot naming pattern for security notes saves an absurd amount of future confusion.
Here’s what no one tells you: unlabeled screenshots age like milk
A screenshot without context looks obvious on the day you take it. Two weeks later, it becomes strangely mysterious. Which host was this? Before or after the follow-up test? Did this screenshot support the finding or just lead to it? Memory is a charming liar. Label the screenshot while the moment is fresh.
The easiest habit is to pair each saved image with one sentence in your notes: what it shows, why it matters, and where it belongs in the chain. That tiny sentence is often what rescues the screenshot from becoming visual clutter. This is the same reason disciplined lab logging in Kali tends to outperform improvised memory every single time.
- The exact step or command it belongs to
- The finding or clue it supports
- A one-line caption in plain English
- The confidence level of the claim nearby
Neutral next step: Rename your three most important images before drafting the next section of your report.
Don’t Skip This: Keep Raw Output and Plain-English Notes Side by Side
Terminal output is evidence
Raw terminal output matters because it preserves the original shape of the result. The spacing, response, status, returned text, and sequence often matter more than we realize in the moment. It is the closest thing you have to a witness statement from the machine. Do not throw it away just because it looks messy.
For a beginner report, you do not need to paste every mile of raw output into the body. But you do need to keep the relevant parts somewhere intact. Otherwise you risk paraphrasing too confidently and smoothing away the very nuance that made the result interpretable.
Plain-English notes are interpretation
Evidence alone is not enough. Reports are for humans, not only for terminals. Plain-English notes help explain why a result mattered, what it might indicate, and what you did next. This is where you translate the machine’s behavior into a readable path.
The crucial trick is not to confuse the two. Raw output is not the same as your interpretation of raw output. When you blend them, you can accidentally upgrade hints into conclusions. Keep the transcript and the explanation close together, but not fused together like they are trying to become one giant paragraph monster.
Why you need both if you want the report to survive rereading
A report often feels complete on the day you write it because your memory is still carrying half the context silently. A week later, that invisible context evaporates. What remains are your notes. If they contain only output, the meaning may be hard to recover. If they contain only interpretation, the evidence may be too thin to trust.
That is why the side-by-side habit works so well. It keeps one foot in the original observation and one foot in your reasoning. Together, they survive time much better than either one alone. For many learners, a reusable note-taking system for pentesting is the bridge between chaotic sessions and reports that can still be understood a week later.
A simple two-column note habit that prevents fuzzy claims
You do not need fancy software for this. A plain two-column note table works beautifully:
| Raw output / proof | Plain-English note |
|---|---|
| Observed service response, banner, code, or returned text | What this suggests and why it matters |
| Follow-up validation step result | What moved from clue to verified condition |
| Missing proof or failed step | What remains unknown and what to test next |
That little table has saved more of my own draft sanity than I care to admit. It keeps me from writing the report I wish I had and forces me back toward the report I can actually support.
Show me the nerdy details
Side-by-side evidence logging also helps when multiple tools report overlapping but not identical details. Comparing raw output directly against your interpretation makes it easier to catch when a scanner hint, banner string, or transient response has quietly become overstated in prose.
- Raw output preserves the original result
- Plain-English notes make the report readable
- Together they prevent fuzzy claims
Apply in 60 seconds: Create two headings in your notes right now: “Observed” and “Interpretation,” then move one mixed-up paragraph into the correct buckets.
Common Mistakes That Make First Practice Reports Hard to Trust
Writing conclusions before verification
This is the classic beginner move because it feels efficient. You see a clue, your brain leaps ahead, and the report starts writing itself in your head. The danger is that you become attached to the conclusion before you finish testing. Now every later note is quietly serving that storyline.
The fix is wonderfully humble: delay the conclusion. Write the observed condition first. Then write the follow-up step. Only after the validation result lands should you decide whether the report has earned a stronger sentence. It is less glamorous and much more reliable.
Treating service banners as final proof
Banners are useful. They are not sacred scripture. A banner can point you in a direction, but it is not always definitive proof of service version, configuration, or exploitability. Beginner reports often get into trouble when a scanner hint or displayed string is treated like the last word.
A better habit is to use banner evidence as the start of a sentence, not the end of the argument. “The banner suggested X, so I tested Y.” That is a clean, honest chain. It shows curiosity without pretending a clue has already graduated.
Mixing scan noise with real evidence
Not everything that appears in output deserves equal weight. Labs generate noise. Repeated lines, ambiguous hints, timing quirks, and tool chatter can make your notes feel busy while adding very little proof. A report becomes stronger when you sort signal from decoration.
One of the quiet skills in writing is deciding what not to include. If a line does not affect the reader’s understanding of what was observed, validated, or left unverified, it may not belong in the main body. You can keep it in raw notes without making the report carry it like extra luggage. This is a frequent problem in early recon, and many of the patterns show up in common Kioptrix recon mistakes and enumeration mistakes that make clues look larger than they are.
Confusing reachability, enumeration, exploitation, and post-exploitation
These stages blur easily in a beginner write-up, especially when the notes were taken in a hurry. But the distinction matters. Reachability tells you whether you can talk to the target. Enumeration tells you what the target appears to expose. Validation tests move clues toward confirmed conditions. Later actions belong to later phases. If you collapse all of that into one fuzzy narrative, the report becomes hard to follow and easy to overread.
Think of these as separate rooms in the same house. You may walk through them quickly, but you should still label which room you were in when a result happened. One reason this confusion happens is that a walkthrough-ready chain feels smoother on reread than it did live, but the report should still preserve the separation between enumeration in Kioptrix and what comes later in Metasploit-driven validation or exploitation work.
Calling something “critical” without scope or impact context
Words like “critical,” “severe,” and “catastrophic” feel exciting, but in practice reports they are often out of proportion to the evidence actually shown. Without scope, impact context, and careful validation, those labels tend to sound borrowed rather than earned.
For a first home-lab report, you almost always gain more credibility by describing the verified condition plainly instead of trying to rank it dramatically. Trust the detail. It is stronger than the adjective anyway.
- Tier 1: Single clue only
- Tier 2: Clue plus basic context
- Tier 3: Clue plus follow-up test
- Tier 4: Repeatable validation with proof attached
- Tier 5: Verified condition plus clear limits and next steps
Neutral next step: Mark each draft finding Tier 1 to Tier 5 and prioritize improving the ones stuck below Tier 3.
Small Frictions, Big Errors: Where Beginners Usually Misread the Trail
Version strings can hint, not prove
One of the easiest traps in a beginner lab write-up is the version string. It appears, it looks precise, and the brain immediately wants to build a castle on top of it. Resist that urge. A version string can be helpful, but it is still evidence that must be interpreted carefully. It may be incomplete, misleading, or only one part of the story.
That does not mean version data is useless. It means you should treat it like a signpost instead of a certificate. The report gets stronger when you write, “The observed string suggested this possibility,” rather than “This definitively proves the exact state.”
A tool result is not the same as a validated condition
Tools are useful companions. They are not your final editor. A tool result may offer a likely interpretation, but a good report distinguishes between what the tool inferred and what you personally verified through the next step. That distinction sounds subtle until you reread a draft and realize three-quarters of the certainty came from your scanner sounding confident on your behalf.
Tools help you see faster. They do not remove the need to think. In fact, the better the tool output looks, the more carefully you should decide what belongs in the “verified” bucket. That is why learning to read Nikto scan results in older labs or to filter Nikto false positives in older environments matters more than simply collecting more scanner output.
One successful command does not explain the whole chain
Beginners often place too much meaning on the first successful action. A single success can matter a great deal, but it does not automatically explain everything that led to it. The chain still matters. What condition enabled the step? What was actually confirmed? What remained unclear even after success?
I have had moments in labs where one command finally worked and I nearly wrote the report like angels had descended over the terminal. Then I realized I could not clearly explain the stages that got me there. The result was real, but the story was incomplete. A report should not merely celebrate the endpoint. It should preserve the path.
Let’s slow that down: if the callback failed, the story is incomplete
This is where calm wording saves you. If part of the chain failed, the report should say so. A failed callback, incomplete response, or broken follow-through does not erase the earlier evidence, but it does limit the conclusion. That is not embarrassing. It is valuable. Failure narrows the truth.
In first reports especially, some of the most credible sentences are the modest ones: “The test reached this stage, but I did not confirm the next condition.” Readers trust that sentence because it sounds like someone who knows the map and the missing mile. Anyone who has wrestled with target found but no session opens in Metasploit knows how often the missing mile is the whole story.
- Treat version strings as signposts
- Separate tool inference from your validation
- Document where the chain stopped
Apply in 60 seconds: Find one place where your report says “confirmed” and ask whether it was confirmed by you, or merely suggested by a tool.
Report Architecture: Build Sections That Let Each Finding Stand Alone
Finding title that says what was verified
A strong finding title does not tease. It states. The title should say what was actually verified, not what felt exciting. This matters because readers skim. If the title is inflated, vague, or built around mystery, the report begins losing trust before the section even starts.
Try titles that describe the condition in plain language. Focus on what the evidence supports. If you only verified a response, say that. If you only confirmed exposure under a certain path, say that. A modest title with solid proof underneath feels wonderfully adult.
Evidence block: commands, outputs, screenshots, timestamps
Right after the title, give the proof. This is where the report shows its work. Include the exact command or action at a level that helps the reader follow the sequence, then the relevant output or screenshot, and, when helpful, a time or order marker. You are not trying to write literature here. You are building a clean exhibit table.
The mistake to avoid is hiding the proof deep in the middle of prose. When evidence is buried, the report becomes slippery to audit. Put the proof where the eye can find it. Let the reader see the backbone quickly. If your end goal is a polished deliverable, reading how to read a penetration test report can sharpen your sense of what a good evidence block looks like in the wild.
Interpretation block: what the evidence supports and what it does not
Once the proof is visible, interpretation becomes much easier to trust. This block should answer two questions: what does the evidence support, and what does it not yet support? That second half matters enormously. It keeps your reasoning from growing beyond the fence line.
When I write these blocks well, they are often only two or three sentences. The power is not in length. It is in the clean border between observation and meaning.
Limitation block: what you could not confirm yet
This may be the most underrated part of a beginner report. A limitation block tells the reader what remains unknown, incomplete, or untested. It stops the report from sounding accidentally absolute. It also gives you a natural place to park the next question instead of smuggling it into the finding like fake certainty.
Ironically, limitation blocks often make a report feel more competent, not less. They signal that you know where the proof stops. That is a mark of judgment, not weakness.
Why this structure helps Google Passage Ranking and human trust at the same time
There is a pleasant overlap here. A section that stands on its own with a clear title, evidence, interpretation, and limitation is easier for humans to scan and easier for search systems to parse meaningfully. Each section becomes a self-contained answer instead of a wandering chapter.
That does not mean you write for machines first. Quite the opposite. The more a section cleanly answers a real reader’s question, the better it tends to perform structurally. Clarity is one of those rare virtues that helps almost everyone in the room.
If you have 5 findings and each one loses the reader for even 30 seconds because the proof is buried, that is 150 seconds of friction.
Put the evidence block first and you may save your reader 2 to 3 minutes across one report.
Neutral next step: Reorder one finding so the title, proof, interpretation, and limitation appear in that sequence.
Don’t Do This: Stop Writing Like Every Clue Is a Breakthrough
Red-flag phrases that overinflate the write-up
Certain phrases make beginner reports sound puffed up immediately. “This proves total compromise.” “A devastating vulnerability was discovered.” “The target was completely exposed.” These lines may feel satisfying in the moment, but unless your evidence is astonishingly complete and tightly bounded, they usually oversell the situation.
A good test is simple. If the sentence sounds like it wants entrance music, it probably needs editing. Reports do not need swagger. They need traction.
Safer wording for uncertain results
Safer wording is not weak wording. It is precise wording. Try phrases like these instead:
- Observed: when you directly saw the condition
- Suggests: when the evidence points in a direction
- Consistent with: when behavior matches a possibility but does not prove it alone
- Not yet confirmed: when the final proof is missing
These phrases do quiet, elegant work. They create room for truth. They let the reader feel that the report knows where its own floor ends.
How to describe possibility without pretending certainty
You can absolutely mention likely possibilities in a practice report. The trick is to anchor them correctly. Tie them to the evidence that raised the possibility and to the missing step that prevents full confirmation. That is the cleanest way to be useful without becoming theatrical.
For example: “The observed response suggests this service may match the identified condition, but I did not complete a follow-up step sufficient to confirm the exact state.” That sentence may not get invited to a parade, but it will age better than most flashy alternatives.
The quiet power of “observed,” “suggests,” and “not yet confirmed”
These phrases feel small, but they are doing serious work. They keep your writing honest under pressure. They let you say something useful now without borrowing certainty from a future you has not earned yet.
In a strange way, restrained language also makes your genuinely strong findings stand out more. When everything is described as explosive, nothing is. But when most clues are written calmly, a truly well-supported finding carries real weight.
Plain rule: If the evidence is modest, let the sentence be modest. That is not timid writing. That is disciplined writing.
First-Practice Workflow: A Repeatable Evidence Log You Can Use Every Time
Before scanning: define target, scope, and note template
The best evidence logs start before the first interesting result appears. Set up a note template before you begin. It does not need to be elaborate. You just want fields for target, date, context, observed output, interpretation, screenshot name, and next question. That small structure reduces future panic enormously.
When I skip this step, I always regret it about 40 minutes later, right when the screenshots pile up and my notes start using words like “that weird thing” and “maybe this one?” Technical clarity does not usually collapse in one dramatic moment. It leaks out through lazy placeholders. For readers who want a more ready-made starting point, an enumeration template in Obsidian or an OSCP-style host note template can make this setup phase much easier.
During enumeration: capture only what moves the case forward
During the active phase, do not try to preserve every atom. Capture the facts that matter to the chain. If a result changes your next step, save it. If it merely repeats something you already know, keep it in raw logs but do not let it crowd the main note stream.
This is where beginner reports often become exhausting. They mistake accumulation for rigor. A cleaner approach is selective preservation. You are not trying to create a museum of every keystroke. You are building a map another reader can walk.
After each test: log outcome, proof, and next question
One of the best habits you can build is the post-step triad. After each meaningful test, jot down three things:
- Outcome: what happened
- Proof: what output or screenshot supports it
- Next question: what this result makes worth checking next
This rhythm keeps your notes forward-moving without letting them melt into a diary. It also prevents a common beginner problem: arriving at the end of the lab with lots of raw output but no memory of why you ran half the steps in the first place.
Before drafting: remove duplicates and sort by confidence
Before you begin the actual report, do one short cleanup pass. Remove duplicate proof, merge overlapping notes, and sort your findings by confidence. Put the strongest, clearest findings first. Readers appreciate early traction, and so do you. Starting with a murky maybe when you have a well-supported verified condition available is like opening a concert with the tuning noise.
Sorting by confidence also helps emotionally. It stops you from trying to make weak findings sound bigger just to fill space. The report does not need everything to be dramatic. It needs the strong parts to be clear and the weaker parts to be framed honestly.
- Prepare a note template before the lab
- Capture only what advances the chain
- Sort findings by confidence before drafting
Apply in 60 seconds: Create a three-line note shortcut: “Outcome / Proof / Next question,” and use it for your next validation step.
Next Step: Write One Finding Using the “Claim-Proof-Limit” Pattern
Claim: what you verified
If you want one pattern that improves a first practice report almost immediately, use this: Claim, Proof, Limit. Start with the claim, but keep it narrow. The claim should say only what the evidence genuinely supports. Not the whole theory. Not the inferred narrative. Just the verified condition.
Examples of strong claim shape include things like: “The target exposed a reachable web service under the observed condition,” or “The test produced the response shown below, consistent with the validated step.” The sentence is doing less, and that is exactly why it works.
Proof: the exact output or screenshot that supports it
Next, attach the proof as directly as possible. This can be a short excerpt of output, a screenshot, or a concise evidence block with context. The key is proximity. Do not make the reader wander across three paragraphs to find what supports the sentence.
When proof sits close to the claim, trust rises. When proof is delayed, vague, or tucked away in a caption nobody will notice, trust drops. This is not because the reader is impatient, though they probably are. It is because technical writing depends on visible support.
Limit: what remains unknown
Then end with the limit. This is where many first reports mature in a single sentence. State what you could not confirm, what condition remains unclear, or what additional proof would be needed to strengthen the finding. That sentence turns the report from puffed-up narration into measured analysis.
It also helps future you. Good limitation lines often become perfect to-do markers for the next practice round.
Do this today: rewrite your strongest finding in three sentences only
Here is the exercise I recommend most. Take the strongest finding in your current draft and rewrite it using only three sentences:
- Claim: what you verified
- Proof: what exactly supports it
- Limit: what remains unknown
That tiny constraint is surprisingly powerful. It trims hype, exposes missing proof, and forces the section into a shape that both humans and your future self can understand quickly.
Short Story: The Screenshot With No Name
On one of my earliest lab write-ups, I had a screenshot that I was sure would anchor the whole report. It showed the moment a test finally returned something meaningful. I remembered the relief of it, the little internal trumpet blast, the sense that the puzzle had cracked. Two days later, when I sat down to write, I opened the image and felt my confidence drain like bathwater.
Which stage was this from? Was it before the follow-up check or after it? Was this the clue or the confirmation? I had saved the image as a default timestamp and written no caption. The screenshot had gone from trophy to riddle. I ended up keeping it in the report, but only after surrounding it with careful caveats. That was the day I learned a small embarrassing truth: unlabeled evidence does not stay evidence for long. It becomes archaeology.

FAQ
How detailed should a first Kioptrix practice report be?
Detailed enough that another learner can follow your reasoning, but not so bloated that the key findings disappear inside repetition. Focus on the chain that matters: context, observed result, validation step, interpretation, and limitation. A shorter report with clean proof is stronger than a long one full of noise.
Do I need screenshots for every command I run?
No. Screenshot the moments that establish context, preserve important output, or clarify a meaningful transition. Redundant screenshots make reports slower to read and harder to trust. Keep the ones that change the reader’s understanding.
What is the difference between evidence and interpretation in a lab report?
Evidence is what you can directly show: output, screenshots, responses, timestamps, observed conditions. Interpretation is what you think that evidence means. Good reports keep the two close together but clearly separated.
Can I mention likely vulnerabilities if I have not confirmed them yet?
Yes, but frame them as possibilities, not confirmed facts. Use language like “suggests,” “consistent with,” or “not yet confirmed,” and identify the missing validation step. That way you stay useful without overstating the result.
How do I organize notes when multiple scan results overlap?
Sort them by finding or test objective rather than by raw chronology alone. A two-column structure works well: proof on one side, plain-English interpretation on the other. Then group overlapping results under the same potential finding and sort by confidence.
Should a beginner report include failed attempts?
Yes, when the failed attempt helps explain limits, missing proof, or why a conclusion remains incomplete. You do not need every dead end, but meaningful failures often improve credibility because they show where the chain stopped.
What makes a practice report look exaggerated?
Vague dramatic wording, inflated severity labels, conclusions that arrive before proof, and tool results presented as if they were final verification. Exaggeration often comes less from length than from certainty that the evidence has not earned.
Is raw terminal output enough without explanation?
Usually not. Raw output preserves evidence, but without brief explanation the reader may not know why the result matters. The strongest reports pair the original output with plain-English interpretation and a clear statement of limits.
Conclusion
The curiosity loop from the beginning closes here in a simple way: the best first Kioptrix practice report does not come from sounding intense. It comes from leaving clean footprints. A useful report is not a monument to excitement. It is a map of observation, proof, and restraint.
If you remember only one thing, let it be this: write what you can support, show what supports it, and name what remains unknown. That pattern is humble, but it travels well. It will make your first report clearer, your future reports faster, and your thinking sharper under pressure. And when you are ready to turn that habit into a more formal deliverable, a Kali pentest report template or a Kioptrix pentest report example can help you bridge from practice note to polished structure.
In the next 15 minutes, pick one draft finding and rewrite it using the Claim-Proof-Limit pattern. Rename the screenshots that support it. Add a confidence label. Then stop. You do not need to perfect the whole report today. One cleaner finding is enough to change the tone of the entire document.
Last reviewed: 2026-03.