

Mastering Kioptrix Level 1: A Disciplined Approach
Most first runs at Kioptrix Level 1 in Kali Linux do not fail because the lab is hard. They fail because beginners burn 20 minutes on the wrong service, the wrong IP, or a terminal full of commands they cannot explain afterward.
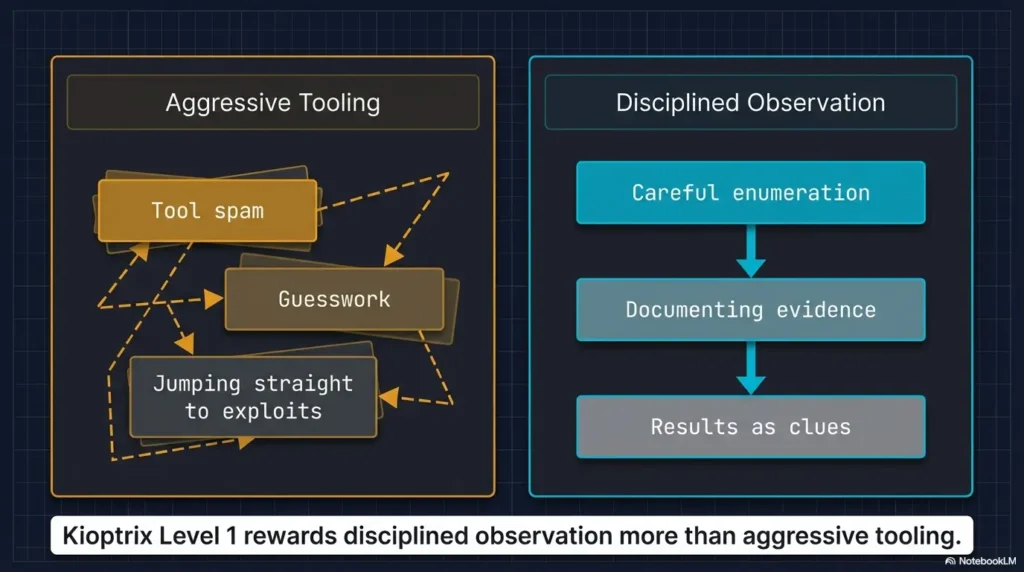
That is the real friction in an authorized lab: not lack of tools, but lack of sequence. One noisy Nmap pass, one ignored web clue, one sloppy SMB assumption, and the whole session turns into guesswork wearing a hacker costume. Keep guessing, and you do not just lose time, you lose the reasoning chain that makes penetration testing skills transferable.
This guide helps you move through reconnaissance, service enumeration, foothold validation, and privilege escalation with a cleaner workflow that is actually reproducible. You will know what to check first, what to ignore for now, and how to turn raw output into useful evidence instead of terminal confetti.
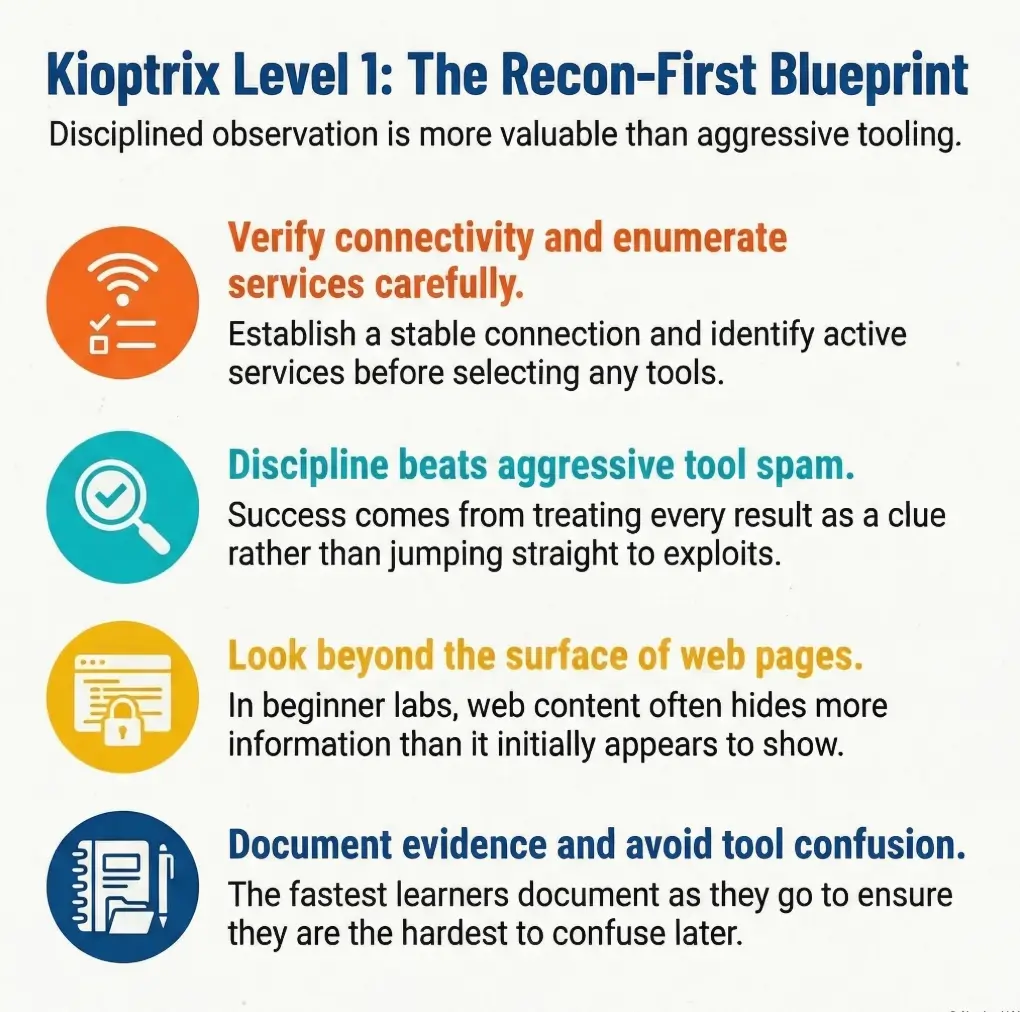
The method here is old-school in the best way: verify the network, read the signals, match the evidence, document the path.
- # No Tool Spam
- # No Cinematic Typing
- # Sharper Results
Just a safer, sharper route from first scan to first shell. And that is where beginner confidence usually starts.
Table of Contents
Start Here First: Who This Is For / Not For
Who this is for
This guide is for first-time lab users running Kali Linux in a home lab or virtualized practice environment. It is also for the person who does not just want a shell, but wants a repeatable process they can explain later without mumbling “and then… something happened.” That last part matters more than beginners think.
If you are a student, an entry-level blue teamer trying to understand attacker logic, or a curious learner building discipline in a legal sandbox, this is your room. The goal is not speed. The goal is signal. In a good lab session, you should be able to answer three questions at any point: what do I know, how do I know it, and what should I verify next?
Who this is not for
This is not for anyone trying to apply lab tactics to systems they do not own or do not have explicit permission to test. It is also not for readers who want a magic-trick walkthrough with no reasoning between steps. Kioptrix teaches a habit that becomes priceless later: old targets often give away more than they should, but only if you are patient enough to notice.
I still remember one of my own early practice labs where I spent 25 minutes chasing the “interesting” service and ignored the boring web page. The boring web page won. It often does. Beginner labs are full of that kind of quiet irony.
- Stay inside an authorized VM lab
- Prefer evidence over assumptions
- Write down each clue before the next command
Apply in 60 seconds: Open a notes file now and create four headings: Network, Web, SMB/RPC, and Privilege Escalation.
Lab Before Loot: Build the Environment the Right Way
Confirm your virtual network actually works
Before you scan anything, confirm that Kali and Kioptrix sit on the same lab network. Use whichever virtualization platform you prefer, but make sure both VMs share the same isolated segment. NAT confusion and adapter mismatches have ruined more “exploitation attempts” than any patch ever did. The machine is not always hard. Sometimes the room is simply wired wrong.
On Kali, start with the plain, boring commands that save you later:
ip addr
ip route
ping -c 3 <gateway-or-known-host>
You are not trying to be impressive yet. You are trying to verify reality. In many beginner labs, the first real win is learning to distrust your assumptions about networking. That tiny habit pays rent forever.
Verify Kali and Kioptrix can see each other
If you already know the target IP, test basic connectivity. If you do not, the next section will handle discovery. Right now, you only care whether the network behaves like a shared room or like two apartments arguing through the wall.
Kali’s own documentation notes that some tools behave differently when run as non-root, and specifically points out that Nmap defaults differ depending on privileges. Privileged users get a SYN scan by default, while unprivileged users fall back to a full TCP connect scan. That matters because your results and timing can change even when your command looks “the same.”
Snapshot first so one bad move does not poison the whole lab
Take a VM snapshot before deeper testing. I say this with affection and a little battlefield fatigue: you will break something eventually. Maybe an exploit crashes the service. Maybe you corrupt the box by accident. Maybe you make a note that says “works now” and forget how you got there. Snapshotting turns panic into housekeeping.
My own rule is simple: snapshot at three points. Before discovery, after initial foothold, and after root. Three restore points are enough for most beginner labs and save absurd amounts of time.
Let’s be honest…
A surprising number of “exploitation failures” are really adapter-mode mistakes, IP confusion, or broken VM settings wearing a hacker costume.
- Yes/No: Kali and Kioptrix are on the same isolated VM network
- Yes/No: You can identify Kali’s IP with
ip addr - Yes/No: You created a snapshot before scanning
- Yes/No: You have a notes file open for evidence
Next step: If any answer is “No,” fix that before moving on.
First Clue Wins: Find the Target Without Guesswork
Identify the Kioptrix machine on your local lab subnet
Now discover the target calmly. Start with your own IP and subnet, then probe the local range. If your lab subnet is, for example, 192.168.56.0/24, use a host-discovery step that is readable and easy to document.
ip addr
sudo nmap -sn 192.168.56.0/24
Nmap’s official reference describes it as a network exploration and security auditing tool with host discovery, port scanning, version detection, and OS fingerprinting features. That matters here because even the “simple” ping-scan stage is part of a larger workflow, not a separate hobby. If you are unsure when to use host discovery versus forcing a scan, this is exactly the kind of distinction covered in the difference between Nmap -Pn and -sn.
If multiple machines answer, compare MAC vendor hints, hostnames if present, and service patterns in later steps. Do not guess. Guessing is how people end up scanning the wrong VM and writing deeply confident nonsense.
Separate your attacker IP from the target IP before you do anything else
Write both IPs down in plain English. Something like this:
Attacker (Kali): 192.168.56.101
Target (Kioptrix): 192.168.56.105
This sounds almost childishly simple until you mix them up once. Then it becomes sacred. In one older lab I saw a learner run the right enumeration against the wrong host for nearly 40 minutes. The screenshots were immaculate. The target was not.
Record the first evidence point: IP, MAC, and hostname hints
Save the earliest facts before your brain starts decorating them. Good notes at this stage might include:
- Target IP address
- Observed MAC vendor, if visible
- Any hostname or reverse-DNS clue
- Whether the host responds to ICMP
These clues are not glamorous, but they create the spine of your report later. And just as important, they help you notice whether the box changes state after a crash or reboot.
If one host answers: Move straight to a light port scan.
If several hosts answer: Record each IP first, then identify the most lab-like target by service mix.
Time trade-off: Two extra minutes here can save 20 minutes of confusion later.
Neutral action: Create a tiny target table before deeper enumeration.
Scan Smarter, Not Louder: Your First Nmap Pass
Start with a simple service discovery scan
With the target IP recorded, begin with a readable scan. For a first pass in a local lab, this is usually enough:
sudo nmap -sV -O <target-ip>The logic is elegant. -sV asks Nmap to interrogate open ports and identify what is actually running behind them. Nmap’s version-detection documentation explains that it uses a probes database and match expressions to determine the service protocol, application name, version number, and often extra details like hostname, device type, and sometimes CPE information. If you want a beginner-safe breakdown of what those version clues do and do not mean, read how to use Nmap in Kali Linux for Kioptrix.
This is one of those moments where beginner restraint matters. You do not need 14 flags and a dramatic soundtrack. You need a clean first map.
Read open ports like a story, not a scoreboard
When the results return, resist the beginner urge to treat every open port as equally meaningful. They are not. Ask better questions:
- Which services are most exposed and easiest to verify?
- Which ones look old enough to be worth closer attention?
- Which services give version strings or naming hints?
If you see HTTP, SMB, RPC-related services, SSH, or older-looking Unix/Linux services, read them as a connected narrative. This box is telling you what kind of machine it is. The art is learning to listen before you swing tools at it. A good companion mindset is the one in which service to investigate first on Kioptrix, because first attention often shapes the rest of the lab.
Decide what deserves deeper enumeration next
Usually, older beginner labs reward a web-first and legacy-service-second order. Why? Because the web server often leaks visible clues quickly, and SMB/RPC-style services can reveal naming, share, or policy information that sharpens your vulnerability search. You are trying to narrow possibilities, not audition every exploit on the internet.
Here’s what no one tells you…
The first scan is not about looking impressive. It is about narrowing uncertainty without creating noise that hides the useful clues.
Show me the nerdy details
Nmap’s -A option can enable OS detection, version detection, default scripts, and traceroute, but for first-time lab users it can blur which data came from which technique. Starting with -sV and selective follow-up scans often makes your evidence chain much easier to explain in a writeup.
Web Server First: Pull on the Easiest Thread
Inspect HTTP service banners, page source, and default content
If the initial scan shows a web server, visit it in the browser and also inspect it from the terminal. Beginner labs love to hide clues in plain sight. A bare page, a default install, a version banner, or a suspicious comment can be more useful than a dozen brute-force attempts.
curl -I http://<target-ip>
curl http://<target-ip>
whatweb http://<target-ip>
Keep your mindset narrow and tidy. You are looking for evidence of product versions, unusual directories, generated pages, or comments that hint at the stack. Write down what you observe, not what you hope it means. That same discipline matters in common banner-grabbing mistakes, where small reading errors can spin into big wrong assumptions.
Look for version leakage, unusual comments, and forgotten paths
Check the page source. Check obvious paths like /manual, /icons, or application-specific defaults if the banner suggests a known service. In older lab targets, information leakage is often almost impolite in its generosity. The box is not whispering. It is practically setting the table.
One of my favorite beginner-lab lessons came from a page that looked useless until I viewed source and saw a tiny version clue tucked away like a receipt under a coffee cup. It changed the whole route. If you want to go deeper on that pattern, legacy PHP reconnaissance clues is the kind of rabbit hole worth following.
Use directory discovery carefully without turning the lab into brute-force soup
A restrained directory discovery pass can help, but do not make your first lab session into a wordlist demolition derby. Use a modest list and keep results readable.
gobuster dir -u http://<target-ip> -w /usr/share/wordlists/dirb/common.txtIf your page already gave you a product name or version, that clue usually matters more than a giant pile of 403s and false hope. Sometimes a lighter touch, or even a curl-only recon approach, gives you cleaner signal than a noisy sweep.
- Check headers and source before scanning deeper
- Prefer small, explainable directory discovery
- Treat visible version clues as your next search pivot
Apply in 60 seconds: Save the raw HTML or a screenshot of the landing page before changing tactics.
SMB, RPC, and the Older Linux Lab Pattern
Check SMB exposure and version clues
If SMB-related ports are open, they deserve attention. Older lab targets often expose more than modern hardening would tolerate. Start simple:
smbclient -L //<target-ip>/ -N
rpcclient -U "" -N <target-ip>
Be patient with errors. An empty response, access denial, or partial list still tells you something. The point is not to force entry. The point is to learn what the service reveals under light pressure. Even frustrating output like failed negotiation has its own pattern language, which is why posts such as SMB negotiation failed on Kali can save a beginner from misreading the whole situation.
Enumerate shares, users, and naming hints where available
Kali’s tool page for enum4linux describes it as a wrapper around Samba tools such as rpcclient, smbclient, net, and nmblookup, built to enumerate information from Windows and Samba systems. That makes it useful as a convenience layer when you want a broader first look, especially in older labs where naming and share data can steer the next move.
enum4linux -a <target-ip>Read the output with a pencil, not with panic. Shares, usernames, workgroup names, password policy hints, and OS guesses are all signals. Not all of them are true in a strict sense, but all of them deserve comparison with your Nmap and web data. For a more deliberate workflow, this practical enum4linux guide for Kali Linux fits naturally into this stage.
Notice how older lab machines often reveal too much through legacy services
This is one of the central lessons of Kioptrix-style practice boxes. Legacy services often bleed information because their defaults were built for a different era. That does not mean you should romanticize them. It means you should learn how quickly unnecessary exposure compounds into a path.
I have seen beginners treat SMB enumeration like a vending machine: insert IP, receive shell. The real lesson is subtler. Enumeration is not a one-armed bandit. It is a witness interview. Sometimes the witness is chatty. Sometimes the witness just shrugs. Both responses matter.
- Exact service banners from Nmap
- Web product/version hints
- SMB share names or user/account clues
- Any OS-family guess that appears more than once
Neutral action: Do not search for exploits until these four items are written down.
The Vulnerability Pivot: Match Evidence Before Action
Tie discovered versions to plausible attack paths
This is the fork where many beginner writeups become either thoughtful or theatrical. Once you have candidate versions or service identities, search for known issues that fit the evidence. The keyword there is fit. Not “sound exciting.” Not “show up first on a forum.” Fit.
Good search notes might look like this:
Apache version from banner
Samba version clues from SMB enumeration
Possible CGI or module exposure from HTTP content
Kernel hints from OS detection or service stack
Now compare those clues against plausible attack paths. The best first foothold is usually the one that explains the available evidence with the fewest heroic assumptions. For Kioptrix specifically, the thinking process becomes much cleaner after reading what to do after finding the IP in Kioptrix Level 1.
Distinguish “interesting” from “actionable”
A service can be old and still not be your best route. A vulnerability can exist on paper and still not match the exact build, module set, or exposed feature on your target. This is where beginner discipline starts to look like real operator judgment.
Nmap’s OS detection guide explains that remote OS fingerprinting is probabilistic and relies on packet-response characteristics compared against a large signature database. In plain English: treat OS guesses as clues, not courtroom testimony. The same caution applies to service detection errors and false positives in Nmap version detection.
Choose the most evidence-based foothold instead of trying five random ideas
Pick one attack path and test it carefully. If it fails, revisit your evidence before selecting the next candidate. You are building a reasoning chain, not a scrapbook of half-remembered commands. This matters because later, when you write the report, you want a line of causality that another beginner could follow without needing telepathy.
Short Story: I once watched a learner solve a lab the hard way because they were emotionally attached to the first exploit they found. It was a beautiful mess. They had three terminal tabs, two search windows, and the thousand-yard stare of someone arguing with destiny. Meanwhile, the target had already left clues in the web layer that pointed toward a cleaner route.
Once we stopped and laid out the evidence on one page, the whole room changed. The exploit did not become easier. The problem became smaller. That is the hidden pleasure of a good lab: not the shell itself, but the moment the chaos organizes into a shape you can trust.
Show me the nerdy details
When matching versions to public vulnerability writeups, compare product name, major/minor version, exposed module or feature, and the actual network path involved. “Same service family” is often too weak to justify an exploit attempt, even in a lab.
Don’t Skip This: Common Mistakes That Waste an Hour
Treating every open port as equally important
This is the beginner equivalent of carrying every grocery bag at once and then wondering why the tomatoes died. Not every open port deserves equal attention. Some are supporting actors. Some are the whole plot.
Rank services by three things: visibility, version clarity, and likely exploitability in the context of an old lab box. Web and legacy file-sharing services often rise to the top because they produce fast clues. That ranking mindset is exactly what gets sharpened in reading Kioptrix open ports without overreacting.
Running exploitation tools before verifying service versions
If the exploit idea depends on a version, verify the version as carefully as you can first. Nmap -sV, headers, page source, and service-specific enumeration each give partial truth. Combine them. A rushed exploit attempt on a fuzzy version is usually just a ceremony for disappointment.
Ignoring web content because SMB “looks easier”
This is a classic beginner trap. SMB feels technical, therefore important. The web page feels obvious, therefore disposable. Labs love punishing that logic. If HTTP is open, inspect it like it matters, because it often does.
Forgetting to save output for later writeups
The terminal scrollback is not a filing cabinet. Save scan results as you go:
sudo nmap -sV -O <target-ip> -oN nmap-initial.txt
enum4linux -a <target-ip> | tee enum4linux.txt
The future version of you, slightly tired and trying to write a coherent report, will be absurdly grateful.
If you skip note-taking and need to re-run 3 scans at 5 minutes each, that is 15 minutes lost before you even rebuild your reasoning chain.
Neutral action: Save raw output the first time.
Don’t Do This: Beginner Habits That Break the Learning Curve
Do not copy commands blindly from old forum posts
Old labs generate old forum advice, and old forum advice ages like yogurt in a glove box. A command that worked for someone else may assume a different network layout, package version, or service state. Use community hints as context, not scripture.
Do not assume your exploit failed before checking target reachability again
Sometimes the target service crashes. Sometimes your VM networking flinches. Sometimes you just pointed the command at the wrong IP because your notes were optimistic fiction. Re-check basic connectivity before rewriting your entire theory of the box. When a module swears the target fits but no shell ever arrives, this guide on Metasploit finding the target but opening no session is a useful reality check.
Do not confuse lab success with real-world authorization
This article lives inside a lab wall. Keep it there. The valuable habit here is disciplined observation and validation, not opportunism. The machine is old on purpose. The openness is deliberate. Real environments are governed by permission, scope, logging, and consequences.
Do not overwrite your notes with vague phrases like “got shell somehow”
That phrase has ended more educational value than any failed command. A reproducible lab path is the real prize. The shell is just the receipt.
- Re-check reachability after failures
- Keep notes specific enough to replay
- Treat community posts as clues, not commands to worship
Apply in 60 seconds: Add a “Why I ran this” line under your next command in your notes.
From Foothold to Shell: Keep the Path Reproducible
Validate the foothold before escalating your excitement
Suppose you obtain initial access. Pause. Confirm what happened before you celebrate like a man who found concert tickets in an old coat. What user context do you have? What service or vulnerability delivered it? Is the shell interactive, partial, or unstable?
Document the proof with restraint. Save terminal output. Record the exact input that produced the foothold. If you are using Metasploit in a lab, note the module, options, and evidence that justified choosing it. If you are solving manually, record the exact request or sequence that triggered access.
Capture command output that proves what worked
Proof matters. Use commands that establish who you are and where you landed:
whoami
id
uname -a
pwd
These tiny lines become anchors in your writeup. They also prevent a common beginner mistake: feeling so victorious that you skip the boring confirmation and later cannot explain what level of access you actually had.
Stabilize shell access only as needed for the lab objective
If the shell is rough, stabilize it enough to continue methodical enumeration, but do not turn this step into performance art. The purpose is clean progression, not terminal theatrics. Keep the adjustments small and documented. For that stage, a focused checklist like this Kioptrix TTY upgrade checklist helps keep the victory from turning into a tangled extension cord.
Let’s be honest…
A messy victory is hard to explain later. A clean, reproducible path is what actually teaches you something.
Show me the nerdy details
For writeup quality, separate “trigger” from “post-access validation.” These are often blurred together by beginners, which makes it harder to explain cause and effect. Think in two columns: what produced access, and what confirmed access.
Privilege Escalation Without Chaos
Enumerate the local system methodically after initial access
Once you have a foothold, switch from excitement to inventory. This is where good lab work starts resembling calm housekeeping. Gather the basics:
id
uname -a
cat /etc/issue
ps aux
netstat -tulpn 2>/dev/null
find / -perm -4000 -type f 2>/dev/null
You are looking for kernel clues, SUID binaries, running services, configuration mistakes, writable paths, and local misconfigurations that fit the age and style of the target. Move in order. Do not fling 19 scripts at the box because silence makes you nervous.
Check kernel, services, permissions, and misconfigurations in order
My own preferred order for a first lab looks like this:
- Identity and group membership
- Kernel and distro clues
- Interesting processes and services
- SUID/SGID binaries
- Writable files, cron jobs, and configs
This order works because it narrows the search space without making the host feel like a junk drawer. In many older boxes, privilege escalation is less about wizardry and more about noticing that one permission setting is practically begging for attention. If you want a cleaner path through that stage, this Kioptrix Level 1 privilege escalation checklist is a natural extension.
Prefer the smallest logical next move over noisy escalation attempts
If you spot three possible privesc paths, choose the one with the clearest evidence and lowest chaos. The beauty of a lab is not that you can try everything. It is that you can learn why one path was cleaner than the others.
- Tier 1: Identity, kernel, distro
- Tier 2: Running services and listening ports
- Tier 3: SUID binaries and file permissions
- Tier 4: Scheduled tasks, configs, and writable paths
- Tier 5: Targeted validation of the most plausible privesc path
Neutral action: Work top to bottom unless a stronger clue interrupts the sequence.
Write It Like a Pro: Turn Lab Notes Into a Report
Build a timeline from discovery to root
Once the box is solved, the real learning crystalizes in the writeup. Structure your notes as a timeline:
- Environment setup and network verification
- Target discovery
- Initial scan findings
- Web and SMB/RPC enumeration
- Evidence-based exploit selection
- Foothold validation
- Privilege escalation
This structure does two beautiful things at once. It makes your work reproducible, and it turns your terminal chaos into a story that someone else can actually follow. That second part is underrated. Clear writing is a security skill.
Save screenshots, command output, and reasoning checkpoints
Reasoning checkpoints are the difference between a professional-looking report and a screenshot scrapbook. A good checkpoint sounds like this: “HTTP banner and page source suggested product X; SMB enumeration supported OS-family guess Y; chose path Z because it matched both.” That is how you teach the reader to think, not merely to imitate.
Write findings so another beginner could reproduce them safely
Assume your reader is smart, tired, and new. Define what mattered, not just what happened. State the command. State the result. State why it mattered. Then move on. That rhythm is simple enough for a beginner and sturdy enough for an operator.
Kali’s current tool pages also make it easy to confirm package presence or installation commands for tools like Nmap and enum4linux, which is handy when you want your report to be reproducible on a fresh Kali setup rather than only on your already-customized machine. If you want a stronger reporting standard, how to read a penetration test report adds a useful editor’s eye to the technical notes.
Best use: Treat each box as a checkpoint. Do not jump ahead until you can explain the previous one in one sentence.
Next Step: Do One Concrete Thing Now
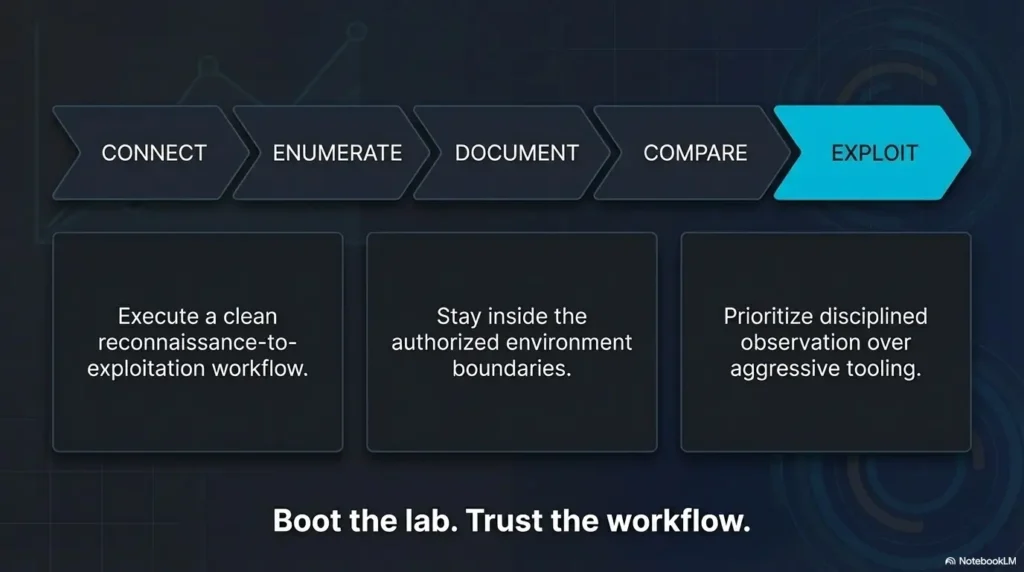
Boot both VMs, verify they share the same lab network, and document the target IP before running any deeper scan
If you do only one thing after reading this, make it that. Not because it is glamorous, but because it closes the loop from the opening confusion. The first lab feels overwhelming when every tool seems equally urgent. It feels manageable the moment you realize the workflow has an order.
Start with shared network verification. Identify your Kali IP. Find the target IP. Save them both. Run one light Nmap pass. Then inspect the web service and legacy services like SMB/RPC with a notebook open beside you. That sequence is modest, almost plain. It is also the sequence that prevents the beginner spiral where each new command is secretly an attempt to compensate for missing structure.
In practical terms, this is what “thinking like an operator” looks like at the beginner level. Not fireworks. Not cinematic typing. Just a chain of verified facts that gets stronger with each step.
The curiosity loop from the start closes here: the “right command” was never the real problem. The real problem was trying to solve the lab without a trustworthy order of operations. Once you have the order, the box becomes less like a wall and more like a conversation. Your next 15 minutes are simple: boot the VMs, confirm the network, identify the target, save the evidence, and begin with one measured scan. That is enough to turn confusion into traction. If you want a compact routine to keep beside the keyboard, this Kioptrix recon routine fits that exact moment well.
Last reviewed: 2026-03.
FAQ
Is Kioptrix Level 1 good for absolute beginners?
Yes, if you keep it inside an authorized VM lab and focus on the reasoning chain rather than just the final shell. It is old enough to be approachable, but still rich enough to teach discovery, service interpretation, and privilege-escalation habits.
Should I use only Kali Linux tools or add extra utilities?
For a first run, Kali’s built-in or easily installable tools are enough. Nmap, curl, whatweb, smbclient, rpcclient, and enum4linux can carry a surprising amount of the lab. Extra tools can help later, but they are not a substitute for disciplined reading of the evidence you already have.
Why does my scan show the target but the exploit still fails?
Usually one of four reasons: your version assumption is wrong, the route you chose does not actually match the exposed service, the target state changed, or your network context shifted. Re-check reachability, confirm service details, and compare all clues again before trying a different path.
What should I do if the web page looks empty?
Inspect headers, source, and obvious default paths before declaring it useless. In older labs, an “empty” page can still leak stack details, comments, modules, or default content that becomes your best pivot.
Is SMB always the best first path in Kioptrix Level 1?
No. SMB may be fruitful, but it is not automatically superior to the web path. The best route is whichever one matches the strongest evidence with the fewest assumptions. Sometimes the quietest clue wins.
How much note-taking is enough for a beginner lab?
Enough that you can replay the entire path tomorrow without relying on memory. Save raw command output, screenshots of key states, and one sentence explaining why each major step mattered.
What if my virtual machines cannot ping each other?
Check adapter mode, subnet alignment, host-only or internal network settings, interface state, and local firewall behavior. In beginner labs, broken networking is a far more common culprit than a broken technique.
Do I need Metasploit, or can I solve it manually?
Either can be educational in a lab. Manual work tends to teach the reasoning chain more vividly. Metasploit can still be useful if you document exactly why you chose the module and how you verified the target fit.